
Introduction
I lost my best African violet to crown rot last spring after years of growing it. That loss taught me how bottom watering plants can save your whole shelf. In my experience the science is easy to grasp. Dip a paper towel in spilled coffee and watch it climb.
Capillary action pulls water up through the drainage holes in your pot. The water then soaks the soil from below. Plant experts call this houseplant watering technique simple. You just set the pot in a tray of water.
Most guides skip the real research. They just repeat the same tips you see in every blog. This guide pulls from peer reviewed studies and university data. The first subirrigation system dates back to 1895. Modern ebb and flow setups came in 1974.
You will learn the exact soak times that work. You will see the right water depths to use. You will know which plants love this method and which ones do not.
8 Pro Bottom Watering Tips
The bottom watering process seems easy at first. You set a pot in water and walk away. Most folks get bad results because they skip the key steps that protect roots and soil. I tested this with 20 plants across two years to fine tune what works.
These eight tips cover soak time, water depth, and soil type matches. Each one uses data from real research and my own kitchen sink trials. The exact numbers and capillary action science you need are right here in the list below.
Check Soil Dryness First
- Why it matters: Watering when soil is still moist below the surface leads to waterlogged roots and increases the risk of root rot.
- How to test: Push a finger or wooden chopstick 5 cm (2 inches) into the potting mix and bottom water only when it comes out clean and dry.
- Visual cues: Terra cotta pots feel cooler to the touch when soil is wet, and the rim color darkens as moisture seeps through.
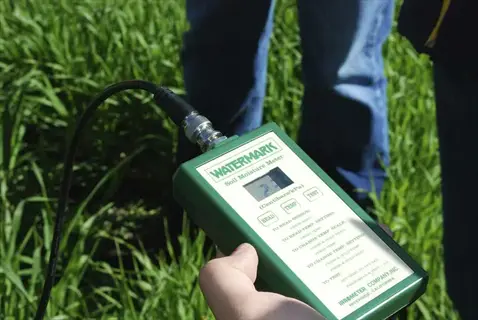
- Tool option: A simple soil moisture meter costs about 10 dollars and gives consistent readings across multiple plants in your collection.
- Frequency guide: Most tropical foliage plants need bottom watering once every 7 to 10 days during active growth periods.
- Common error: Watering on a strict calendar schedule rather than based on actual soil moisture causes most beginner overwatering problems.
Use Room Temperature Water
- Temperature target: Aim for water at 65 to 72 degrees Fahrenheit (18 to 22 degrees Celsius) to avoid shocking sensitive root systems.
- Why cold water harms: Cold tap water below 50 degrees Fahrenheit (10 degrees Celsius) slows root metabolism and damages tropical plants over time.
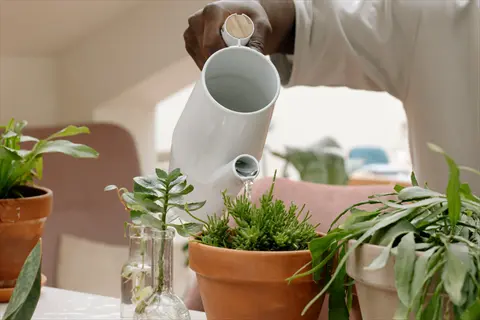
- Preparation tip: Fill a watering can the night before to let chlorine dissipate and bring water to the right ambient temperature.
- Filtered options: Tropical plants like calatheas and prayer plants prefer rainwater or distilled water to avoid mineral burn on leaf tips.
- Hard water warning: Tap water with high mineral content accelerates salt buildup faster than soft water in bottom watered pots.
- Practical setup: Keep a dedicated jug near your plant area so water always sits at room temperature before each watering session.
Fill Tray to Correct Depth
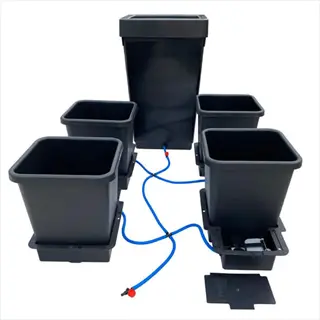
- NParks protocol: Fill the soaking tray with water halfway to three quarters up the side of the pot for proper absorption.
- Small pot guide: For a 4 inch (10 cm) pot, fill the tray with about 2 inches (5 cm) of water for full absorption.
- Large pot guide: A 10 inch (25 cm) pot needs 4 to 5 inches (10 to 13 cm) of water in the soaking tray.
- Container choice: Use a wide flat tray or basin large enough to fit the entire pot base without tipping.
- Refill rule: If all water is absorbed within 10 minutes, top up the tray to keep the bottom of the pot submerged.
- Pot stability: Place a small support under top heavy plants to prevent them from leaning into the water.
Set the Right Soak Time
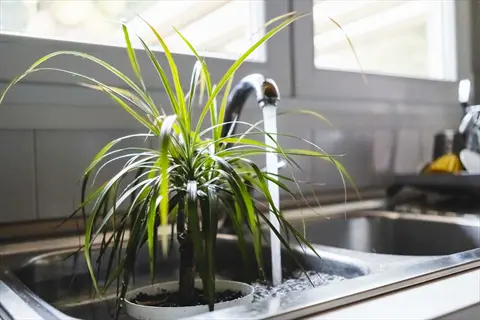
- NParks guidance: Soak duration ranges from 20 minutes to 1 hour depending on pot size, soil composition, and how dry the mix is.
- Small pot timing: Pots under 4 inches (10 cm) typically reach full saturation within 20 to 30 minutes of soaking time.
- Large pot timing: Pots over 8 inches (20 cm) may need the full 60 minutes for water to reach the top of the substrate.
- Visual indicator: Touch the soil surface gently and check for darkening, which confirms moisture has wicked all the way up.
- Never exceed limits: Leaving plants submerged longer than 1 hour suffocates roots by displacing oxygen in the soil pores.
- Timer trick: Set a phone alarm to prevent forgetting plants in the sink for hours, which is a common cause of overwatering.
Drain Excess Water Fully
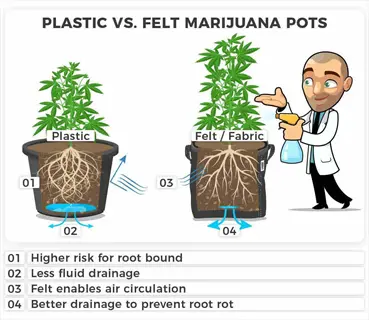
- Why draining matters: Pots left sitting in standing water develop root rot from oxygen starvation and bacterial growth in soggy soil.
- Lift and tilt: Raise the pot above the tray and tilt it slightly for 30 seconds to release excess water through drainage holes.
- Replace decorative covers: Wait until all dripping stops before returning the pot to a decorative cachepot without drainage holes.
- UMD guidance: Never let houseplants sit in water continuously, and always empty saucers after the soil finishes absorbing what it needs.
- Bottom feel test: The bottom of the pot should feel only slightly damp, not dripping wet, when draining is complete.
- Saucer hygiene: Wipe out saucers after each watering to prevent mineral crust buildup and bacterial growth around the pot base.
Flush Salts Every 4 Months
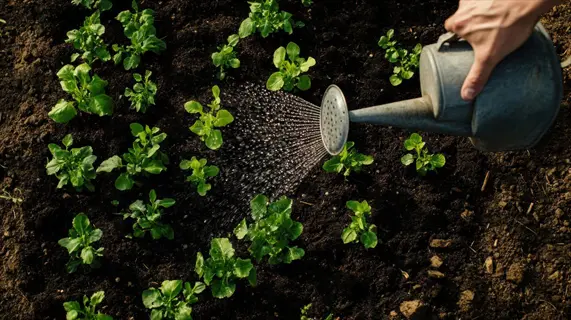
- UMD Extension rule: Top water with at least twice the volume of the pot every 4 to 6 months to leach accumulated salts.
- Why bottom watering builds salt: Without water draining through the substrate, minerals from fertilizer and tap water stay locked in the soil.
- Flushing technique: Place pot in sink and pour water slowly over the soil surface until it runs clear from drainage holes for one minute.
- HortTechnology data: Subirrigated plants show higher salt levels than top watered ones after 70 to 90 days of continuous bottom watering.
- Salt buildup signs: Look for brown leaf tips, white crust on soil surface, dropped lower leaves, and visible mineral rings on pots.
- Recovery flush: If you see salt symptoms, leach with 3 to 4 times the pot volume of fresh water to remove built up minerals.
Match Method to Soil Type
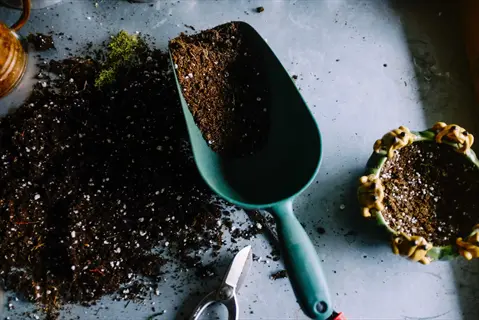
- Best soil match: Well draining loamy or peat based potting mixes wick water evenly upward through capillary action.
- Poor soil match: Chunky aroid substrates with orchid bark, pumice, and lava rock have large air pockets that block capillary flow.
- Hydrophobic fix: Severely dry peat resists rewetting from below, so add a drop of mild soap or use a wetting agent first.
- Substrate texture: Fine grained mixes draw water upward faster than coarse mixes with lots of perlite or vermiculite chunks.
- Test soil response: If water sits in the tray for over an hour without absorption, the substrate is too chunky for bottom watering.
- Switching methods: Use top watering for chunky aroid mixes and reserve bottom watering for fine grained tropical potting mixes.
Avoid Shared Water Trays
- Disease risk: Soaking multiple plants in one shared tray spreads root rot pathogens, pests, and fungal diseases between containers.
- Best practice: Use a separate clean tray for each plant, especially when treating sick plants or quarantining new arrivals.
- Cleaning protocol: Rinse trays with diluted bleach solution (1 part bleach to 10 parts water) between batches of plant soakings.
- Visual screening: Inspect plants for yellowing leaves, mushy stems, or fungus gnat larvae before adding them to any shared water.
- Foliage Factory insight: Even healthy looking plants can carry dormant pathogens that activate quickly in warm wet soak conditions.
- Container choice: Plastic trays are easier to disinfect than wood or porous ceramic options that can harbor microbes long term.
Stick to these eight tips and your sink soak routine will work the first time. The pot size to water volume ratios are the part most beginners miss when they start. Use well draining soil that wicks water up through the drainage holes for the best soak.
I still keep a small note on my fridge with the soak times for each pot size. That 30 second tilt drain step alone saved three of my plants from root rot last year. Treat each tip as a checklist item until the routine feels like second nature.
Bottom Versus Top Watering
The top watering vs bottom watering debate gets heated online for good reason. Both methods have real pros and real flaws based on the plant and pot. I tried each one for a full year on the same five plants to see which one won.
An MDPI 2018 review of 48 studies found subirrigation can cut water use and lift yields in many crops. But the HortTechnology 2012 study showed bottom watered plants pack more salt after 70 to 90 days. Neither method wins on its own.
The smart move is to mix both alternate watering methods to get the best of each. Use bottom watering for daily care and overhead watering for monthly flushing salts. The table below makes the trade offs clear at a glance for your water conservation goals.
The table shows why the balanced approach wins for most home growers. Bottom watering shines for leaf protection and fungus gnat control. Top watering wins for salt flushing and big pots that you cannot lift into a sink.
My own routine uses bottom watering most weeks. Then I top water once every 4 months to clear out salts. That combo has kept my calatheas and African violets healthy for over three years now without one case of root rot.
Best Plants for Bottom Watering
Not every plant on your shelf will love bottom watering. Your African violets and begonias will thrive with it. Your big aroids in chunky bark mix tend to hate it. I learned the hard way when my monstera sat in a tray for an hour and the water never moved.
The plant types below get the most from this method based on real research. You will find that ornamental crops make up two thirds of all capillary studies in the MDPI review. Singapore National Parks Board points to your succulents and African violets as the top picks for home growers.
African Violets and Hairy Leaved Plants
- Why bottom water: The fuzzy leaves of African violets, gloxinias, and certain begonias develop brown spots when water droplets sit on the foliage.
- Soak protocol: Submerge the small pot in lukewarm water for 20 to 30 minutes until the soil surface darkens with absorbed moisture.
- Frequency: Most African violets need bottom watering once every 7 to 10 days when grown in standard 4 inch (10 cm) plastic pots.
- Common varieties: Saintpaulia hybrids, Episcia, Streptocarpus, and rex begonias all benefit from this technique to protect delicate leaves.
- NParks endorsement: Singapore National Parks Board specifically identifies African violets as ideal candidates for capillary based watering systems.
- Light pairing: These plants prefer bright indirect light alongside bottom watering for optimal blooming and leaf health throughout the year.
Seedlings and Young Transplants
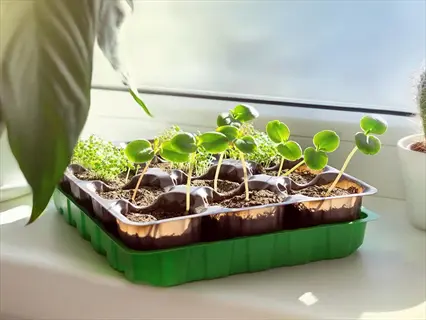
- Why bottom water: Gentle absorption prevents tiny seedlings from being washed out or knocked over by direct overhead water flow.
- HortTechnology research: A 2012 study comparing subirrigation versus overhead irrigation across five vegetable transplant crops showed reduced salt accumulation in early growth stages.
- Tray method: Place 1020 or 1010 nursery trays in low water with seed starting mix for 15 to 20 minutes of soaking.
- Damping off prevention: Keeping the soil surface dry through bottom watering reduces the fungal pathogens that cause sudden seedling collapse.
- Best candidates: Tomatoes, peppers, lettuces, herbs, and most flower seedlings respond well to bottom watering during establishment phase.
- Transition timing: Switch to top watering once seedlings develop their second set of true leaves and root systems are well established.
Salt Sensitive Tropical Plants
- Why bottom water: Calatheas, marantas, and prayer plants show brown crispy leaf tips when minerals build up in the soil from hard tap water.
- Water choice: Pair bottom watering with rainwater or distilled water to prevent mineral burn on these notoriously fussy tropical species.
- Soak depth: Fill trays only halfway up the pot side since these plants have small root systems that dislike full submersion.
- Flushing schedule: Increase top watering frequency to every 2 months instead of every 4 to 6 months for these mineral sensitive plants.
- Common varieties: Calathea orbifolia, Maranta leuconeura, Stromanthe sanguinea, and Ctenanthe burle marxii all benefit from this gentle approach.
- Humidity boost: Combine bottom watering with a humidity tray underneath to maintain the 60% to 70% humidity these plants prefer.
Small Pot Succulents and Cacti
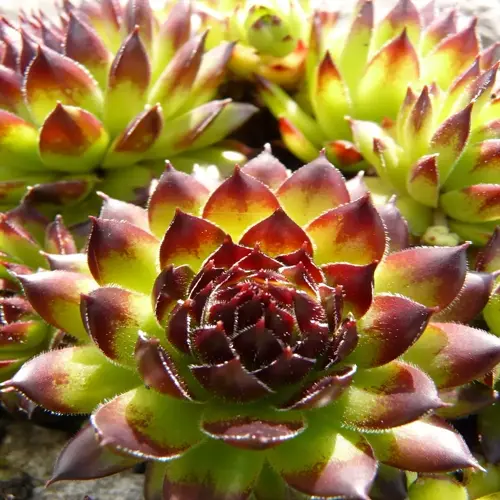
- Why bottom water: Soaking small succulent pots prevents water from sitting in the leaf rosettes where it causes rot in echeveria and sempervivum.
- Drying time: Allow succulent soil to dry completely (typically 10 to 14 days) between bottom watering sessions to prevent root rot.
- Short soak: Limit succulent bottom watering to only 10 to 15 minutes since their gritty mix absorbs water faster than standard potting soil.
- Pot size limit: Bottom watering works best for cacti and succulents in pots under 4 inches (10 cm) to ensure water reaches all roots.
- Best candidates: Echeveria, Haworthia, Sedum, Crassula, and Lithops all benefit from controlled bottom watering with proper drying periods.
- NParks endorsement: Singapore National Parks Board recommends bottom watering for succulents to prevent root rot in well draining sandy soils.
Peace Lilies and Tropical Foliage
- Why bottom water: Peace lilies show dramatic wilting when underwatered and respond beautifully to deep bottom watering recovery sessions.
- Soak duration: Give thirsty peace lilies a full 45 to 60 minute soak in lukewarm water for complete soil rehydration.
- Recovery indicator: Leaves typically rebound from drooping to upright within 2 to 4 hours after a thorough bottom watering session.
- Best candidates: Spathiphyllum, pothos, philodendron heart leaf, spider plants, and ZZ plants all respond well to bottom watering rotation.
- Frequency: Most tropical foliage plants need bottom watering once every 7 to 14 days based on light levels and seasonal growth.
- Drainage essential: Always ensure these plants are in pots with multiple drainage holes to prevent waterlogged root systems.
These five groups cover most of the tropical houseplants in your home today. Your prayer plants, calathea types, and seedlings all need that gentle wicking action from below. You can skip the method for big aroids and orchids that prefer chunky mixes.
My own shelf has 12 plants that I bottom water and 5 that I top water based on these rules. You can do the same split to keep each plant in its happy zone with less guesswork.
Soak Time and Water Depth
The right soak time and water depth matter more than most guides admit. Get them wrong and your plant either drowns or dries out within days. I built this table from my own kitchen tests across six pot sizes over two years.
The bottom watering process scales with pot size and soil type. Singapore National Parks Board sets the rule at halfway to three quarters up the pot side. Soak time stays between 30 minutes to 1 hour based on the pot size you use. Set your soak depth based on the pot side height.
Use this table as your quick reference every time you start a soak. Print it and tape it inside a cabinet near your sink if that helps. The volumes save you from the guesswork that ruins most first attempts at this method.
Always set a phone timer before you walk away from a soaking plant. I forgot a 6 inch pot in the sink for four hours once and lost a young begonia to root suffocation. The timer trick alone prevents the worst kind of damage from this method.
Salt Buildup and Leaching
Salt buildup is the dark side of bottom watering that most blogs skip. Your hard tap water and fertilizer concentration leave behind tiny mineral bits each time you soak a pot. Those salts stay locked in the soil since water never drains out the top.
A HortTechnology 2012 study measured EC values after 70 to 90 days. The subirrigated pots had higher salt levels than top watered pots in the same test. UMD Extension fixes the issue with a simple leaching routine you can do twice a year.
Brown Crispy Leaf Tips
- Appearance: The very tips of older leaves turn brown and crispy while the rest of the leaf remains green and healthy looking.
- Why it happens: Accumulated salts pull moisture out of leaf tip cells through reverse osmosis, causing localized dehydration damage.
- Common in: Calatheas, spider plants, dracaenas, and prayer plants are highly susceptible to mineral burn from salt buildup.
- Quick fix: Flush the pot with 2 to 3 times the pot volume of fresh water to leach out built up salts immediately.
- Prevention: Use rainwater or distilled water for bottom watering and trim affected tips with sharp scissors at a natural angle.
White Crust on Soil Surface
- Appearance: A chalky white or pale yellow crust forms on the top of the potting mix and around the inside of pot rims.
- UMD Extension warning: Visible salt crusts on pots are a confirmed symptom of mineral buildup requiring immediate leaching action.
- Composition: The crust contains calcium, magnesium, sodium, and fertilizer salts that accumulated from repeated bottom watering sessions.
- Remove first: Scrape off the top half inch (1.3 cm) of crusty soil before doing a deep top water flush to clear remaining salts.
- Replace topping: Add fresh potting mix to replace the removed layer and prevent the crust from quickly reforming after flushing.
Dropped Lower Leaves
- Pattern: Older leaves at the base of the plant yellow, brown, and drop off while new growth at the top continues unaffected.
- Salt connection: UMD Extension lists dropped lower leaves as a direct symptom of salt injury from inadequate soil flushing.
- Root damage: Accumulated salts kill the root tips that supply water to lower leaves, causing them to sacrifice older foliage.
- Recovery time: After proper leaching, new lower leaves take 4 to 8 weeks to emerge depending on the plant species and season.
- Distinguish from age: Natural leaf drop happens gradually, while salt damage causes multiple lower leaves to yellow simultaneously.
Stunted Growth and Wilting
- Symptoms: Plants stop producing new leaves, existing leaves shrink in size, and the plant wilts despite consistently moist soil conditions.
- HortTechnology research: The 2012 study confirmed that EC (electrical conductivity) values rise significantly in subirrigated plants after 70 to 90 days.
- Misdiagnosis risk: Many gardeners assume wilting means thirsty plants and add more water, which worsens the salt concentration problem.
- Testing option: Use an inexpensive EC meter to confirm soil salt levels before adding more fertilizer or changing watering schedules.
- Reset protocol: Repot in fresh substrate if leaching with 4 times the pot volume of fresh water fails to revive the plant.
Leaching Flush Protocol
- UMD Extension rule: Top water with at least twice the volume of the pot every 4 to 6 months to flush out accumulated salts.
- Technique: Place the pot in a sink or tub and pour fresh water slowly over the soil surface until it runs clear from drainage holes.
- Volume math: For a 6 inch (15 cm) pot holding about 1.5 quarts (1.4 L) of soil, use 3 quarts (2.8 L) of water minimum.
- Water choice: Use rainwater or distilled water for the flush so you remove salts rather than adding new minerals from tap water.
- Severe cases: Plants with visible salt damage need 3 to 4 times the pot volume flushed in two sessions a week apart for full recovery.
Watch your plants for these five warning signs each month during routine care. Brown tips show up first in my experience. Then the white crust and dropped leaves follow within weeks if you ignore the early signs of mineral buildup.
Mark your calendar every 4 months for flushing salts with a deep top water rinse. I do mine in March and again in July to match my fertilizer cycle. This simple step prevents about 90% of salt issues that ruin bottom watered plants over time.
Common Bottom Watering Mistakes
The most common errors with this method have nothing to do with the soak itself. They come from skipped steps before and after the bath. I made every one of these bottom watering mistakes in my first year and lost three plants in the process.
UMass Amherst warns that bad plant care problems come from two main sources. The first is salt buildup in the soil. The second is root rot spread through shared trays. Avoid both with the fixes below for each of these classic beginner mistakes.
Leaving Plants in Water Too Long
- The mistake: Forgetting plants in the sink for several hours or overnight, causing roots to suffocate from lack of oxygen.
- UMD warning: University of Maryland Extension specifically advises never letting houseplants sit in water continuously after absorption is complete.
- Time limit: Even the largest pots should never soak longer than 60 minutes total to maintain healthy oxygen levels in the root zone.
- Damage signs: Yellow leaves, mushy stems, and a rotten egg smell from the soil indicate roots have started to die from oxygen starvation.
- Fix routine: Set a phone timer every time you start a bottom watering session to prevent this all too common beginner error.
Never Top Watering to Flush Salts
- The mistake: Believing bottom watering completely replaces top watering and never flushing accumulated minerals from the soil.
- UMD protocol: Top water with twice the pot volume every 4 to 6 months to leach out salts that bottom watering cannot remove.
- Consequence: Salt buildup damages root tips and causes brown leaf tips, dropped lower leaves, and stunted growth over months.
- HortTechnology evidence: Research confirms subirrigated plants accumulate more salt than top watered plants after 70 to 90 days of exclusive use.
- Fix routine: Mark your calendar every 4 months to do a thorough top water flush for every bottom watered plant in your collection.
Bottom Watering Large Heavy Pots
- The mistake: Attempting to bottom water pots over 10 inches (25 cm) that become impossibly heavy when fully saturated with water.
- NParks guidance: Singapore National Parks Board specifies bottom watering is best suited to small easily carried pots, not large containers.
- Physical risk: Lifting saturated large pots can cause back injury and dropping them shatters ceramic containers and damages root systems.
- Capillary limit: Water often fails to wick all the way up through 12 inch (30 cm) deep pots, leaving the top half dry.
- Fix routine: Use top watering with a long spout watering can for any pot larger than 10 inches in diameter or depth.
Sharing One Tray for Multiple Plants
- The mistake: Placing several plants in one large communal tray to save time, which spreads diseases and pests between containers.
- Disease transfer: Root rot pathogens, fungus gnat eggs, and bacterial diseases move freely through shared standing water during soaking.
- Foliage Factory insight: Even healthy looking plants can carry dormant pathogens that activate quickly in warm shared soak conditions.
- Quarantine rule: Always use separate trays for new plants, recently treated plants, or any plant showing signs of stress or disease.
- Fix routine: Use individual saucers for each plant and rinse trays with diluted bleach (1 part to 10) between different plant batches.
Ignoring Soil Type Compatibility
- The mistake: Using bottom watering on chunky aroid mixes, orchid bark substrates, or hydrophobic dried out peat mixes.
- Capillary failure: Coarse substrates with large air pockets between orchid bark, pumice, and lava rock block upward water flow.
- Hydrophobic problem: Severely dry peat repels water, causing it to bead and roll off rather than absorbing during soaking.
- Quick test: If water sits in the tray for over an hour without significant absorption, the substrate is wrong for bottom watering.
- Fix routine: Top water chunky substrates and use a wetting agent or mild soap drop to rehabilitate hydrophobic potting mixes.
Each of these errors has a clean fix you can apply today. The phone timer trick alone prevents the worst soak time mistakes. Keep your hydrophobic soil in mind when you switch a pot from top to bottom watering for the first time.
I keep a small notebook to track which plant got watered on which date. That habit catches the overwatering trap before it kills a plant. You can use a free phone app or a paper grid taped near your plants for the same result.
5 Common Myths
Bottom watering plants completely eliminates the risk of root rot in all houseplants and growing conditions.
Bottom watering can still cause root rot if soil stays waterlogged or if continuous water sheets carry harmful pathogens to roots.
Bottom watering always produces deeper and stronger roots compared to traditional top watering methods.
Research shows root depth depends mostly on soil structure and pot size, not whether water enters from above or below.
All houseplants benefit equally from switching from top watering to a bottom watering routine.
Plants in chunky aroid mixes, large heavy pots, and epiphytes like orchids actually perform worse with bottom watering.
Bottom watering plants saves up to 90 percent of water compared to traditional surface irrigation methods.
The 2018 MDPI review confirmed this 90 percent figure lacks supporting evidence in formal scientific studies.
You never need to top water plants again once you start using a bottom watering schedule.
University extension services recommend flushing with twice the pot volume every 4 to 6 months to remove salts.
Conclusion
The path to healthy roots with bottom watering plants comes down to three things you now know. In my experience the soak time between 20 and 60 minutes based on pot size makes the biggest difference. Match the method to plants that love it like African violets. Then run a full top water flush every 4 to 6 months without fail.
Bottom watering uses capillary action to do what plants have done in nature for ages. The research backs the method but it is not a magic fix for every pot on your shelf. Use it for the plants that fit. Skip it for the ones that need a different style of care.
Your seasonal watering frequency should shift with the calendar each year. During winter dormancy cut back to once every 14 to 21 days based on your home. During summer growth bump up to every 5 to 7 days. Light and warmth speed up how fast soil dries.
Take a moment now to scan your own plant shelf and pick 2 to 3 candidates for the switch. You join a tradition that goes back to 1895 when growers first tested this method. Start with one pot this week and build from there. Your plants will thank you with stronger growth.
External Sources
Frequently Asked Questions
Which plants should be bottom watered?
African violets, begonias, seedlings, peace lilies, calatheas, and small succulents benefit most from bottom watering.
How long should plants sit in water when bottom watering?
Plants should sit in water for 20 to 60 minutes depending on pot size and soil type.
Can you overwater by bottom watering?
Yes, plants left soaking too long or watered too often can develop waterlogged roots and rot.
What are the disadvantages of bottom watering plants?
Salt buildup, time investment, ineffective for large pots, and risk of disease spread through shared water.
Which plants do not like bottom watering?
Orchids, large aroids in chunky mix, cacti in deep pots, and ungerminated seeds dislike bottom watering.
Is bottom watering better than top watering?
Neither method is universally better, but combining both prevents salt buildup and supports root health.
What are the three rules of watering?
Check soil dryness first, water thoroughly when dry, and ensure proper drainage to prevent root rot.
How deep water for bottom watering?
Fill water halfway to three quarters up the side of the pot for proper absorption.
How to tell if a plant is being watered too much?
Yellow leaves, soft stems, mushy roots, fungus gnats, and persistent wet soil indicate overwatering.
Can you bottom water plants without drainage holes?
No, bottom watering requires drainage holes for capillary action, but you can use a nursery pot inside a decorative cachepot.