
Introduction
Cold frame gardening adds 2 to 4 weeks to each end of your growing year. The number comes from Iowa State Extension trials. I built my first frame from an old storm window. My fall tomato crop had just died in a hard freeze. Real season extension is the payoff that hooked me.
Think of a cold frame as a car in a sunny winter lot. The cabin warms up fast. Clear glass lets sun in but traps the heat. Your miniature greenhouse works the same way. It holds 5 to 10°F (3 to 6°C) above outside air per University of Missouri data.
Most guides skip the daily check. You cannot set this thing and walk away for a week. A sunny day can cook your winter vegetables in under an hour. I learned that the hard way with a tray of seedlings in March that I was hardening off before transplant.
This guide covers the basics, the build, and the site. You will learn the best crops, the heat rules, and the hotbed add-ons. We end with fixes for the issues that hit every gardener. By the end you will know if a cold frame fits your daily routine.
Cold Frame Gardening Basics
A cold frame is a bottomless box with a clear sloped lid. The lid traps sun and warms the soil and air inside. The lid usually slopes south so it can catch the low winter sun at the best angle.
The physics is simple. Sun rays pass through clear glass and hit dark soil. The soil soaks up that energy and gives off heat. The glass blocks most of that heat from leaving. This is solar gain at work, the same trick a car uses on a sunny winter day.
Thick walls and damp soil store heat through the night. Gardeners call this thermal mass. Niki Jabbour likes to say a frame puts your plants one zone south of where you live. Eliot Coleman has grown food in frames in Maine for over 30 years.
Your frame builds a small microclimate that runs 5 to 10°F (3 to 6°C) warmer than the air outside, per Missouri Extension. The University of Maine notes that frames give more frost cover than row cloth. That makes a mini greenhouse a smart season extender for fall and spring.
Most setups fit into one of three types. A portable frame moves with you. A permanent frame stays put for years. A short term plant forcing structure goes up for one season and comes down in summer. The chart below breaks down each one.
Portable Cold Frame
- Best for: Renters and gardeners with shifting layouts, since the lightweight frame moves between raised beds throughout the season.
- Materials: Typically PVC piping with polyethylene film or lightweight aluminum with twin-wall polycarbonate panels under 10 pounds (4.5 kg).
- Strengths: Quick to set up, easy to store flat in summer, and forgiving for first-time builders who want to test the concept before committing.
- Limitations: Less heat retention than heavier permanent frames and prone to wind lift without anchoring stakes or sandbag weights.
- Cost range: Roughly 50 to 150 dollars for ready-made portable kits sold at garden centers and online retailers.
Permanent Cold Frame
- Best for: Serious year-round gardeners who want a fixed structure attached to a south-facing wall or built into a raised bed system.
- Materials: Cedar, redwood, or ACQ-treated lumber with a hinged glass or twin-wall polycarbonate lid that lasts 10 years or more.
- Strengths: Maximum thermal mass from heavy walls and partial soil burial, ideal for winter harvest in colder hardiness zones.
- Limitations: Permanent footprint reduces summer flexibility and requires more upfront materials, time, and tools to construct properly.
- Cost range: Roughly 150 to 400 dollars for a do-it-yourself build using new cedar lumber and polycarbonate glazing.
Temporary Cold Frame
- Best for: Hardening off seedlings in spring or protecting a single bed during an unexpected late frost or early cold snap.
- Materials: Often straw bales stacked into a rectangle topped with an old storm window, or a row of cinder blocks under reclaimed glass.
- Strengths: Nearly free to assemble from materials many gardeners already have, and the straw doubles as mulch when dismantled later.
- Limitations: Short lifespan of one season, less attractive than finished builds, and offers limited protection in sustained subfreezing weather.
- Cost range: Often under 25 dollars when using salvaged windows and locally sourced straw or recycled cinder blocks.
Hotbed Cold Frame Variant
- Best for: Starting heat-loving seedlings 4 to 6 weeks earlier than an unheated frame, especially in northern climates with late springs.
- Materials: Standard cold frame structure plus an electric heating cable rated at 10 watts per square foot (108 watts per square meter) or a thick layer of fresh horse manure.
- Strengths: Adds reliable bottom heat that holds soil temperatures in the optimal 70 to 75°F (21 to 24°C) seed germination range per Nebraska Extension.
- Limitations: Requires either an electrical outlet within reach or a steady supply of fresh manure, plus a thermostat to prevent overheating.
- Cost range: Roughly 75 to 200 dollars in added components on top of the base cold frame build cost.
Build Your Own Cold Frame
How to build a cold frame is a one weekend job with basic tools and a sharp saw. I built mine for under 50 dollars using a curbside storm window and scrap cedar. The key is the slope. Picture an old school desk with the lid tipped toward you. That same tilt aims the lid at the low winter sun.
Iowa State Extension lists the standard size for DIY cold frame builds and most cold frame plans copy these numbers. The back wall sits at 18 inches (46 cm) tall. The front wall sits at 12 inches (30 cm) tall. Keep the front to back depth at 3 feet (91 cm) or less. That way you can reach the back row without crawling inside.
Missouri Extension says to slope the bed itself at 1 inch per foot (8.3 cm per meter) from back to front. A sloped bed pulls water to the front edge and feeds drainage. Stock sash sizes of 3 by 6 feet (91 by 183 cm) make the build math easy when you order glass or polycarbonate cold frame panels.
Choose your cold frame materials with care. Missouri Extension warns to skip creosote and pentachlorophenol wood since the fumes hurt plants. Pick cedar, redwood, or ACQ treated wood for a cedar cold frame that lasts ten years. If you go with old windows cold frame plans, check the sash for lead paint on any frame made before 1978.
Site, Soil, and Orientation
Where to put a cold frame matters more than the frame itself. The wrong spot can sink even a pro grade build. Picture a beach chair tilted to catch low winter sun. That same logic guides your cold frame location.
Aim for a south-facing cold frame or one with a southeast exposure. Nebraska Extension says this catches the most sun on short cold days. At 40°N the sun sits just 26 degrees above the horizon in January. A flat lid catches very little of that light. A sloped lid soaks up far more.
Add a windbreak to the north of the frame. A wall, fence, or evergreen hedge cuts cold blasts and saves heat at night. Iowa State says to set the north end of the frame against a wall or shed for the same reason. My own frame sits 3 feet from the south wall of my garage, which has cut night losses by a wide margin.
Use well-drained soil under the box. The University of Maine warns that wet ground will sink your frame plan and rot your root crops. A raised bed cold frame solves drainage in one move. Avoid frost pockets where cold air pools at night, and use the checklist below before you place the frame.
Southern or Southeastern Exposure
- Why it matters: Low winter sun (around 26° above horizon at 40°N) reaches the glazing at a usable angle only when the slope faces south or southeast.
- How to check: Stand at the planned site at solar noon in December and confirm direct sun reaches the area for at least 6 hours without shadow from trees or buildings.
- Common mistake: Placing the frame on the east or west side of a building, which loses morning or afternoon sun during the shortest days of the year.
- Fix if shaded: Trim back deciduous branches or relocate the frame several feet south before construction rather than after.
Wind Protection from the North
- Why it matters: Cold north winds strip heat from the frame at night, and a windbreak can reduce heat loss by an estimated 20 to 30% on cold clear nights.
- Best options: House wall, garage, fence, or evergreen hedge positioned to the north of the frame without casting winter shadows onto the lid.
- Distance guideline: Place the frame within 2 to 4 feet (60 to 120 cm) of the windbreak so the shelter effect is meaningful but does not block low winter sun.
- Materials caution: Avoid metal sheds with reflective surfaces that can reflect intense sunlight back onto the frame and trigger sudden overheating.
Well-Drained Soil Underneath
- Why it matters: University of Maine Extension warns that saturated ground undermines frame performance and rots root crops that overwinter inside the box.
- How to test: Dig a 12-inch (30 cm) hole, fill with water, and time how long it takes to drain; less than 4 hours indicates good drainage.
- Improvement options: Add 2 to 3 inches (5 to 7.5 cm) of coarse sand and compost to heavy clay sites, or build on a raised bed for guaranteed drainage.
- Avoid these spots: Low areas where snowmelt or rainwater pools, downspout outflow zones, and compacted soil along walkways or driveways.
Convenient Access for Daily Checks
- Why it matters: Iowa State Extension stresses that overheating is the principal risk, and frames need daily monitoring during sunny periods to vent in time.
- Ideal location: Within sight of a frequently used window or on the path between the kitchen door and the main garden so daily visits are automatic.
- Path planning: Allow a 2-foot (60 cm) clearance on the south side for kneeling to harvest, and avoid placing the frame at the back of a deep garden.
- Water access: Keep a hose, watering can, or rain barrel within 25 feet (7.6 m) because winter watering is easier when the source is close.
What to Grow Inside
Think of your frame as a salad bar that stays open all winter long. Each crop plays its part. When you ask what to grow in a cold frame, you want cold-hardy crops that shrug off cold soil and short days.
Nebraska Extension says cool season cold frame plants want 65 to 70°F (18 to 21°C) by day. They need 55 to 60°F (13 to 16°C) at night. Iowa State picks late August or early September as your best time to sow fall and winter vegetables cold frame crops.
Eliot Coleman built his Maine farm fame on cold-tolerant crops from Europe. Mâche is his star green and holds up past 5°F. Claytonia is just as tough and seeds itself for the next year. I tested both in my own frame last winter and pulled fresh salads in January with snow on the ground.
Your frame also works for hardening off seedlings in spring. Tomato, pepper, and broccoli starts need a week to adjust before you move them to the open garden. My list below ranks your top 10 crops by cold tolerance and frame fit, so you can match each one to your zone and your goals.
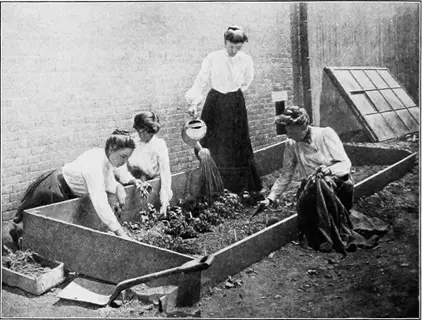
Spinach
- Cold tolerance: Survives down to about 15°F (-9°C) interior temperature, making it one of the most reliable cold frame winter performers.
- Sowing window: Direct sow late August through early September for fall and winter harvest in northern climates, per Iowa State Extension fall use guidance.
- Spacing: Roughly 4 inches (10 cm) between plants and 8 inches (20 cm) between rows for cut-and-come-again harvests.
- Harvest method: Take outer leaves when 3 inches (7.5 cm) long and let the center keep producing through several harvest cycles.
- Recommended varieties: Tyee, Bloomsdale Long Standing, and Winter Bloomsdale are bred for cold weather performance in northern zones.
- Common issues: Bolts quickly when temperatures climb above 75°F (24°C), so vent the frame aggressively in early spring sunny weather.
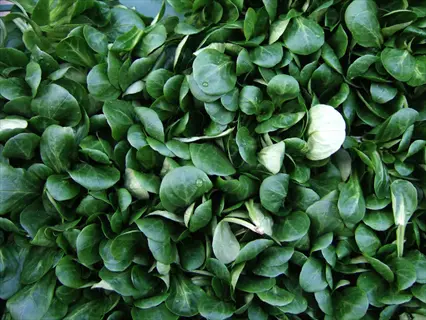
Mâche (Corn Salad)
- Cold tolerance: Eliot Coleman's signature chilling-resistant green tolerates temperatures down to 5°F (-15°C) inside a cold frame on Maine farms.
- Sowing window: Direct sow August through October in cool soil, since germination is best below 70°F (21°C) soil temperature.
- Spacing: Sow thinly and thin to 3 inches (7.5 cm) apart, since each plant forms a compact rosette only 4 inches (10 cm) wide.
- Harvest method: Cut whole rosettes at soil level when leaves are 2 to 3 inches (5 to 7.5 cm) long, typically through midwinter.
- Recommended varieties: Vit, Verte de Cambrai, and Coquille de Louviers are classic European types that hold up through deep cold.
- Common issues: Slow to establish in fall, so sow earlier than you would for spinach and protect young seedlings from heavy rain.

Kale
- Cold tolerance: Survives interior temperatures down to about 10°F (-12°C), and the flavor sweetens noticeably after the first hard frost.
- Sowing window: Start indoors in July, transplant into the frame late August, or direct sow early August for established plants by frost.
- Spacing: Set transplants 12 to 18 inches (30 to 46 cm) apart because mature plants spread broadly inside the frame.
- Harvest method: Pick outer leaves continuously and leave the central growing point intact to keep producing through winter.
- Recommended varieties: Winterbor, Red Russian, and Lacinato (Dinosaur) all tolerate deep cold and produce well in confined cold frame space.
- Common issues: Aphids can take hold in protected winter conditions, so inspect leaf undersides weekly during warm spells.
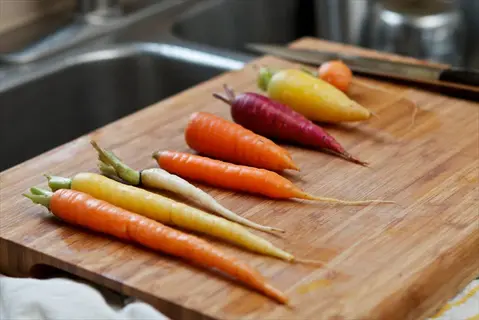
Carrots
- Cold tolerance: Roots stay sweet and crisp in cold soil under a frame, and harvest extends through winter under 4 inches (10 cm) of mulch.
- Sowing window: Direct sow in early August for late fall and winter harvest, since carrots need 60 to 80 days to mature before cold slows growth.
- Spacing: Thin to 2 inches (5 cm) between plants and 6 inches (15 cm) between rows for full-size roots.
- Harvest method: Eliot Coleman's famous 'candy carrot' technique uses the cold frame to convert starches to sugars for unusually sweet roots.
- Recommended varieties: Napoli, Mokum, and Bolero are bred for fall planting and cold-storage sweetness in the ground.
- Common issues: Slow germination in warm August soil, so pre-soak seeds or cover with a damp board until sprouts appear.
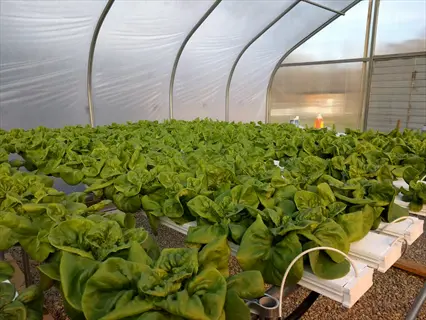
Lettuce
- Cold tolerance: Hardy lettuces tolerate interior temperatures down to 25°F (-4°C), making them reliable spring and fall cold frame crops.
- Sowing window: Direct sow late August through September for fall, and again in late February under the frame for an early spring harvest.
- Spacing: Sow thinly and thin loose-leaf types to 6 inches (15 cm), or head lettuces to 10 inches (25 cm) between plants.
- Harvest method: Cut outer leaves of loose-leaf types continuously, or wait 50 to 60 days for full heads on butterhead and crisphead types.
- Recommended varieties: Winter Density, Arctic King, Rouge d'Hiver, and Marvel of Four Seasons hold up through cold frame winters.
- Common issues: Damping off in damp closed frames, so vent on warm days and water early so leaves dry before nightfall.

Claytonia (Miner's Lettuce)
- Cold tolerance: Another Eliot Coleman favorite that produces fresh greens through deep cold down to about 10°F (-12°C) inside the frame.
- Sowing window: Direct sow September through October in cool soil, and plants will self-seed inside the frame for future years.
- Spacing: Broadcast seeds thinly and thin to 4 inches (10 cm) apart, since each plant forms a small heart-shaped rosette.
- Harvest method: Cut entire stems with leaves and flowers for salads, since the whole plant is mild and slightly succulent.
- Recommended varieties: The straight species (Claytonia perfoliata) is the most widely available and the most cold-tolerant choice.
- Common issues: Disappears in summer heat, so use the frame space for warm-season annuals once temperatures climb in May.
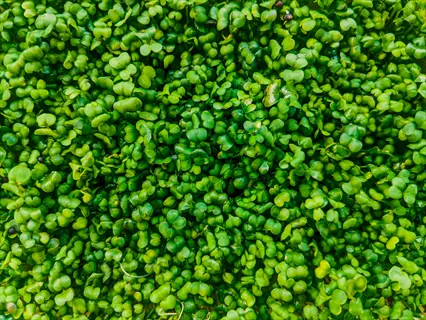
Arugula
- Cold tolerance: Survives down to 22°F (-6°C) and develops a milder, sweeter flavor in cold weather compared to summer-grown plants.
- Sowing window: Direct sow late August through October for fall and winter harvest, and again in February under the frame for spring.
- Spacing: Sow thinly and thin to 3 inches (7.5 cm) between plants for full-size leaves or grow densely for baby greens.
- Harvest method: Cut outer leaves 4 to 5 inches (10 to 13 cm) long, or harvest whole plants at 4 weeks for tender baby arugula.
- Recommended varieties: Astro, Sylvetta (wild arugula), and Rocket are reliable cold frame producers through fall and early winter.
- Common issues: Flea beetles can find their way inside in early fall, so install fine mesh ventilation covers during warm spells.
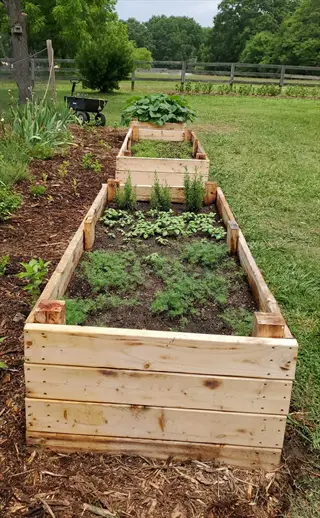
Radishes
- Cold tolerance: Hardy varieties survive interior temperatures down to 25°F (-4°C) and mature in just 25 to 30 days under the frame.
- Sowing window: Direct sow September through October for fall harvest and again in late February for the earliest spring radishes possible.
- Spacing: Thin to 1 inch (2.5 cm) between plants and 4 inches (10 cm) between rows for full bulb formation.
- Harvest method: Pull when roots reach 1 inch (2.5 cm) across, since overcrowding and overgrowth turn bulbs woody and pithy.
- Recommended varieties: French Breakfast, Cherry Belle, and the long winter daikon types all perform well in the cold frame.
- Common issues: Bulbs split or turn pithy if soil dries between waterings, so check moisture twice weekly through warm spells.
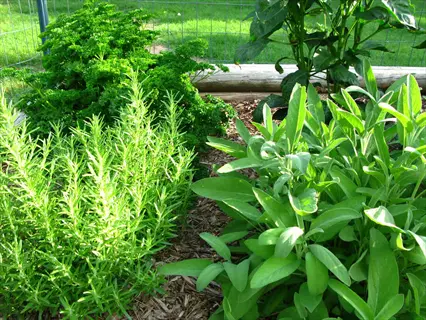
Parsley
- Cold tolerance: Both flat-leaf and curly parsley survive winter inside a cold frame down to about 15°F (-9°C) interior temperature.
- Sowing window: Transplant established plants in late August or early September, since seeds are slow to germinate in cool soil.
- Spacing: Set plants 8 to 10 inches (20 to 25 cm) apart, since mature plants form bushy clumps under the frame.
- Harvest method: Cut outer stems at the base and let the central growing point keep producing fresh leaves through winter.
- Recommended varieties: Italian Flat Leaf, Giant of Italy, and Triple Curled all tolerate cold and recover quickly after a hard freeze.
- Common issues: Slugs find shelter inside warm cold frames, so check under leaf litter and remove hiding places weekly.
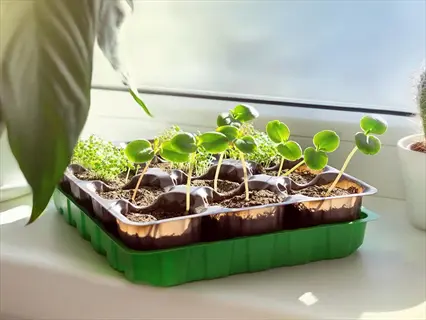
Hardening-Off Seedlings
- Use case: Nebraska Extension recommends a spring hardening-off progression where seedlings start indoors, then transition to the frame.
- Timeline: Move indoor-started seedlings into the closed frame for 2 to 3 days, then prop the lid by day, then remove the lid before transplanting.
- Best candidates: Tomato, pepper, eggplant, broccoli, cabbage, and most herb seedlings before final transplanting into the open garden.
- Watering during transition: Keep soil consistently moist but not saturated, and water in the morning so leaves dry before the cold night.
- Temperature target: Aim for 65 to 70°F (18 to 21°C) daytime and 55 to 60°F (13 to 16°C) nighttime, per Nebraska Extension guidance.
- Common issues: Sudden temperature swings shock young plants, so vent gradually rather than removing the lid all at once on day one.
Temperature and Ventilation Rules
Heat is your friend and your worst foe inside a cold frame. A parked car on a cold sunny day can hit 100°F in 30 minutes. Your frame does the same thing. That is why cold frame temperature rules matter more than how well your box holds heat.
Iowa State Extension gives one simple when to vent rule. Open the cover when the inside reads above 85°F (29°C). I cooked a flat of spring lettuce by missing that mark on a clear March day. The leaves turned to mush in three hours flat.
Nebraska Extension adds a second trigger for cold frame ventilation. Prop the lid open on any sunny day when outside air rises above 45°F (7°C). Your venting cold frame routine should also check soil heat. Missouri Extension pegs 70 to 75°F (21 to 24°C) as the sweet spot for seed start.
Set a min/max thermometer inside the box and check it each morning. That one tool teaches you your frame more than any guide. For days when you cannot be home, an automatic vent opener with a wax piston runs about 60 to 90 dollars and saves your crop. The table below maps each weather case to the right move so you can dodge overheating cold frame losses.
Hotbed and Heated Variants
A hotbed is a cold frame with extra heat from below. Think of it as a heated floor in your house. Warm feet keep your whole body cozy. Warm roots do the same for your plants. The frame on top traps the rising heat.
The cold frame vs hotbed choice comes down to your goal. A plain frame works for cool season greens and to harden off starts. A heated cold frame can sprout warm crops like tomatoes and peppers weeks early. I built my first manure hotbed in 2019 and pulled pepper starts ready for the garden by April 10th.
Missouri Extension lays out the electric heating cable path. Use 10 watts per square foot (108 W per square meter) in mild zones. Bump that to 12 watts per square foot (129 W per square meter) in cold ones. A hotbed thermostat keeps soil at 74°F (23°C), right in the seed start sweet spot.
The manure path skips the wiring. Fresh horse manure gives off strong microbial heat as it breaks down. French market gardeners ran Paris greens this way in the 1800s. They had no power and no cold chain trucks. The chart below maps four ways to add bottom heat to your frame so you can pick the best fit.
Electric Heating Cable Hotbed
- Setup depth: Missouri Extension recommends excavating about 14 inches (36 cm), installing 6 inches (15 cm) of coarse gravel, 2 inches (5 cm) of sand, then 4 to 6 inches (10 to 15 cm) of planting soil over the cable.
- Wattage requirements: Use 10 watts per square foot (108 W per square meter) in mild climates, or 12 or more watts per square foot (129+ W per square meter) in colder zones.
- Thermostat range: Operates between 30 and 120°F (-1 and 49°C), and built-in thermostats commonly hold soil around 74°F (23°C) for seed germination.
- Power source: Requires an outdoor-rated GFCI outlet within reach, plus weatherproof cable splices and a buried conduit for the cable run.
- Best for: Reliable, controlled seed starting and early spring crops, especially for gardeners without access to fresh livestock manure.
Manure (Biothermal) Hotbed
- Setup depth: Excavate 18 to 24 inches (46 to 61 cm), pack 12 to 18 inches (30 to 46 cm) of fresh horse manure, then top with 6 inches (15 cm) of planting soil.
- Heat duration: Microbial decomposition produces strong heat for 4 to 6 weeks, then gradually diminishes as the manure breaks down into compost.
- Manure source: Fresh horse manure mixed with straw bedding works best, and competitors who keep horses on hand often share excess in early spring.
- Monitoring: Insert a compost thermometer into the manure layer and wait until temperature drops below 90°F (32°C) before planting to avoid root damage.
- Best for: Off-grid gardeners and traditional growers who want a no-electricity option that also produces finished compost for the next season.
Standard Unheated Cold Frame
- Heat source: Solar gain only, which adds 5 to 10°F (3 to 6°C) above outside air per University of Missouri Extension measurements.
- Setup depth: No excavation needed beyond standard soil prep, since the frame sits on top of the existing bed or garden soil.
- Operating cost: Essentially zero ongoing cost once built, with no electricity bill or manure sourcing required.
- Limitations: Cannot reliably germinate warm-season seeds in early spring, since soil rarely reaches the 70 to 75°F (21 to 24°C) optimal range.
- Best for: Hardening off seedlings, growing cool-season crops, and extending fall and spring shoulder seasons without added inputs.
Compost-Sided Hybrid Hotbed
- Construction: Surround the cold frame on three sides with a 2-foot (60 cm) berm of active compost that radiates gentle warmth inward through the winter.
- Heat output: Less intense than buried manure but easier to refresh, since you simply add fresh material to the berm every few weeks.
- Material sources: Kitchen scraps, fall leaves, grass clippings, and coffee grounds combine into a steady compost feedstock for the berm.
- Monitoring: Check berm temperature with a compost thermometer, since active piles can hit 130°F (54°C) and need turning to moderate heat.
- Best for: Urban or suburban gardeners with a kitchen-scrap habit who want extra winter warmth without buying electric cable or sourcing manure.
Troubleshooting Common Issues
Every frame I have ever owned has hit at least one of the cold frame problems below. The good news is each one has a clear fix. Think of a small sealed bathroom with no fan. Steam builds up fast and mold soon follows. Your frame works the same way without airflow.
Condensation cold frame drip is the most common issue I see in fall and early spring. A mold cold frame problem with white fuzz on leaves shows up next. Pest intrusion from voles or mice comes third. The University of Maine warns that overheating cold frame events are the top cause of crop loss when you skip the daily check.
Lumber rot and cracked glazing wear down older frames over time. My first build lost its lid hinge in year two because I used cheap steel screws. Stainless or galvanized hardware saves you that headache. Winter watering also trips up new growers since the soil dries faster than people guess.
Missouri Extension shares one fix worth your time. Bake old frame soil at 140°F (60°C) for 30 minutes to kill off pests and disease before you reuse it. The guide below walks you through each common issue with the cause, the fix, and how to dodge it next time.
Condensation and Humidity Buildup
- Symptom: Heavy water droplets coat the inside of the glazing and drip onto plants, especially in early morning during cool weather.
- Cause: Sealed frame traps plant transpiration without ventilation, since University of Maine Extension confirms airflow is critical for cold frame health.
- Fix: Crack the lid 1 to 2 inches (2.5 to 5 cm) on milder days to release humid air, and water plants in the morning so leaves dry before night.
- Prevention: Install a small piece of dowel (around 4 inches / 10 cm) for daily lid propping, and check the frame at sunrise during overcast stretches.
Overheating Damage to Plants
- Symptom: Leaves wilt, scorch, or turn yellow within hours on bright sunny days, even when outside temperatures feel cool to the gardener.
- Cause: Iowa State Extension warns that interior temperatures climb past 85°F (29°C) quickly under direct winter sun, and closed lids trap that heat.
- Fix: Open the lid fully when interior temperature exceeds 85°F (29°C), and consider a solar-powered automatic vent opener for days you cannot be home.
- Prevention: Place a min/max thermometer inside the frame and check it every morning to learn your specific microclimate behavior over time.
Mold, Mildew, and Damping Off
- Symptom: Fuzzy gray or white growth on leaf surfaces, stems collapsing at soil level (damping off), or black spotting on seedlings.
- Cause: Excess moisture combined with poor airflow creates ideal fungal conditions, especially on closely spaced winter greens.
- Fix: Increase ventilation, water at the base rather than overhead, and remove infected plants immediately before disease spreads to neighbors.
- Prevention: Missouri Extension recommends pasteurizing reused frame soil at 140°F (60°C) for 30 minutes in an oven to kill soil-borne pathogens.
Rodent and Pest Intrusion
- Symptom: Tunneled greens, gnawed root crops, droppings inside the frame, or seedlings disappearing overnight without obvious leaf damage.
- Cause: Warm frame interior offers winter shelter for voles and mice, and stored leaf litter or fall debris provides nesting material.
- Fix: Clean fallen leaves and harvest debris from the frame weekly, and bury fine hardware cloth (1/4 inch / 6 mm) around the base 6 inches (15 cm) deep.
- Prevention: Keep mulch pulled back 3 inches (7.5 cm) from frame walls, and remove all plant debris before sealing the frame for winter.
Lumber Rot and Hardware Failure
- Symptom: Soft spongy spots on wooden frame walls, rusted screws, sagging lid hinges, or warped sides after the first wet winter.
- Cause: Untreated wood in constant ground contact fails within 2 to 3 seasons, and steel hardware corrodes in the humid frame microclimate.
- Fix: Replace failed sections with cedar, redwood, or ACQ-treated lumber per Missouri Extension, and swap steel screws for stainless or galvanized.
- Prevention: Coat untreated wood with white latex paint on outside surfaces only, and lift the frame onto a gravel pad to break the wood-to-soil contact.
Cracked or Cloudy Glazing
- Symptom: Reduced light transmission, visible cracks in glass panes, or hazing and yellowing of polycarbonate or plastic sheeting.
- Cause: Hail, falling branches, thermal stress from extreme temperature swings, and ultraviolet degradation over multiple seasons.
- Fix: Replace single-pane glass with twin-wall polycarbonate for better insulation and impact resistance, or splice in clear plastic sheeting as a fix.
- Prevention: Cover the frame with a tarp during hailstorms, trim overhanging branches in fall, and choose UV-stabilized polycarbonate from the start.
5 Common Myths
Cold frames only work in mild climates and cannot protect crops through real winters in northern zones.
Cold frames successfully protect cold-hardy greens like mche and spinach into winter even in Zone 3, as Eliot Coleman demonstrates in Maine.
Once you set up a cold frame in fall, you can leave the lid closed all winter without checking on it.
Even in cold months, sunny days can push interior temperatures past 85F (29C), so you must vent the lid whenever outside air rises above 45F (7C).
You need expensive new lumber, real glass, and custom hardware to build an effective cold frame structure.
Reclaimed windows, scrap plywood, cinder blocks, and straw bales all build a working frame, and many gardeners spend under 50 dollars on materials.
Cold frames create the same warm tropical environment as a heated greenhouse for summer-loving vegetables.
Cold frames only hold 5 to 10F (3 to 6C) above outside air, so they suit cool-season crops, not heat lovers like tomatoes or peppers in winter.
Any treated lumber works fine for building a long-lasting cold frame structure that touches garden soil.
Avoid creosote and pentachlorophenol lumber because their fumes damage plants, and choose cedar, redwood, or ACQ-treated lumber instead per Missouri Extension.
Conclusion
Cold frame gardening comes down to three simple wins. You gain 2 to 4 weeks of growing time each season per Iowa State data. You vent at 85°F (29°C) to dodge heat loss. You pick cold-hardy crops like mâche, spinach, and kale that thrive in the cold.
The numbers back this up. Your frame holds 5 to 10°F (3 to 6°C) above outside air per Missouri Extension. The University of Maine confirms a frame gives more frost cover than row cloth. That gap can mean the difference between a green crop in December and a row of dead stems by Thanksgiving.
I will not lie about the work. You signed up for daily checks on sunny days. Skip them and your winter harvest dies in one hot afternoon. I learned that the hard way when I burned a tray of spring lettuce in just three hours. Set a phone alarm for solar noon during the first month. After that, the routine becomes second nature like watering your house plants.
Think of your first frame as a small science lab. Each season teaches you a bit more about how your yard, your sun, and your soil work as a system. I built my second frame after only 18 months of running the first one. In my experience, most growers I know add a second or third box within two years of pulling their first year-round vegetables from one. Start small, learn the rhythm, then scale your season extension as far as your space allows.
External Sources
Frequently Asked Questions
What is a cold frame in gardening?
A cold frame is a bottomless box with a clear sloped lid that captures solar heat to protect plants and extend the growing season by 2 to 4 weeks.
What are the disadvantages of a cold frame?
Cold frames can overheat fast on sunny days, need daily monitoring, offer limited space, hold only 5 to 10°F above outside, and require ventilation to avoid plant damage.
What do you use a cold frame for in the garden?
Gardeners use cold frames to harden off seedlings, start cool-season crops early, extend the fall harvest, overwinter tender perennials, and grow winter salads.
Should a cold frame be in full sun?
Yes, a cold frame should sit in full sun with a south or southeast exposure so the sloped glazing captures maximum winter sunlight for solar heat.
What plants can go in a cold frame?
Cold frames work for lettuce, spinach, kale, arugula, mâche, claytonia, carrots, beets, radishes, scallions, parsley, and hardening-off vegetable seedlings.
When to put plants in a cold frame?
Put cool-season crops in 4 to 6 weeks before last frost in spring, and sow fall crops in late August or early September for winter harvest.
Is a cold frame as good as a greenhouse?
A cold frame is not as good as a greenhouse for warmth but it costs far less, needs no power, and still extends the season and protects cold-hardy crops.
Are tomatoes ok in an unheated greenhouse?
Tomatoes can grow in an unheated greenhouse once nights stay above 50°F (10°C), but cold nights below this will stall growth and risk damage.
Can I build a cold frame myself?
Yes, you can build a cold frame yourself in a weekend using scrap lumber, an old window or polycarbonate, hinges, and basic tools for under 100 dollars.
Can you get vitamin D through a greenhouse?
You cannot get vitamin D through a typical glass or polycarbonate greenhouse because the glazing blocks the UVB rays your skin needs to produce vitamin D.