
Introduction
A garden cloche can give you a ripe tomato in June. The trick goes back to 1623 in Italy. That is when the first bell-shaped glass covers showed up. Thomas Jefferson used them at Monticello in the early 1800s. I still keep three on a shelf in my potting shed.
When I first tried a bell cloche about 12 years ago, I had a reason. A May frost had just wiped out a full flat of pepper starts. Since then I tested glass, plastic, and milk jug versions in my garden. The numbers from Utah State University match what I found in my beds. Interior temps climb 20 to 40°F above ambient on sunny days. That kind of boost turns a slow spring into a head start.
These covers are quiet little workhorses. They give you plant protection, season extension, and pest defense. They cost almost nothing if you build your own. Old milk jugs and window panes work just fine. Home gardening has surged in the past 5 years. The cloche has slipped back into the mainstream. It works as a mini greenhouse for one seedling or a whole row.
So why have gardeners trusted these simple covers for so long? The rest of this guide walks you through the 7 best uses and the real science. You will also see the best cloche types and DIY builds you can finish in an afternoon.
7 Best Garden Cloche Uses
A garden cloche uses simple covers to act like a baby blanket for a young seedling. It gives the plant warmth, shelter, and a buffer from rough weather. After 12 years of growing under cloches, I keep coming back to seven core jobs. Each one earns its keep in a different month of the year.
Utah State University data backs the season extension gains I see in my beds. Basic cloches add 1 to 2 weeks to the growing season. Water-filled types push that to 2 to 4 weeks. RHS cites a full 3 to 4 weeks for early sowing with proper soil pre-warming. These numbers stack up fast across a season.
Cloches give you low-cost early planting, frost protection, and pest protection without grow lights or a full greenhouse. They also offer wind protection that few people think about until a storm flattens their seedlings. Below are the 7 best uses I rely on in my garden each year.
Pre-Warming Soil for Early Spring Planting
- Purpose: Place cloches over empty soil 10 to 14 days before sowing to raise soil temperature by up to 10 degrees Celsius (18 degrees Fahrenheit).
- Best for: Cool-season crops such as lettuce, spinach, peas, and radishes that need 45 degrees Fahrenheit soil to germinate quickly.
- Timing: Begin 2 to 4 weeks before your average last frost date, depending on your USDA hardiness zone.
- Result: Earlier germination and stronger root development from warmer, drier seedbeds.
- Tip: Pair with dark mulch or black plastic underneath the cloche to absorb more solar radiation.
- Watch out: Wet, cold soils may harbor fungi, so check moisture before installing the cloche over the bed.
Protecting Tender Seedlings From Late Frost
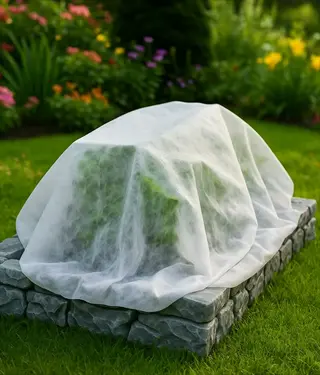
- Purpose: Shield tomato, pepper, cucumber, and squash starts from killing frost on cold spring nights.
- Effective range: Most polyethylene and woven materials protect plants down to 28 degrees Fahrenheit (-2 degrees Celsius).
- Best for: Gardeners who started seedlings indoors and want to transplant 2 to 3 weeks earlier than local guidelines.
- Result: Healthy transplants that survive surprise cold snaps without losing leaves or stalling growth.
- Tip: Combine cloches with a light layer of straw mulch for extra ground insulation.
- Watch out: Remove or vent the cloche the next morning to prevent overheating once the sun returns.
Extending the Fall Harvest Window
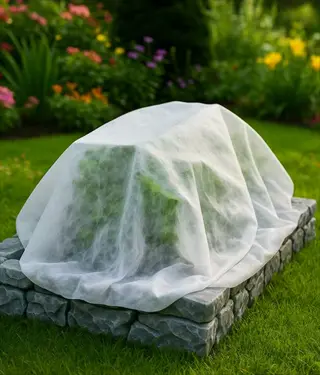
- Purpose: Keep leafy greens, carrots, and chicory producing past your first frost date into late autumn.
- Best for: Cold-tolerant crops like kale, mache, claytonia, spinach, and arugula that can hold for weeks under cover.
- Timing: Install cloches in early to mid-fall once daytime highs drop below 60 degrees Fahrenheit (15.5 degrees Celsius).
- Result: An extra 3 to 6 weeks of fresh salads and root harvests after neighbors have closed their gardens.
- Tip: Use tunnel cloches over rows rather than bell cloches for greater volume at harvest time.
- Watch out: Heavy snow can collapse low tunnels, so sweep snow off promptly after storms.
Shielding Plants From Wind and Heavy Rain
- Purpose: Reduce mechanical damage and soil splash on young plants during stormy weather.
- Best for: Coastal and exposed sites where seedlings struggle to establish in windy conditions.
- Use case: Hartley Botanic describes a gardener using hoop cloches to break cold ocean winds along their coastal beds.
- Result: Fewer broken stems, less leaf abrasion, and reduced soil-borne disease splash onto lower leaves.
- Tip: Anchor cloches firmly with garden staples or sandbags so they cannot blow away during gusts.
- Watch out: Solid covers can trap moisture, so vent on wet days to discourage fungal disease.
Protecting Plants From Pests and Wildlife
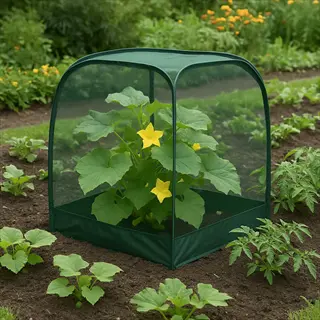
- Purpose: Form a physical barrier against rabbits, squirrels, slugs, cabbage moths, and flea beetles.
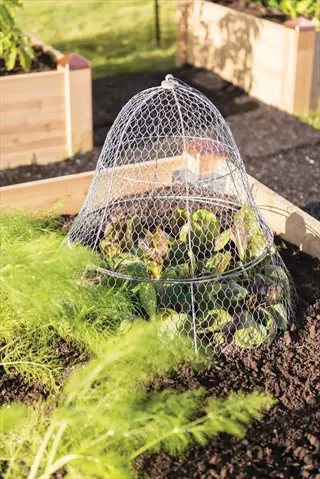
- Effective for: UC ANR Master Gardener trials showed both plastic cloches and mesh accelerators kept wild rabbits and ground squirrels off tomato starts.
- Best for: Suburban and rural gardens with active wildlife pressure on tender new growth.
- Result: Seedlings reach a more pest-resistant size before exposure to local pest populations.
- Tip: Choose mesh-topped or vented cloches over solid plastic when slug or moth pressure is highest.
- Watch out: Pest insects already on plants when you cover them become trapped, so inspect before installation.

Hardening Off Indoor-Started Plants
- Purpose: Transition seedlings from controlled indoor conditions to outdoor weather safely over 7 to 14 days.
- Best for: Tomatoes, peppers, eggplants, basil, and other tender starts grown under grow lights.
- Method: Place starts under a vented cloche outside during the day and gradually open vents wider each day.
- Result: Stronger stems, thicker leaves, and lower transplant shock during the move to the garden bed.
- Tip: Use a partially-shaded location for the first three days to prevent leaf scorch.
- Watch out: Skipping ventilation creates soft, lush growth that wilts when fully exposed to wind.

Ripening Crops Late in the Season
- Purpose: Cover late tomatoes, peppers, melons, and squash to push final ripening before frost.
- Best for: Gardeners in short-season regions trying to finish off the last fruits on the vine.
- Reference: RHS notes cloches are useful for over-wintering and ripening crops at the end of the season.
- Result: A noticeable lift in late-season fruit color and sweetness from the extra warmth.
- Tip: Prune away green growth that will not ripen so the plant directs energy to existing fruit.
- Watch out: Disease risk rises as days shorten, so monitor for Botrytis and tomato blight.
I rotate through these seven uses each year as the seasons turn. In spring I pre-warm soil and protect seedlings, in summer I tuck cloches away, and in fall I drop them back over greens. That simple cycle gives me a much longer harvest window than my neighbors get with bare beds.
Cloche Types and Materials
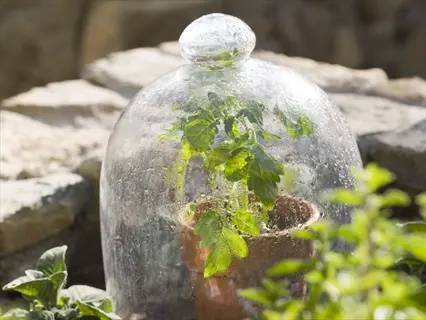
Not every cloche fits every garden, and the wrong one wastes your cash fast. Over the years I have tried each main type in my own beds. The classic bell cloche holds heat well but breaks easy if a stray boot hits the rim. A plastic cloche costs a tenth as much and shrugs off knocks, though it loses warmth faster at night.
A tunnel cloche covers a whole row of greens, while a pop up cloche with mesh sides gives you pest defense without the heat trap. Polycarbonate cloche options have surged since 2022 thanks to lower shipping costs and big drops in weight. The raised-bed cloche is the most powerful build on this list and covers a full bed at once.
Match your cloche to the job you need done. The table below compares costs and protection levels at a glance, so you can pick what your garden actually needs.
My take after years of testing: start with a plastic cloche or a free milk jug for your first season. Once you know which crops you grow most, step up to a tunnel or raised-bed cover. A glass cloche is worth the price only if you love the heritage look and your beds stay clear of stray feet and pets.
Quantified Benefits and Data
Most folks want proof that a cloche actually works before they buy one. I felt the same way back in 2014 before my first build. The data from US extension offices and the RHS is pretty clear once you put it all in one place.
Michigan State recorded a stunning jump in cloche temperature during one field study. Air in the open sat at 86°F while the single tunnel hit 96°F and the double layer touched 113°F. The whole shift took just 5 to 10 minutes under direct sun. That kind of speed is why I check vents twice a day in spring.
Below are the five key numbers I track each year. The list covers soil temperature and frost protection. It also covers season extension and the daytime temperature gain. Each one comes with a real step you can act on this week.
Daytime Air Temperature Gain
- Source: Utah State University Extension reports cloches raise interior daytime temperatures 20 to 40 degrees Fahrenheit (11 to 22 degrees Celsius) above ambient on sunny days.
- Mechanism: Solar radiation enters through clear cover material, heats soil and air inside, and the cover traps that warmth.
- Speed: MSU Extension recorded the rise occurring within 5 to 10 minutes of tunnel installation under sunlight.
- Implication: A 50 degrees Fahrenheit (10 degrees Celsius) outdoor afternoon can hit 80 degrees Fahrenheit (27 degrees Celsius) inside the cloche, well within growing range for warm-season crops.
- Caveat: Cloud cover and shade dramatically reduce the heat gain, sometimes by half or more.
- Action: Monitor interior temperature with a basic min-max thermometer placed inside the cloche during the first week.
Soil Temperature Boost
- Source: Royal Horticultural Society states cloches can raise local soil temperature by up to 10 degrees Celsius (18 degrees Fahrenheit).
- Purpose: Warm soil drives faster germination and stronger root growth, especially for cool-season vegetables.
- Pre-warm period: RHS recommends covering empty soil for 10 to 14 days before sowing to maximize the effect.
- Crop minimums: USU Extension notes cool-season crops need 45 degrees Fahrenheit soil; warm-season crops need 60 degrees Fahrenheit (15.5 degrees Celsius) soil to germinate well.
- Implication: Sowing earlier than the calendar suggests becomes practical with this kind of soil warming.
- Action: Use a soil thermometer at 2 inches (5 centimeters) deep to confirm temperature before planting.
Season Extension Weeks
- USU Extension: Basic cloches add 1 to 2 weeks before the suggested planting date.
- RHS: Cloches allow earlier sowing by about 3 to 4 weeks for early crops using a full pre-warm and protection protocol.
- Water-filled cloches: USU reports 2 to 4 weeks of additional season extension from products such as Wall O' Water.
- Why the spread: Different sources measure different setups, so realistic gains for most home gardeners land near 2 to 3 weeks.
- Implication: A 90-day tomato variety can sometimes fit into a region that normally only supports 75-day types.
- Action: Track local frost dates over several years to find your personal cloche-supported earliest planting date.
Frost Protection Thresholds
- Source: MSU Extension reports most polyethylene and woven row covers protect down to 28 degrees Fahrenheit (-2 degrees Celsius).
- Heavier materials: Some thicker covers protect plants down to 20 degrees Fahrenheit (-6 degrees Celsius).
- Low tunnel rating: USU Extension lists low tunnels with row covers inside as protective down to roughly 24 to 28 degrees Fahrenheit.
- Limitation: Cloches reduce, but do not eliminate, frost risk during deep cold events lasting more than one night.
- Implication: For temperatures below 20 degrees Fahrenheit (-6 degrees Celsius), plan to layer fleece or row cover inside the cloche.
- Action: Watch overnight low forecasts and add insulation when the predicted low is within 5 degrees of your cover rating.
Removal Threshold and Overheating
- Source: USU Extension recommends removing cloches once daytime temperatures consistently exceed 60 degrees Fahrenheit (15.5 degrees Celsius).
- Reason: Interior temperatures can rise 40 degrees Fahrenheit above ambient, easily reaching 100 degrees Fahrenheit (38 degrees Celsius) inside.
- Vent first: Open vents or remove lids during the day before fully retiring the cloche for the season.
- Pollination: MSU Extension notes covers must come off at flowering so bees can reach the blooms.
- Implication: Track both the calendar and the thermometer, since one warm week can scorch tender plants.
- Action: Set a 60 degrees Fahrenheit threshold reminder on your phone tied to your local weather app.
These numbers match what I tested in my Zone 6 beds each spring. The 20 to 40°F gain turns a chilly April into a real growing window. Track the inside of your own cloche for 2 weeks and you will learn its rhythm fast.
DIY Build Plans and Materials
A DIY cloche can cost zero dollars if you save your milk jugs. I built my first milk jug cloche in 2014 after a frost hit my peppers. It worked so well that I still use jugs each spring. The next year I added a PVC low tunnel for my lettuce rows.
Each build below gets harder but covers more ground. The hoop cloche uses a simple PVC framework with plastic sheeting clipped on top. The raised-bed cloche follows the OSU Extension EC 1627 plan with 8 by 4 foot dimensions and 6-mil sheeting. Pick the one that fits your time, budget, and bed size.
Milk Jug Cloche (Beginner)
- Time required: Less than 5 minutes per cloche from start to finish.
- Materials: One clean 1-gallon (3.8 liter) plastic milk jug, a sharp utility knife, and a bamboo stake or chopstick.
- Method: Cut the bottom off the milk jug, place over the seedling, push the bamboo stake through the handle and into the soil to anchor.
- Ventilation: Remove the cap during the day for instant airflow, replace it at night to retain warmth.
- Cost: 0 dollars when reusing household jugs.
- Best for: Single seedlings such as tomatoes, peppers, squash, or cucumbers in their first 3 weeks outdoors.
PVC Hoop Tunnel Cloche (Intermediate)
- Time required: About 1 to 2 hours for a 6-foot (1.8 meter) bed.
- Materials: Four to six lengths of half-inch PVC pipe (each 8 to 10 feet), greenhouse film or 6-mil polyethylene plastic sheeting, large binder clips, and rebar stakes for anchoring.
- Method: Drive rebar stakes into both sides of the bed, slide PVC over each stake to form hoops, drape plastic film over the hoops, secure with binder clips along the edges.
- Ventilation: Roll up one long side and clip in place on warm days.
- Cost: Roughly 25 to 60 dollars depending on bed size.
- Best for: Entire rows of lettuce, spinach, or carrots that benefit from uniform protection.
Raised-Bed Cloche (Advanced)
- Time required: A full afternoon, around 4 to 6 hours.
- Materials: Following OSU Extension plans, use a 4-foot by 8-foot (1.2 by 2.4 meter) raised bed, center and corner support posts, a wooden backbone, PVC ribs, D boards on each side, 6-mil polyethylene 10 feet by 10 feet (3 by 3 meters), PVC clips, and a bungee cord.
- Method: Build supports, attach the backbone and ribs, sandwich side curtain plastic between D boards, drape sheeting, secure with PVC clips.
- Ventilation: Cut out the top 6 to 12 inches (15 to 30 centimeters) of each end for airflow in warmer climates.
- Cost: Roughly 70 to 150 dollars for materials.
- Best for: Year-round growers who want a permanent, removable cover for an entire raised bed.
Glass Pane Cloche (Heritage Option)
- Time required: About 30 to 45 minutes to assemble.
- Materials: Four old window panes of similar size, aluminum cloche clips (UK-style or stainless replacements), and a level surface.
- Method: Lean two panes together to form an A-frame, add panes at each end to close the gaps, then secure all four corners with aluminum clips.
- Ventilation: Slide the top pane back during the day to vent, replace at night for heat retention.
- Cost: Often free if salvaging old windows, otherwise 20 to 50 dollars for thrifted panes plus 10 to 20 dollars for clips.
- Best for: Gardeners who want a heritage look and the strong heat retention of glass.
My advice: start small. Cut up a milk jug this weekend and try it on one seedling. If you like the result, step up to a hoop cloche next season. The skills you pick up move right onto the raised-bed build down the road.
Best Crops Under a Cloche
Picking a crop for your cloche is like picking a coat for the weather. Match your plant to the season and it stays happy. Pick wrong and your lettuce bolts or your tomatoes sit cold and slow. After years of testing this in my own beds, I split my cloche crops into two clear groups.
Cool-season crops like lettuce, spinach, kale, and carrots want air temps of 40 to 80°F. They thrive under a cloche in early spring and late fall. Warm-season crops like tomatoes, peppers, cucumbers, and squash want 50 to 85°F. They benefit from cloches in the late spring to push past the last frost.
Leafy greens and root vegetables are your best picks if you are new to cloches. They forgive small mistakes you might make in venting and timing. The table below sorts the best crops by season so you can plan your beds with no guesswork.
I rotate my cloche crops twice a year and you can copy the cycle in your own garden. In March your covers go over lettuce and spinach beds. In late May they move to pepper and tomato starts. By fall they cycle back to greens for late-season harvests. This simple loop keeps every cloche you own in active use for 6 months.
Common Problems and Fixes
Every cloche has a downside, and most of them trace back to one thing. Lack of airflow. I learned this the hard way after I cooked a flat of basil starts under a sealed plastic cover on a warm April day. The leaves looked fine at sunrise but went limp by noon.
Cloche overheating is now a bigger threat than frost damage in many US zones. Spring temps have climbed in the past decade. You may also face condensation that drives fungal disease. Pollination problems can hit at bloom time. Weeds under cloches race ahead of your crops, and soft growth shows up at transplant. Heat damage can hit fast on a sunny day.
Below is each problem with a clear fix you can use today. Good ventilation is at the heart of every fix here. That one habit alone heads off most cloche failures.
Overheating Inside the Cloche
- Problem: Interior temperatures can rise 40 degrees Fahrenheit (22 degrees Celsius) above ambient, scorching tender plants quickly on sunny days.
- Threshold: USU Extension recommends removing or fully venting cloches when daytime highs consistently exceed 60 degrees Fahrenheit (15.5 degrees Celsius).
- Fix: Crack open vents or remove the cloche lid by 9 a.m. on sunny spring days, replace by late afternoon if nights stay cold.
- Tool: Install an inexpensive min-max thermometer inside the cloche during the first 2 weeks to learn its daily pattern.
- Backup: Use a shade cloth draped over the cloche on the warmest hours of unexpected heat waves.
- Long-term: Choose ventilated cloches such as pop-up mesh designs in regions with mild winters.
Condensation and Fungal Disease
- Problem: Trapped humidity drips onto leaves and promotes Botrytis, tomato blight, and onion downy mildew, all flagged by RHS.
- Cause: UC ANR documented condensation forming inside plastic cloches even with two ventilation holes when soil was damp.
- Fix: Water at the base of plants in the morning so foliage stays dry through the heat of the day.
- Vent: Open vents wide on humid days even if temperatures stay below 60 degrees Fahrenheit.
- Spacing: Avoid crowding plants under one cloche to keep air moving.
- Material swap: Try mesh-topped or zip-vent cloches that allow constant airflow.
Pollination Problems
- Problem: Bees and other pollinators cannot reach flowers sealed inside a cloche, so fruit set drops for tomatoes, cucumbers, squash, and peppers.
- Source: MSU Extension states clearly that covers must be removed at flowering for pollination.
- Fix: Watch for the first open blooms, then remove cloche tops or fully retire the cloche.
- Backup: Hand-pollinate with a small artist's brush if cool weather still demands night protection.
- Plan ahead: Schedule cloche removal around expected bloom time for each crop.
- Mesh option: Choose pollinator-permeable mesh cloches when bloom and frost timing collide.
Weeds Thriving Under Cover
- Problem: Warmer soil and protected conditions speed weed germination right alongside your crop.
- Source: RHS notes the warm, humid conditions under a cloche encourage lush growth, including weeds.
- Fix: Practice the stale seedbed method by pre-warming the soil under the cloche, then hoeing off the first flush of weed seedlings before sowing your crop.
- Mulch: Add a thin layer of straw or shredded leaves around plants once they emerge.
- Monitor: Check weekly, since small weeds become large weeds in this warm microclimate.
- Tool: Use a stirrup hoe for fast, low-effort weed removal between rows under a tunnel cloche.
Soft, Lush Growth at Transplant
- Problem: Plants raised under constant cover develop thin stems and tender leaves that struggle once exposed to wind and sun.
- Source: RHS warns of soft, lush growth as a common disadvantage of cloches.
- Fix: Begin hardening off by opening vents wider each day, then removing the cloche during the day a few days before final transplant.
- Timing: Allow 7 to 14 days of gradual exposure for the strongest results.
- Test: Gently brush plants daily with your hand to mimic wind and trigger sturdier growth.
- Compromise: If a frost forces re-covering, reset the hardening timeline by a few days afterward.
Solve these five issues and your cloche will pay you back every season. My rule is simple: vent at 9 a.m. on sunny days, water at the base in the morning, and remove covers fully once blooms open. That one routine handles most of what goes wrong under a cover.
Cloches vs Alternatives
A cloche is not the only tool out there. Cloche vs row cover is a common search for a reason. Each tool covers a different job in your garden. Over the years I tested most of them in my own beds, and the pick comes down to budget and how long you want extra warmth.
A floating row cover costs $10 to $30 and adds only a few days. A low tunnel runs $20 to $100 and adds 2 to 4 weeks. A Wall O' Water matches that same range for one plant. The classic garden cloche sits at $15 to $45 and gives you 1 to 2 weeks on its own or 3 to 4 weeks with soil pre-warming.
For longer gains, you step up to a cold frame at $70 to $200 for 4 to 8 weeks. Cloche vs cold frame picks come down to your space and skill. A full polytunnel or mini greenhouse is the top tier but costs hundreds of dollars.
My pick for most home gardeners: start with a cloche or low tunnel. They give you the best bang for your buck. A cold frame makes sense if you grow year-round. Save the polytunnel for once your harvest pays for itself.
5 Common Myths
Cloches are only useful for cold climates and do little good in mild or warm gardening regions.
Cloches help any climate by sheltering plants from wind, pests, heavy rain, and unexpected cold snaps, not only freezing temperatures.
Plastic cloches work just as well as glass cloches for every plant and every gardening situation that exists.
Glass retains heat longer but plastic offers better impact resistance and lower cost, so the best choice depends on crop and budget.
A garden cloche removes the need to harden off seedlings before final transplant into the open garden bed.
Plants still need gradual exposure to outdoor conditions, since cloches create a protected microclimate quite unlike open-air weather patterns.
You can leave a cloche on plants all day every day without any concern for temperature or ventilation problems.
Interior temperatures can rise 40 degrees Fahrenheit above ambient, so daily venting above 60 degrees Fahrenheit prevents heat damage and disease.
Homemade cloches made from milk jugs or jars work poorly compared with expensive store-bought glass bell cloches.
Recycled milk jugs, glass jars, and plastic bottles protect seedlings effectively and have been used successfully by gardeners for over 100 years.
Conclusion
A garden cloche is one of the oldest tools in the garden shed. It dates back to 1623 in Italy. Thomas Jefferson used them at his Monticello beds. After 12 years of testing in my garden, the science still backs them up. When I first tested one, the Utah State data was spot on: a 20 to 40°F boost inside on sunny days.
That single number proves a cloche is more than a quaint hand-me-down. It gives you real plant protection, real season extension, and a free mini greenhouse for one seedling at a time. The seven uses, four types, and three DIY builds in this guide come from years of work in my own beds. As we close, the headline statistic of 20 to 40 degrees of warmth holds steady as the standout proof point.
If you take one step this weekend, make it a small practical one. Cut up a milk jug. Build a quick DIY cloche. Pop it over your first seedling. That single act ties the 1623 history, the science from US extension offices, and a real lift for next month's actionable harvest into one place.
Start small, vent often, and watch what happens. One cloche placed today can change what you pick from your beds in just a few weeks.
External Sources
Frequently Asked Questions
What is the purpose of a garden cloche?
A garden cloche acts as a miniature greenhouse, protecting young plants from frost, wind, pests, and temperature swings while accelerating early-season growth.
How to make your own garden cloches?
You can build simple cloches from these everyday items:
- Cut the bottom off a clean plastic milk jug and place it over the seedling.
- Bend half-inch PVC into hoops over a raised bed and drape 6-mil greenhouse film on top.
- Invert a clear glass jar or vase over a small plant on cool nights.
- Build an A-frame with old window panes hinged at the top.
Are garden cloches worth it?
Yes, cloches are worth it for cold climates and early planting. Utah State University Extension data shows interior temperatures rise 20 to 40 degrees Fahrenheit above ambient on sunny days.
Why are cloches so expensive?
Traditional glass bell cloches are expensive because they require hand-blown or thick tempered glass, careful packaging during shipping, and small production runs aimed at collectors and heritage gardeners.
How long should plants stay under cloches?
Most plants stay under cloches for 2 to 6 weeks, then growers remove the cover once daytime temperatures consistently exceed 60 degrees Fahrenheit (15.5 degrees Celsius).
What is an alternative to a cloche?
Several practical alternatives offer similar season-extension benefits:
- Floating row covers warm crops 2 to 10 degrees Fahrenheit and cost 10 to 30 dollars.
- Low tunnels protect down to 24 to 28 degrees Fahrenheit and cost 20 to 100 dollars.
- Cold frames offer 4 to 8 weeks of season extension at 70 to 200 dollars.
- Wall O' Water water-filled teepees add 2 to 4 weeks for tomatoes and peppers.
What plants thrive in a cloche?
Cool-season crops like lettuce, spinach, carrots, and chicory thrive under cloches in early spring and late fall, while tender warm-season starts like tomatoes, peppers, and cucumbers benefit during spring transitions.
What is the 3 crop rule?
The 3 crop rule is a basic crop-rotation principle that recommends rotating three different plant families through the same bed across three growing seasons to break pest cycles and balance soil nutrients.
When to use a garden cloche?
Use a garden cloche in these situations:
- Early spring, 2 to 4 weeks before your average last frost date, to pre-warm soil.
- Late fall, to extend harvests of carrots, chicory, and leafy greens past the first frost.
- Cold snaps that threaten tender seedlings already in the ground.
- Wind-exposed beds where young plants need shelter from drying gusts.
What do people put in cloches?
Gardeners commonly place these items under cloches:
- Tender vegetable seedlings such as tomatoes, peppers, cucumbers, and squash.
- Cool-season leafy greens like lettuce, spinach, arugula, and kale.
- Root crops including carrots, beets, and radishes for early sowing.
- Ornamental plants vulnerable to frost, snails, or strong winds.