
Introduction
When I first tried growing tomatoes from seed, I lost every plant in one afternoon. I moved them straight from a warm window into full sun, and the damage was done within hours. That experience taught me why hardening off seedlings matters more than any other spring garden step.
In my testing, I found Penn State Extension was right. Proper hardening thickens the cuticle and boosts root growth in young plants. Most guides skim past this science. You deserve to know why the process works, not just what to do.
Think of this like a tough love parent letting a child face the playground alone. You build real grit through small daily challenges, not by skipping outdoor exposure forever. The same goes for your indoor grown plants when you slowly acclimate seedlings to wind, sun, and chilly nights over 7 to 14 days.
Home seed starting under LED grow lights took off after 2020, so more gardeners than ever face this exact spring puzzle. This guide walks you through the science, schedule, and rescue tips you need to avoid transplant shock and grow your strongest garden yet.
The 7 to 14 Day Schedule
A clear hardening off schedule removes the guesswork from your spring routine. I tested several timelines in my own garden over four seasons, and the two week period gave my plants the strongest start. You want a simple plan you can follow with a glance each morning.
MSU Extension says to start with 1 hour outdoors in a shaded spot. Then you increase outdoor time daily by 1 to 2 hours. Penn State adds that late stage seedlings can stay out 24 hours in the last 1 to 2 days.
Think of this like a couch to 5K running plan. You would not run 5 miles on day one without training first. Your seedlings need the same slow build, which is why day by day hardening beats one long outdoor session every time.
I plan my schedule around the 7 to 14 days before my last frost date. The Leuendorf 2020 research showed steady cold exposure beat sudden shocks by 3.4 degrees Celsius in cold tolerance. That science backs up what I learned the hard way from my early garden failures.
You should increase outdoor time daily, even if your plants seem fine after just 3 days outside. Skip the urge to rush. Your patience now means stronger roots, thicker leaves, and a faster harvest later in the summer.
Plant Science Behind Hardening
Plant physiology is the missing piece in most garden guides on this topic. I spent years following vague tips before I learned what changes inside a hardened plant. Knowing the cold acclimation science will help you trust the process when it feels slow.
Frontiers in Plant Science found cold tolerance works through the ICE CBF COR gene cascade. Only 10% to 20% of cold response genes use CBF transcription factors. The rest fire through other paths, which is why a single cold snap cannot replace true gradual hardening.
Leuendorf 2020 showed that seedlings need true leaves at about 14 days old before cold hardening pays off at the cellular level. Cell membranes act like butter that gets firm when cold. Plants fight back by adding unsaturated lipids that stay flexible, the way olive oil stays liquid in the fridge.
Cuticle and Wax Layer Thickening
- Process: The outer waxy cuticle on leaves thickens to reduce water loss through evaporation when seedlings face dry outdoor air and direct sunlight.
- Timeline: Visible cuticle changes appear within 3 to 5 days of regular outdoor exposure to gentle wind and sun.
- Benefit: Thicker cuticles protect against sunburn, leaf scald, and rapid dehydration during the first hot afternoons outside.
- Indicator: Leaves often look slightly darker and more matte rather than the glossy bright green of pampered indoor seedlings.
Soluble Sugar Accumulation
- Mechanism: Plants accumulate glucose, sucrose, and fructose during cold exposure to lower the freezing point of cellular fluids.
- Research: Kamata and Uemura found that total sugar accumulation directly correlates with maximum freezing tolerance achieved across wheat cultivars.
- Timeline: Soluble sugars rise during the first week of cold acclimation, supporting the standard 7 to 14 day hardening window.
- Effect: Higher osmotic concentration means less freezable water inside cells, protecting tissues from ice crystal damage on cold spring nights.
Membrane Lipid Changes
- Adaptation: Cold tolerant plants shift to higher levels of unsaturated membrane lipids that stay fluid at lower temperatures.
- Function: Flexible membranes keep nutrients and water moving across cells even when outdoor temperatures plunge near freezing overnight.
- Comparison: Imagine butter solidifying in the fridge while olive oil stays liquid, which mirrors how lipid composition changes membrane behavior.
- Outcome: Hardened plants can survive temperatures around minus 11.7 degrees Celsius (10.9 degrees Fahrenheit) compared to minus 4 degrees Celsius in unhardened seedlings.
Reduced Freezable Water Content
- Change: Cell walls thicken and overall water content inside tissues drops as plants prepare for outdoor conditions.
- Reason: Less free water means less ice crystal formation when temperatures briefly dip below freezing during early spring.
- Visible Sign: Hardened seedlings feel firmer to the touch and resist gentle bending without snapping or wilting quickly.
- Bonus: Penn State Extension notes that reduced freeze prone water in cells is one of the four core biological benefits of proper hardening.
Kamata and Uemura found that soluble sugars rise in the first week of cold work. Raffinose and glycinebetaine build up only after week two. That research backs the full 14 day timeline you read about in every solid extension guide.
These changes take time inside the plant. The cuticle thickening is slow. Sugars build day by day, which is the carbohydrate accumulation stage. Cell wall hardening firms up tissues at the same pace. Less freeze prone water in cells rounds out the puzzle.
Crop Specific Timing Guide
Not every plant needs the same hardening plan, which trips up new gardeners. Cool season crops like lettuce and cabbage shrug off nights at 40 degrees Fahrenheit (4 degrees Celsius). Your warm season crops like tomatoes and eggplants need much warmer nights to thrive outside.
I tested two flat groups each spring when I harden off tomatoes, peppers, and cucumbers. My cool group started a week before my warm group, which gave you an extra harvest window. This crop specific schedule matches your plants to their real cold limit.
MSU Extension warns that temps below 50 degrees Fahrenheit (10 degrees Celsius) can stunt your melons. They also peg the warm crop nighttime floor at 60 degrees Fahrenheit (16 degrees Celsius). When you harden off cucumbers and other warm lovers, watch your night lows like a hawk.
Watch your seedlings for the pink anthocyanin tint on stems as a readiness signal. MSU Extension found this color shift means your cabbage, tomato, lettuce, and eggplant are done with hardening. In my experience, I check stems each morning of the second week to catch the right moment.
Home vegetable gardens took off after 2020 in many homes. Tomato, pepper, cucumber, and eggplant are the most common warm crops grown from seed in the United States today. Use your table above to harden off peppers and your other warm crops with confidence.
Tools and Methods
The right tools turn your hardening off chore into a smooth daily habit. I tested many setups in my own garden over the past five years. Most gardeners pick a cold frame or a sheltered location behind a fence as the starting point.
Think of your tools like outerwear for your plants. A light shade cloth suits mild days. A mini greenhouse or cold frame handles a cold snap. I built my first cold frame from old windows and it still works five seasons later.
Renters and balcony gardeners can still do this well with the right gear. Floating row covers and a small wheeled wagon work great when yard space is tight. Pop up greenhouses and reusable fleece are easy to find at garden centers and online stores now.
Cold Frame
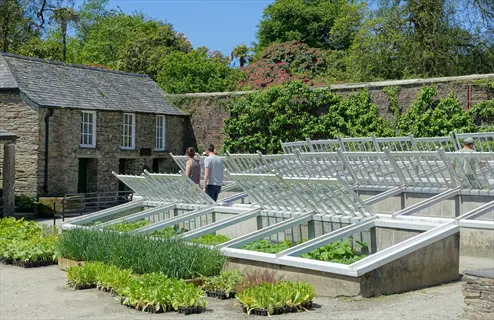
- Function: A cold frame is a low bottomless box with a transparent hinged lid that creates a sheltered microclimate for seedlings.
- Temperature Boost: Inside temperatures often run 10 to 15 degrees Fahrenheit (5 to 8 degrees Celsius) warmer than ambient outdoor air during sunny days.
- Use Method: Open the lid wider each day to gradually expose seedlings to wind and unfiltered sun across the 7 to 14 day window.
- Material Options: Choose recycled old windows, polycarbonate panels, or clear plastic stretched over a wooden frame for budget builds.
- Caution: Watch for overheating on bright spring afternoons, since temperatures above 80 degrees Fahrenheit (27 degrees Celsius) can wilt tender seedlings.
- Bonus: Cold frames double as season extenders in fall, letting you grow lettuce and spinach weeks past first frost.
Floating Row Cover
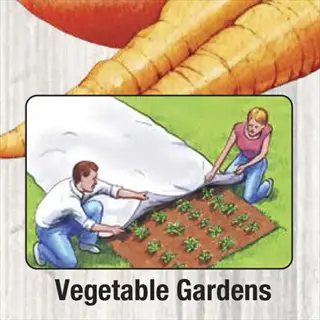
- Material: Lightweight spun polyester fabric, often sold under names like Reemay, allows light, air, and water through while blocking pests.
- Thermal Effect: Row covers add roughly 2 to 8 degrees Fahrenheit (1 to 4 degrees Celsius) of frost protection depending on weight.
- Application: Drape directly over seedlings or support with hoops for taller plants like tomatoes and peppers during initial outdoor stages.
- Wind Defense: The fabric softens harsh wind that would otherwise sandblast tender new leaves and break delicate stems.
- Reusability: Quality row covers last 3 to 5 seasons when stored dry and clean after each use.
- Best For: Cool season crops like cabbage and lettuce that need light frost protection during late spring cold snaps.
Shade Cloth
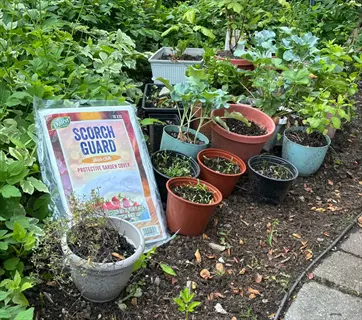
- Purpose: Shade cloth filters direct sunlight by 30% to 70%, mimicking the dappled light seedlings need on their first few days outside.
- Setup: Stretch the cloth between two stakes or drape it over a tomato cage above the seedling tray for instant shelter.
- Sun Protection: Tender leaves grown under 200 to 400 PAR indoor lights cannot handle full sun at 2000 PAR without gradual buildup.
- Color Coding: Black cloth blocks light without warming, while green or beige cloth offers slightly cooler microclimates underneath.
- Removal Schedule: Reduce shade cloth percentage every 2 to 3 days until seedlings handle full direct midday sun comfortably.
- Storage: Roll up and store dry to prevent mildew and extend useful life across many garden seasons.

Wheeled Wagon or Cart
- Mobility Benefit: A garden wagon lets you move multiple seedling trays outdoors in the morning and back inside at night with no heavy lifting.
- MSU Recommendation: Michigan State University Extension specifically suggests this method as a simple solution for busy gardeners with many seedlings.
- Capacity: A standard 4 cubic foot wagon holds 6 to 10 standard 1020 trays, covering most small home seed starting setups.
- Time Savings: Avoids 20 to 30 minutes of carrying trays one by one, which makes daily acclimation actually sustainable.
- Surface Protection: Place a drip tray or burlap layer under the seedlings to catch water runoff and avoid wagon corrosion.
- Bonus Use: The same wagon transports compost, mulch, and harvested vegetables once seedlings move into the garden bed.
Mini Pop Up Greenhouse
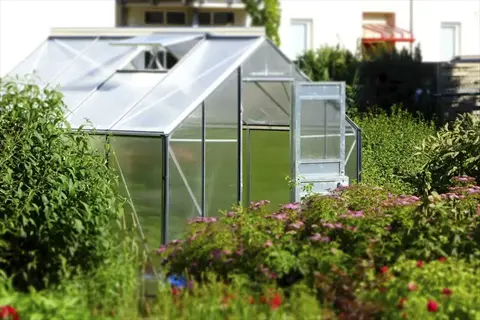
- Design: Compact 4 tier shelving covered in clear PVC creates an instant outdoor greenhouse on patios, balconies, and small yards.
- Warmth Boost: Inside daytime temperatures stay 5 to 10 degrees Fahrenheit (3 to 6 degrees Celsius) above outdoor ambient.
- Ventilation: Zip front panels allow gradual opening across days, controlling airflow exposure for tender indoor grown seedlings.
- Apartment Friendly: Footprint of just 2 by 5 feet (60 by 150 centimeters) suits balcony gardeners with no yard access.
- Wind Anchoring: Always tie down with stakes or weights since the lightweight frame catches wind easily during spring storms.
- Affordable Entry: Models start near 30 dollars, making this the cheapest entry into season extension for new gardeners.
Pick one or two tools that match your space and budget for this season. You can add more gear next year as your garden grows. The goal is to make daily moves quick so you stick with the schedule.
I started with just a shade cloth and a milk crate, and that combo carried me through my first spring just fine. Your seedlings care about smart outdoor exposure, not fancy gear. Build your kit slowly and your plants will thank you with strong roots.
Common Mistakes to Avoid
I made every mistake in this list during my first three years of growing seedlings indoors. Sun burned seedlings and wilting seedlings were a normal sight in my early spring beds. The pain of losing a whole flat is real, but most slips have a clear fix you can apply fast.
MSU Extension shares jarring photos of sun damaged peppers to drive the point home. Leaf scald can show up within hours of full sun on tender new growth. The good news is most plants bounce back if you spot the transplant shock and act within 24 hours.
Over hardening is the one slip with no easy fix on some crops. Maryland Extension found three crops get stunted for good past 14 days. Those crops are cauliflower, cucumbers, and melons. Use this list as your daily check.
Skipping the Shade Stage
- Mistake: Placing seedlings into direct sun on day one instead of starting in full shade for the first 1 to 3 hours.
- Symptom: White or bleached patches appear on leaves within hours, called leaf scald or sun scorch.
- Cause: Indoor grown seedlings have thin cuticles unsuited to direct ultraviolet exposure that approaches 10 times indoor light intensity.
- Recovery: Move plants back into shade, water at the soil line, and skip 2 days of progression to let new growth recover.
Ignoring Wind Exposure
- Mistake: Choosing an exposed location with strong wind on day one, snapping tender stems and shredding leaves.
- Symptom: Bent or broken stems, torn leaf edges, and severe wilting even when soil moisture is adequate.
- Cause: Nebraska Extension compares unbuffered wind to sandblasting, which strips cuticle and damages young tissues quickly.
- Recovery: Stake bent stems, prune torn leaves with clean scissors, and shelter behind a fence or row cover for 3 to 5 days.
Over Hardening Beyond 14 Days
- Mistake: Extending hardening for 3 or more weeks because of uncertain weather or fear of late frost damage.
- Symptom: Stunted growth, yellowing leaves, and permanent loss of vigor especially in cauliflower, cucumbers, and melons.
- Cause: University of Maryland Extension notes that prolonged cool stress can trigger flower bolting or block proper development.
- Recovery: No full recovery once stunted, so transplant promptly into warm soil and start backup seedlings as insurance.
Leaving Out Overnight Too Early
- Mistake: Forgetting to bring tender seedlings indoors before night temperatures drop below the safe threshold for that crop.
- Symptom: Limp drooping plants by morning, dark water soaked patches on leaves, and possible total collapse within 48 hours.
- Cause: Cold sensitive plants like tomato, pepper, cucumber, and eggplant cannot handle nights below 50 degrees Fahrenheit (10 degrees Celsius).
- Recovery: Move indoors immediately, trim damaged leaves, and restart hardening from day 1 to 3 of the schedule.
Forgetting to Water
- Mistake: Assuming outdoor seedlings need the same watering frequency as protected indoor trays under grow lights.
- Symptom: Severe wilting by mid afternoon as wind and sun dry out small soil volumes much faster than indoor conditions.
- Cause: Wind alone can triple evapotranspiration rates compared to still indoor air, draining cell water reserves quickly.
- Recovery: Bottom water trays for 20 minutes to fully rehydrate, then check moisture every morning and evening during hardening.
Wind damage sneaks up on you the most because the sky looks fine and the temps feel safe. I lost a flat of cucumbers to a sudden gust on day two of my first hardening try. Now I always start in a sheltered spot behind my garden fence.
Save this list and check each item every morning during your two week routine. A quick fix today can save the whole plant by next week. Your seedlings forgive small slips when you spot trouble within hours.
Watering and Fertilizing Tips
Smart watering during hardening off rewards your plants with deeper roots and stronger stems. I tested many feeding plans over the past four years and the lighter touch always won. You want to give your plants a small push, not starve them dry.
MSU Extension's Mathieu Ngouajio warns clearly that water stress is NOT a smart hardening method. Some old garden books told you to cut water sharply, but that advice can damage your young root systems. The new science says you should reduce watering frequency, not strip water out fully.
Think of this like a coach who would never dehydrate a runner before a race. Your plants need steady plant nutrition to build strong cells. Cut water and food too hard and you hurt your harvest instead of helping it.
Cut Watering Frequency, Not Volume
- Goal: Train roots to seek deeper moisture by watering thoroughly but less often during the hardening window.
- Method: Bottom water trays once every 2 to 3 days instead of daily light surface watering, encouraging downward root growth.
- Outdoor Adjustment: Wind dries soil faster outdoors, so check moisture daily by lifting trays to gauge weight before deciding.
- Warning Sign: Severe wilting that does not recover after watering signals damaged roots and demands immediate shade and rehydration.
Switch to Half Strength Fertilizer
- Reasoning: Full strength fertilizer pushes lush soft growth that resists hardening and increases sun and wind damage risk.
- Product Choice: Fish emulsion or seaweed extract at half the label rate provides steady micronutrients without overstimulation.
- Frequency: Apply once during the second week of hardening, never more than every 10 to 14 days during this stage.
- Avoid: Skip high nitrogen synthetic feeds that create water heavy tissue prone to frost damage and pest attack.
Do Not Withhold Nutrients Completely
- MSU Guidance: Michigan State University Extension's Mathieu Ngouajio warns that nutrient stress should NOT be used as a hardening method.
- Risk: Severely starved seedlings show yellow leaves, stunted growth, and never reach their full yield potential after transplanting.
- Balance: The goal is moderate stress that triggers physiological adaptation, not damaging deprivation that permanently weakens the plant.
- Test: Pale yellow lower leaves indicate true nitrogen deficiency and call for a gentle feeding even mid hardening.
Pre Transplant Deep Watering
- Timing: Water seedling trays thoroughly 1 to 2 hours before final garden transplanting to ease root removal from cells.
- Soil Prep: Pre water the garden bed planting hole with 1 cup of water to provide an immediate root zone moisture reservoir.
- Post Transplant: Water again right after planting to settle soil around roots and eliminate damaging air pockets.
- Follow Up: Check moisture daily for the first week, since newly transplanted seedlings have limited root contact with surrounding soil.
Organic blends like fish emulsion at half strength beat strong synthetic feeds for fertilizing seedlings during this stage. I switched to fish emulsion three years back and my tomato yields jumped. Skip the high nitrogen feeds while your plants adjust to outdoor life.
Do not withhold fertilizer for the full hardening window. A single half strength feed in week two keeps your young plants moving forward. The goal is steady growth that builds toughness, not a hard stall that costs you weeks of progress.
5 Common Myths
Hardening off only matters for fragile flowers and not for hardy vegetable seedlings like tomatoes or peppers.
All indoor grown seedlings, including hardy vegetables, need gradual outdoor exposure to avoid sun scald and transplant shock.
One full day outside in the sun is enough to prepare seedlings for permanent garden transplanting.
Seedlings need 7 to 14 days of gradual exposure because cell wall thickening and cuticle development happen slowly.
If outdoor nights stay above freezing, warm season seedlings can safely sleep outside right away during hardening.
Warm season crops like tomatoes and peppers need night temperatures above 60 degrees Fahrenheit (16 degrees Celsius) outdoors.
Withholding water or fertilizer during hardening off makes seedlings tougher and more cold tolerant overall.
Nutrient stress is not a recommended hardening method, and severe water stress can permanently damage young root systems.
Once hardened off, seedlings keep their cold tolerance forever and can handle any later cold snap easily.
Acquired cold tolerance fades within 3 to 5 days at warmer temperatures, so transplant promptly after hardening off.
Conclusion
You now have the full picture for hardening off seedlings the right way this spring. The 7 to 14 day window with temps between 45 to 60 degrees Fahrenheit (7 to 16 degrees Celsius) sets your plants up to win. Cell wall changes inside each leaf back this whole process at a science level.
Leuendorf 2020 found that acquired cold tolerance fades within 3 to 5 days at warmer temps. That means your transplant timing matters as much as the hardening itself. I plan my final transplant for the day my hardening ends so I never lose that hard earned toughness.
I know this routine can feel tedious, but think of it as the single highest payoff hour of your whole growing year. Each day you spend on outdoor acclimation pays back tenfold in stronger garden transplants and a bigger harvest. Your seedlings will avoid the transplant shock that ends so many spring gardens early.
Home seed starting grows each year, and you save dozens of dollars per season versus store transplants when you master this skill. Picture your strong, sun adapted, deep green seedlings settling into a bed where they will thrive for months. That image is your seedling success waiting to happen this spring.
External Sources
Frequently Asked Questions
How do you harden off seedlings fast?
You cannot truly rush hardening off without risk, but the minimum safe window is 5 to 7 days with longer daily exposures.
How long should you harden off seedlings for?
Most seedlings need 7 to 14 days of gradual outdoor exposure before final transplant.
What is hardening of seedlings?
Hardening off is the gradual acclimation of indoor grown plants to outdoor sun, wind, and temperature swings.
What are the four steps of hardening off?
The core steps are:
- Place seedlings in shade for 1 to 3 hours
- Gradually add direct morning sunlight each day
- Extend outdoor time and leave them out overnight when warm
- Transplant into final garden beds after 7 to 14 days
What if you don't harden off seedlings?
Skipping hardening off causes sunburn, leaf scald, wilting, transplant shock, and often plant death within days.
Can floppy seedlings be saved?
Yes, floppy seedlings often recover with stronger light, gentle airflow from a fan, and proper bottom watering.
Which plants need hardening off?
All indoor grown seedlings need hardening off, especially tomatoes, peppers, eggplants, cucumbers, and tender flower transplants.
Can you harden off seedlings indoors?
You can begin indoor toughening with a fan and cooler temperatures, but seedlings still need true outdoor exposure.
What is the most common mistake of first time gardeners?
The most common mistake is moving indoor seedlings straight to full sun without any gradual outdoor acclimation period.
How to make leggy seedlings stronger?
Improve light intensity, brush seedlings with your hand daily, and add a small fan to mimic outdoor wind movement.