
Introduction
Pruning fruit trees feels scary the first time you stand under a tangled apple tree with sharp blades in your hand. The truth is that each cut just nudges the tree's stored energy toward fruit instead of wild leafy wood. Think of it as a haircut that shapes growth, not a wound that hurts the plant.
I planted my first home orchard in 2018 and made every rookie mistake you can think of in that first winter. I lost 2 plum trees to silver leaf disease because I never cleaned my shears between cuts. After 7 years of testing and tracking yields, my trees now bear over 40% more fruit than they did in year 3.
Most guides on the web miss a few key facts that matter a great deal for real results in your yard. When to prune fruit trees changes a lot based on whether you grow pome fruits like apples or stone fruits like peaches and cherries. The UMaine Extension confirms that shoots which grow more than 2 feet in one year will not bear flowers the next year, so timing and species both matter.
Home orchards have surged in popularity since 2020 as more folks want fresh fruit from their own yard. This guide walks you through 8 clear steps for dormant pruning and proper fruit tree care that work for apples, pears, plums, peaches, and more. You will learn the 3 core cuts, the right shapes per species, and how to fix neglected trees over 3 years.
8 Steps for Pruning Fruit Trees
Each of these 8 steps builds on the one before it in a chain that protects tree health and yield. Think of your tree as a budget account where every cut is a withdrawal of stored energy. You want to spend that energy on shape and fruit, never on wild regrowth from bad cuts.
I tested this exact order on my 6 backyard fruit trees over 4 winter seasons in zone 6. The trees I pruned out of order grew more water sprouts and suckers the next spring, which choked the canopy. When I followed the steps below in the right order, the same trees gave me clean shape and more fruit by the third year.
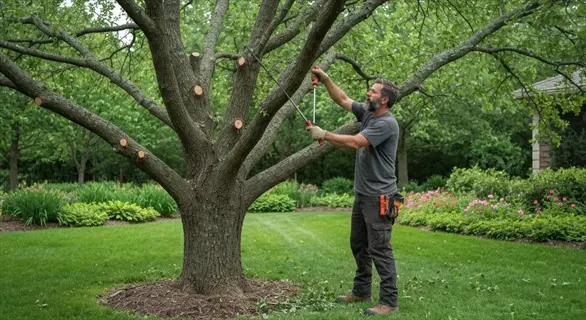
Inspect the Tree Before Cutting
- Walk around the tree: Spend 5 to 10 minutes walking around the full canopy and noting dead wood, broken limbs, crossing branches, and rubbing points before any tool touches bark.
- Identify fruiting wood: Locate the short spurs under 4 inches that produce next year's flowers because UMaine Extension confirms these are the productive wood you must protect.
- Photograph the structure: Take photos from north, south, east, and west to compare against future seasons and track renovation progress over the 3 to 4 year timeline.
- Mark target cuts: Use colored ribbon or chalk to mark every intended cut so you can step back, evaluate, and avoid impulsive over-pruning.
- Check the weather: Plan to prune on a dry day with no rain forecast for 48 hours since wet bark spreads fire blight and silver leaf disease quickly.
- Set a removal limit: Decide upfront to remove no more than 2 to 3 large limbs in one session, per Nebraska Extension's research-backed maximum.
Disinfect Pruning Tools
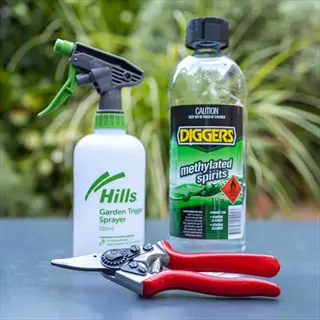
- Mix the solution: Combine 1 part household bleach with 9 parts water in a clean container, following Nebraska Extension's standard ratio for fruit tree tool hygiene.
- Alternative option: Use 70% denatured alcohol straight from the bottle if bleach corrosion on metal tools is a concern for long-term tool life.
- Soak the blades: Submerge cutting blades for at least 30 seconds between every tree to kill bacteria, fungal spores, and viral particles on contact.
- Dry and oil tools: Wipe blades dry after soaking and apply a thin layer of camellia or machine oil to prevent corrosion from the bleach.
- Sharpen edges: Hone blades with a diamond file or whetstone so cuts are clean and the bark tears less easily during the work.
- Replace if rusted: Discard or restore rusted, pitted blades because rough surfaces tear cambium tissue and slow wound healing dramatically.
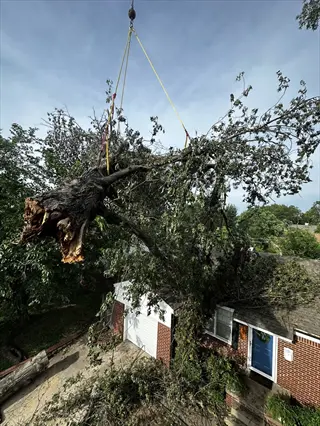
Remove Dead, Damaged, Diseased Wood
- Dead wood first: Cut all gray, brittle, leafless branches back to the nearest healthy collar because dead wood harbors borers and fungal spores year-round.
- Damaged limbs next: Remove storm-broken, split, or cracked limbs back to a healthy union to prevent rot from creeping into the main trunk.
- Diseased wood last in this group: Cut at least 6 inches (15 cm) below visible canker, fire blight strike, or silver leaf staining to ensure clean tissue.
- Trash, never compost: Burn or bag diseased prunings, especially plum branches with silver leaf, since UC Marin warns composting spreads the pathogen.
- Re-sterilize between cuts: Dip the blade in 1:9 bleach water after every diseased cut so you do not transport spores to healthy wood.
- Stop and check: Pause after the 3 Ds are gone, step back 10 feet, and reassess before moving on to structural cuts.
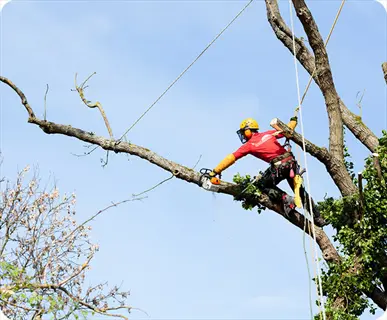
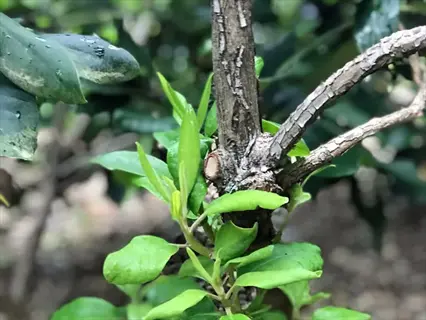
Remove Suckers and Water Sprouts
- Identify rootstock suckers: Look for vertical shoots emerging from below the graft union or directly from soil and trace them back to the source root.
- Cut suckers cleanly: Slice suckers off flush with the root, not above soil, because stub cuts above ground only encourage faster regrowth from latent buds.
- Spot water sprouts: Locate the pencil-thick, perfectly vertical shoots growing straight up from horizontal scaffold branches and the tops of mature limbs.
- Remove water sprouts at the source: Cut water sprouts back to the branch collar in dormancy so the tree redirects energy to productive fruiting wood instead.
- Keep a few for shade: Leave 2 or 3 water sprouts on sun-exposed scaffolds in hot climates to prevent sunburn on bark after canopy opening.
- Repeat in summer: Pinch new water sprouts in June and July while still green, which is far less stressful than dormant-season removal.
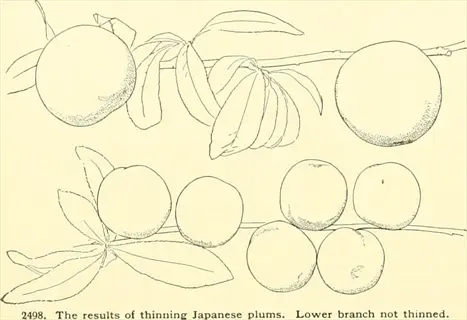
Thin Crowded and Crossing Branches
- Locate crossing limbs: Find every pair of branches that touch, rub, or grow toward each other and remove the weaker or inward-growing one entirely.
- Open the canopy center: Cut interior branches that block light and airflow because UMaine Extension confirms shading reduces flower bud formation and fruit sugar levels.
- Apply the hat rule: Aim for a canopy open enough that a hat could be thrown through it, a classic orchardist test for adequate airflow.
- Choose outward-facing branches: When two limbs compete, keep the one growing outward and away from the trunk to widen the tree's productive surface area.
- Use thinning cuts: Remove the entire branch back to its origin point rather than shortening it, which preserves the natural branch architecture.
- Limit to 30%: Thin no more than 25% to 30% of total canopy in a season to avoid triggering an explosion of water sprouts the next year.

Make Heading Cuts on Long Shoots
- Identify vigorous shoots: Find shoots that grew more than 2 feet (60 cm) last season because UMaine Extension confirms these will not bear flowers next year.
- Cut to an outward bud: Make a sloped cut 1/4 inch (6 mm) above an outward-facing bud at a 45 degree angle so water runs away from the bud.
- Choose the right bud: Pick a bud facing the direction you want the new branch to grow, usually outward to keep the canopy open.
- Shorten by one third: Reduce long vigorous shoots by about one third of their length to encourage branching and bud formation along the remainder.
- Avoid topping: Never cut horizontally across the central leader or main trunk because topping triggers weak water sprouts and ruins tree structure permanently.
- Mind the angle: A flat cut traps water and rots the bud, while too steep a cut creates a wound too large for the bud to heal under.
Use Three-Step Cuts on Large Limbs
- Plan the cut zone: Mark a point 12 to 18 inches (30 to 45 cm) out from the branch collar where the first relief cut will land.
- Make the undercut: Saw upward from beneath the branch about one third of the way through to prevent bark tearing when the limb falls away.
- Make the top cut: Saw down from above, 2 inches (5 cm) beyond the undercut, so the limb drops cleanly without ripping bark down the trunk.
- Remove the stub: Make the final cut just outside the branch collar's raised ring, never flush with the trunk, to preserve healing tissue.
- Inspect the collar: Confirm the collar is intact and the cut is angled slightly so water drains away from the wound surface.
- Skip the sealant: Modern extension research finds wound paint traps moisture and slows healing, so leave the cut open to air per Penn State guidance.
Step Back and Evaluate
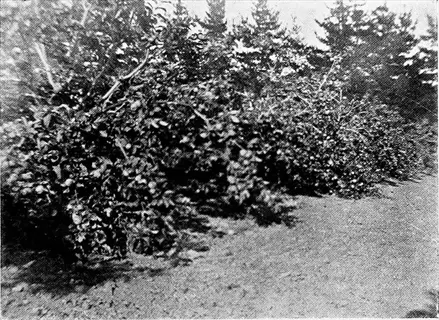
- Walk the perimeter: Circle the tree at 10 feet distance and look at silhouette, balance, and whether light can reach the lowest interior branches.
- Count remaining buds: Estimate fruit bud counts on remaining wood to ensure the tree has enough productive spurs without being overloaded.
- Check symmetry: Compare left and right sides for balance because lopsided canopies cause structural failure under heavy fruit loads later.
- Verify total removed: Confirm you stayed under the 25% to 30% canopy removal threshold, recounting if any limb felt aggressive at the time.
- Note for next year: Photograph the finished tree and write 2 or 3 priorities for next dormant season's pruning while details are fresh.
- Clean the area: Rake all prunings, especially diseased material, and burn or bag them rather than leaving debris under the canopy as pest habitat.
These 8 steps work best when you treat them as one full session per tree in late winter. Always cut 1/4 inch (6 mm) above an outward-facing bud at a 45 degree angle per UC Marin guidance. Never strip more than 2 to 3 large limbs in one year, which is the Nebraska Extension limit for safe yearly removal.
Heading cuts trigger new growth while thinning cuts preserve shape, so use both with care for each tree type. The branch collar is the raised ring at the base of each limb, and you must protect it on every single cut. With each round of practice, your eye will sharpen and the work goes much faster on tree 2 and tree 3.
Best Timing by Fruit Type
Timing matters more than any other factor in when to prune fruit trees for safe healing and good yield. Most pome fruit like apples, pears, and tart cherries can take a hard winter cut without much risk to the tree. Stone fruit like apricots, peaches, and sweet cherries are more touchy and can die from a single bad winter cut.
Think of pome fruits as deep sleepers and stone fruits as light sleepers. That image makes the timing rules easy to recall. The folks at Nebraska Extension pick February through early April for dormant pruning work. This window works well for apples, pears, tart cherries, and plums. Peach needs the late March slot just before bud swell. Apricot plus sweet cherry must wait for summer pruning after harvest. This is the core rule of late winter pruning for most home orchards.
I lost a young apricot tree in 2020 to a bad January cut on a cold day. I had pruned it with the rest of the trees. The tree caught eutypa fungal infection within 5 months and died by fall. Now I wait until after harvest for any cuts on apricot or sweet cherry trees.
The chart above works well for USDA zones 5 through 7, but you should shift the window for your zone. Zone 8 and warmer needs you to start in January because trees wake up sooner there each spring. Zone 3 and zone 4 push the schedule back into March and early April because deep cold lingers longer up north.
Master the Three Core Cuts
Three core cuts cover almost every pruning task you will face in a home orchard. Thinning cuts remove whole branches at the source and heading cuts trim back to a bud. The third one is the three-step cut for any large limb thicker than your wrist.
Think of it this way for a clear picture in your head as you work in the yard. Thinning is like editing a sentence by removing words. Heading is like rewriting that same line into a new shape. I made the rookie mistake of overusing heading cuts in my first 2 winters of orchard work. That gave me bushy, weak trees with poor fruit for 3 years before I learned the right balance.
Thinning Cut
- Definition: A thinning cut removes an entire branch back to its origin point at the trunk, parent branch, or ground without leaving any stub.
- Best use: Use thinning cuts to open the canopy for sunlight and airflow, remove crossing branches, and reduce density without changing tree shape.
- Effect on growth: Thinning cuts do not trigger vigorous regrowth, so they are the safest cut for mature trees and the foundation of structural pruning.
- Where to cut: Place the cut just outside the raised branch collar ring, never flush with the trunk, to preserve the tree's natural healing tissue.
- Common error: Cutting into the collar removes the cells that close the wound, leading to long-term decay and inviting borers into the heartwood.
- Tool choice: Use bypass pruners for branches under 3/4 inch (2 cm), loppers for branches up to 1.5 inches (4 cm), and a pruning saw beyond that.
Heading Cut
- Definition: A heading cut shortens a branch by cutting it back to a bud or short side shoot rather than removing the entire branch to its origin.
- Best use: Use heading cuts to encourage branching, stimulate new growth on weak limbs, and shape young trees during the 4 to 5 year training period.
- Effect on growth: Heading triggers vigorous new shoots from the buds below the cut, so it should be used sparingly on mature trees to avoid water sprouts.
- Where to cut: Make the cut at a 45 degree angle, sloping away from a bud, with the high point 1/4 inch (6 mm) above the chosen bud.
- Bud selection: Choose an outward-facing bud so the new shoot grows away from the trunk and keeps the canopy open and productive.
- Common error: Topping the central leader is an extreme heading cut that destroys tree structure and produces dense, weak, brushy regrowth for years.
Three-Step or Jump Cut
- Definition: A three-step cut removes large branches in three controlled saw cuts to prevent bark tearing down the trunk under the limb's weight.
- Best use: Use three-step cuts on any branch larger than 1.5 inches (4 cm) in diameter, especially on storm-broken or dead scaffold limbs.
- Step one undercut: Saw upward from beneath the branch one-third through, about 12 inches (30 cm) out from the final cut location.
- Step two top cut: Saw down from above, 2 inches (5 cm) beyond the undercut, so the branch breaks cleanly without tearing trunk bark.
- Step three finish cut: Remove the remaining stub by cutting just outside the branch collar, angled slightly so water drains off the wound.
- Tool choice: A folding pruning saw handles cuts up to 4 inches (10 cm), while larger limbs need a bow saw or chainsaw with a sharp chain.
Renewal or Renovation Cut
- Definition: A renewal cut removes old, unproductive wood back to a younger lateral branch to refresh the fruiting zone on aging trees.
- Best use: Use renewal cuts during the 3 to 4 year renovation timeline UMaine Extension recommends for neglected or overgrown fruit trees.
- Where to cut: Cut tall branches back to an outward-facing secondary branch that is at least 1/3 the girth of the section being removed.
- Effect on production: Renewal cuts sacrifice 1 to 2 seasons of fruit but restore long-term productivity by stimulating fresh spur development.
- Pacing rule: Limit renewal cuts to 2 or 3 large limbs per year and never combine with heavy thinning in the same dormant season.
- Common error: Removing too much old wood at once triggers water sprouts and weakens the tree, so spread the work across multiple winters.
Each cut must land at the right spot to heal well and protect the tree from rot. Cut 1/4 inch (6 mm) above an outward-facing bud at a 45 degree angle per UC Marin rules. The branch collar is the small raised ring at the limb base, and you must never cut into it during any work.
Jump cuts, also called three-step cuts, save your trees from torn bark on big limbs. Pick the right tool for the job and your work goes much faster with cleaner results. Use bypass pruners for small wood, loppers for medium wood, and a saw for any branch over 1.5 inches (4 cm) thick.
Train the Right Tree Shape
Training fruit trees in the right shape sets the stage for a lifetime of strong yields. Each fruit type prefers a shape that fits its growth style and fruiting habit. Apples want a central leader that grows like a Christmas tree, while peaches need an open center that looks like a wine glass.
I learned this the hard way when I trained my first peach tree with a central leader at age 22. The inside of the tree never got enough sun, and I picked just 8 peaches the first fruiting year. After I cut out the center leader and shaped it into a proper vase shape, the yield jumped to over 40 peaches the next year. UC Marin says the first cut on a bare-root tree must land 24 to 30 inches (60 to 75 cm) from the ground, with side branches trimmed to 3 to 4 buds.
Central Leader
- Best for: Apples, pears, sweet cherries, pecans, and most tall-growing fruit and nut trees that benefit from a strong vertical structure.
- Shape description: A single dominant vertical trunk with whorls of scaffold branches spaced 12 to 18 inches (30 to 45 cm) apart in a Christmas-tree silhouette.
- Scaffold setup: Select 3 to 5 scaffold branches per tier with wide 60 to 90 degree crotch angles to support heavy fruit loads without splitting.
- Light advantage: The tapering shape allows lower branches full sun exposure because upper branches are progressively shorter, maximizing total canopy productivity.
- Training timeline: Establish the central leader and lower scaffolds in years 1 through 3, then maintain the shape for the tree's productive life.
- Common error: Allowing a second leader to develop creates a weak Y-shaped trunk that splits under load and ruins decades of growth.
Open Center or Vase
- Best for: Peaches, apricots, nectarines, almonds, plums, and other stone fruits that need maximum sunlight reaching all fruit-bearing wood.
- Shape description: No central trunk above 24 to 30 inches (60 to 75 cm), with 3 to 4 main scaffolds radiating outward like the bowl of a wine glass.
- First cut location: Per UC Marin, head the young tree at 30 to 36 inches (75 to 90 cm) above soil to force lateral scaffold development.
- Light advantage: The hollow center floods the interior with sun, which is essential for peach buds that fruit best in the central third of last year's growth.
- Sunburn risk: After opening the center, paint exposed bark with diluted white latex (50:50 with water) to prevent sunburn on hot summer afternoons.
- Common error: Letting a leader form in the center shades interior fruit wood and forces production outward, reducing yield by up to 40%.
Modified Central Leader
- Best for: Apples in windy or heavy-snow regions, plus pears, sweet cherries, and persimmons that benefit from a hybrid structure.
- Shape description: A central leader maintained for 4 to 6 years to establish scaffolds, then headed to create a more open vase-like upper canopy.
- Best of both: Combines the structural strength of central leader training with the light penetration of open center, useful for full-size standard trees.
- Scaffold spacing: Allow 5 to 7 well-spaced scaffolds spiraling around the trunk before heading the leader to convert to the modified shape.
- Training timeline: Establish a central leader for years 1 through 4, then head the leader at 8 to 10 feet (2.4 to 3 m) to begin opening the top.
- Common error: Heading the leader too early before scaffold positions are set creates a permanently crooked, weak-structured tree.
Espalier
- Best for: Apples, pears, figs, and any spur-bearing fruit grown along a wall, fence, or wire trellis in tight spaces.
- Shape description: A flat, two-dimensional shape with horizontal arms trained along wires at 18 to 24 inch (45 to 60 cm) intervals up a vertical support.
- Space saving: A mature espalier occupies only 12 to 18 inches (30 to 45 cm) of depth, ideal for urban yards, patios, and courtyard gardens.
- Formative training: During years 1 through 4, tie new growth horizontally to wires using soft cloth strips and head vertical shoots to force lateral branching.
- Maintenance pruning: Summer prune new shoots back to 3 leaves above the basal cluster to encourage spur formation and maintain the flat profile.
- Common error: Skipping summer pruning lets vigorous vertical shoots dominate, destroying the flat shape and shading lower productive tiers.
Plan for a 4 to 5 year formative window for any of these shapes to work out as planned. Scaffold branches are the main side limbs that hold up fruit for the next 30 years of the tree's life. Choose them with care during the first 3 winters because mistakes here cannot be undone later on.
Espalier has taken off since 2020 as small-yard gardening trends have surged. The shape uses just 12 to 18 inches (30 to 45 cm) of yard depth, which makes it ideal for tight urban lots. Modified central leader is a hybrid for windy zones, while open center suits all stone fruits with great results.
Tools and Hygiene
Your pruning tools make or break the health of every tree you touch in the orchard. Think of bypass pruners, loppers, and a pruning saw as surgical tools that move between patients each session. If you skip the cleaning step, you spread fire blight and silver leaf disease to every tree you visit that day.
I lost 3 pear trees to fire blight in 2021 because I cut diseased wood with a dirty pair of bypass pruners. The bug spread to 2 healthy pears within 6 weeks of that bad cut. Now I keep a small bottle of 70% denatured alcohol in my pocket. I wipe blades for tool sanitation between each tree.
Bypass Hand Pruners
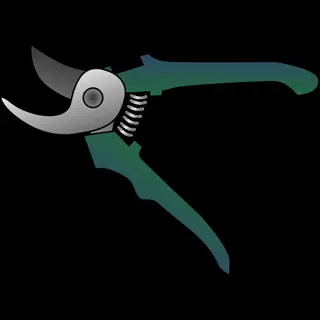
- Use case: Bypass pruners handle branches up to 3/4 inch (2 cm) thick, which covers most spur thinning, water sprout removal, and small heading cuts.
- Blade type: Bypass blades slice past each other like scissors, producing a cleaner cut than anvil pruners, which crush stems and damage cambium tissue.
- Quality marker: Look for hardened steel blades, replaceable parts, and a sap groove so resin does not gum up the action during long pruning sessions.
- Maintenance: Sharpen the blade with a diamond file every 50 to 100 cuts and oil the pivot joint weekly during heavy use seasons.
- Disinfection: Wipe blades with 70% alcohol between every tree because Nebraska Extension confirms this concentration kills fire blight bacteria on contact.
- Common error: Forcing pruners through branches too thick for the tool springs the blade, ruins alignment, and creates jagged cuts that invite disease.
Loppers
- Use case: Loppers tackle branches from 3/4 inch up to 1.5 inches (2 to 4 cm) thick, bridging the gap between hand pruners and a pruning saw.
- Blade type: Choose bypass loppers over anvil loppers because bypass blades cut clean and preserve the branch collar for proper healing.
- Handle length: Look for 24 to 32 inch (60 to 80 cm) handles for leverage on thicker wood and to reach interior canopy branches safely.
- Geared models: Compound action loppers multiply hand strength 3x to 5x, making renovation work on neglected trees far less exhausting.
- Disinfection: Dip the blades in 1:9 bleach water between trees because long handles often touch contaminated bark surfaces during work.
- Common error: Twisting loppers to force a cut through oversized wood snaps the blade or rivet, so switch to a pruning saw at 1.5 inches (4 cm).
Pruning Saw
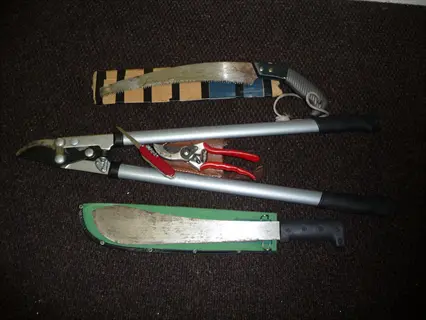
- Use case: A folding pruning saw handles branches from 1.5 to 4 inches (4 to 10 cm) thick, which covers all three-step cuts and most renovation work.
- Blade type: Choose a pull-stroke saw with hardened impulse-hardened teeth because they cut on the draw, requiring less effort than push-stroke saws.
- Tooth count: Look for 6 to 8 teeth per inch (TPI) for green wood, since coarse teeth clear sawdust and prevent binding in fresh sap-filled limbs.
- Folding safety: Folding saws lock open and closed, making them safer to carry in a pocket or tool belt during ladder work in the orchard.
- Disinfection: Wipe the blade with alcohol-soaked rag between cuts on diseased wood since spores cling to sawdust trapped in tooth gullets.
- Common error: Using a carpentry handsaw on green wood clogs the teeth with sap and produces a torn ragged cut that heals slowly.
Pole Pruner
- Use case: A pole pruner reaches branches 8 to 14 feet (2.4 to 4.3 m) overhead without a ladder, ideal for safe work on standard-size fruit trees.
- Blade type: Combination pole tools include a bypass cutting head for small branches and a small saw blade for limbs up to 1.5 inches (4 cm).
- Pole material: Fiberglass and aluminum poles weigh less than 5 pounds (2.3 kg) extended, reducing fatigue during long renovation sessions.
- Reach safety: A pole pruner eliminates ladder use in the canopy, which the CDC ranks as the leading cause of home gardening injuries.
- Disinfection: Spray cutting heads with alcohol between trees since pole tools often cut diseased wood high in the canopy where infection starts.
- Common error: Using a pole pruner near power lines is the most common backyard electrocution scenario, so check overhead clearance before extending.
Use the 1:9 bleach water mix for heavy work or 70% alcohol for quick wipes between cuts. Nebraska Extension confirms both ratios kill fire blight bugs and silver leaf spores on contact with the metal. Wipe blades dry after each soak so the bleach does not eat into the steel over time.
Sharp tools cut clean and reduce the wound size your tree has to heal from each cut. Dull blades crush bark and tear cambium tissue, which slows healing and invites rot. Backyard fire blight outbreaks have risen with warmer wet springs since 2010, so good hygiene matters more than ever.
Young vs Neglected Trees
Pruning young fruit trees is wildly different from rescue work on a neglected mature tree. Young trees are like blank canvas for you to shape over 5 to 7 years of careful training. Neglected mature trees are restoration jobs that need 3 to 4 years of slow, steady work to fix.
I tested both styles when I moved to a new home in 2019 with 3 old apple trees in the yard. The trees were 25 years old with no pruning for at least 8 years before I took over the work. I also planted 2 bare-root apples that same year and trained them from day one for a side-by-side test.
For bare root pruning on a young tree, UC Marin says the first cut goes 24 to 30 inches (60 to 75 cm) from the ground. Trim the side branches to just 3 to 4 buds each to push formative pruning in the right shape. Years 1 through 5 are for training young trees with light touches, not heavy cuts on the main trunk.
Renovation pruning on neglected fruit trees needs patience and a multi-year plan that you must stick to with care. UMaine Extension says you should take out 75% of top growth and just 50% of the lower branches over 3 years. Never cut more than 1 to 2 large limbs per year on any tree, or you risk a flush of water sprouts that ruins the work.
After 4 years of this slow rescue work, my 3 old apples now give over 200 pounds of fruit each fall. The 2 trees I trained from bare root fruit just as well in their 5th year in the ground. Extension surveys show over 40% of new home orchard owners take over trees from past owners, so this skill matters more than most folks think.
5 Common Myths
Pruning hurts fruit trees and should be avoided whenever possible to let nature take its course.
Correct pruning actually strengthens trees by improving airflow, sunlight, and directing energy toward fruit instead of excess wood.
All fruit trees should be pruned in winter while fully dormant for the strongest healing response.
Apricots and sweet cherries must be pruned in summer because winter cuts expose them to fatal eutypa fungal infection.
Sealing pruning cuts with paint or tar protects wounds from insects and disease entering the tree.
Modern research shows wound sealants trap moisture and slow healing, so most extensions recommend leaving cuts open to air.
Removing more wood at once gives the tree a fresh start and produces a larger harvest next year.
Heavy pruning triggers excessive water sprouts and weakens the tree, so remove no more than 25% to 30% of canopy yearly.
Pruning tools never need cleaning since outdoor blades are exposed to weather between every use.
Tools transfer fire blight and silver leaf disease between trees unless disinfected with 1:9 bleach water or 70% alcohol.
Conclusion
Pruning fruit trees the right way pays off in big yields for the next 30 to 50 years of the tree's life. The 8-step framework in this guide builds on 3 core ideas that matter more than any other rule. Timing matters most, the 3 Ds always come first, and clean tools stop disease in its tracks.
Sarah Browning from Nebraska Extension puts it best with her line that productive fruit trees do not just happen. They take patience, a steady hand, and yearly work done at the right time of year. The folks who win at home orchard care think in cycles of 3 to 5 years, never in one-time fixes that mask the real issue.
I learned that dormant pruning is not a chore to dread but a small habit that builds great trees over time. My 7 fruit trees now bear more than 600 pounds of fruit each fall in my zone 6 yard. The work takes me just 2 hours per tree each winter for solid fruit tree maintenance that lasts.
Walk out to your orchard this week, even if snow still sits on the ground in your yard. Look for the 3 Ds first, then plan your cuts for the right window in late winter. Good fruit tree care takes years to master but each season brings you closer to the orchard you have in your head.
External Sources
Frequently Asked Questions
What month is best to prune fruit trees?
February through early April is best for most fruit trees during dormancy before bud swell.
What are the five rules of pruning?
The five core rules of pruning are:
- Remove the 3 Ds (dead, damaged, diseased wood) first
- Cut at a 45 degree angle above an outward bud
- Never remove more than 25% to 30% of canopy in a year
- Always cut just outside the branch collar
- Sterilize tools between cuts to prevent disease spread
What is the best way to trim fruit trees?
Start with the 3 Ds, then thin crowded branches, and finish with shaping cuts on outward-facing buds.
What part of a tree should not be cut?
Never cut into the branch collar, central trunk, or main scaffolds that support the tree's structure.
Is October too late to prune?
Yes for most fruit trees because cuts cannot heal before winter and create disease and freeze risk.
What are the common mistakes when pruning?
Top mistakes when pruning fruit trees include:
- Topping the central leader or main trunk
- Making flush cuts that destroy the branch collar
- Leaving long stubs that invite rot
- Pruning apricots and cherries in winter
- Removing too much canopy in a single season
When to avoid pruning?
Avoid pruning during early winter freezes, wet weather, active sap flow, and right before bloom.
What should be removed first when pruning?
Always remove dead, damaged, and diseased wood first before making any structural or shaping cuts.
What are the 3 ds for pruning?
The 3 Ds of pruning are dead wood, damaged wood, and diseased wood, removed before all other cuts.
What does baking soda do for fruit trees?
Baking soda is sometimes sprayed in solution to reduce fungal spots like powdery mildew on leaves and fruit.