
Introduction
You want strong garden plants but every tray you have tried so far seems to flop, mold, or stretch into weak stems. My guide on Starting Seeds Indoors: 10 Steps for Success will fix all of that with clear steps backed by real university research.
I have run indoor seed starting trays in my kitchen for over a decade. The first three years gave me more flops than wins. So I leaned on extension science to fix the same spring mistakes I kept making.
Most seeds sprout in 5 to 10 days when the soil sits at 65 to 75 degrees Fahrenheit (18 to 24 degrees Celsius). The University of Maryland Extension calls that the sweet spot. Good germination kicks in for most home crops.
Here is the trick most blogs skip though: your soil runs about 5 degrees Fahrenheit (3 degrees Celsius) cooler than the room air around it. That gap can stall seedlings for weeks, so always measure the soil itself with a probe thermometer.
Healthy moisture should feel just like a wrung-out sponge, damp but never dripping water when you squeeze. Pair that benchmark with a steady soil temperature and count back from your last frost date so you sow at the right week for your area.
Food prices keep climbing and supply chains feel shaky. Home seed starting has surged for that reason. Below are the ten steps that turn a packet of seeds into healthy transplants ready for your garden bed.
10 Steps for Starting Seeds Indoors
Here is the full how to start seeds indoors plan I run every spring in my own home setup. Iowa State Extension says most seeds need to be sown about 6 weeks before the transplant date for the strongest plants.
Each step below stacks on the last, so do not skip ahead. When I first started, I jumped right to sowing without sterile mix and lost the whole tray to mold in a week. Sow seeds at the right depth, then warm the trays, then water from below, then dial in light and feeding.
Gather Seeds and Sterilize Supplies
- Pick fresh seeds: Use seeds saved within the last 1 to 3 years to ensure strong viability and a high germination rate from the very start.
- Sterilize containers: Soak cell trays, pots, and tools in a 10% bleach solution for 30 minutes, then rinse well to kill fungal pathogens.
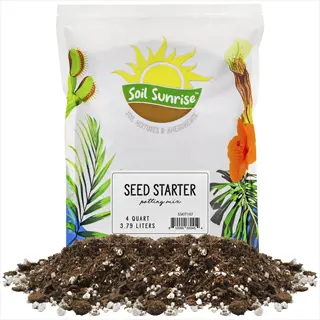
- Prepare seed starting mix: Buy a sterile soilless mix rather than using garden soil, which compacts and carries diseases that cause damping off.
- Wear a dust mask: Dry seed starting mix releases fine particulates that can irritate lungs, so cover your face when scooping and moistening it.
- Stage your workspace: Keep a labeled bin for seeds, a tray of moist mix, and clean tools within reach for an efficient sowing session.
- Check the seed packet: Note the recommended planting depth, indoor sowing window, and germination temperature printed on the back of the packet.
Moisten the Seed Starting Mix Evenly
- Hydrate first: Pour warm water into your mix in a separate bucket and stir until the texture feels like a wrung-out sponge before filling trays.
- Avoid soggy mix: If water drips when you squeeze a handful, the mix is too wet and will starve seeds of oxygen needed for germination.
- Fill cells loose: Scoop the damp mix into cells and tap the tray to settle it without crushing the air pockets.
- Leave headroom: Stop filling about a quarter inch (6 millimeters) below the rim to leave space for seeds and a thin cover layer of mix.
- Smooth the surface: Run your finger or a flat tool across the top so each cell holds an even, level layer that supports uniform germination.
- Pre-warm for warm crops: For tomatoes or peppers, set the moist tray on a heat mat for an hour before sowing to encourage faster sprouting.
Sow Seeds at the Correct Depth
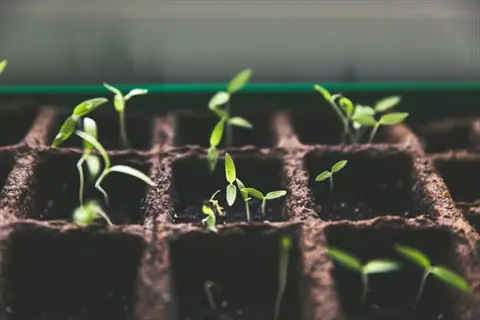
- Follow the 2x rule: Plant most seeds at a depth equal to 2 to 3 times the seed's diameter for reliable germination and even emergence.
- Surface-sow light lovers: Press seeds of basil, snapdragons, petunias, and lettuce onto the soil surface since they need light to germinate.
- Drop 2 to 3 per cell: Sow extra seeds per cell as germination insurance, then thin to the strongest seedling once true leaves appear.
- Space larger seeds: For trays without divided cells, space small to medium seeds 1 to 2 inches (2.5 to 5 centimeters) apart in rows.
- Cover light: Sift a thin layer of mix or vermiculite over the seeds where needed, then mist to settle the surface in place.
- Label at once: Use a permanent marker on a plastic tag with the variety and sow date so you never lose track of what is where.
Provide Warmth for Germination
- Target the right range: Most seeds germinate best at a soil temperature of 65 to 75 degrees Fahrenheit (18 to 24 degrees Celsius).
- Warm-season boost: Tomatoes, peppers, and eggplant prefer 80 degrees Fahrenheit (27 degrees Celsius), while cucumbers, squash, and melons want 85 degrees Fahrenheit (29 degrees Celsius).
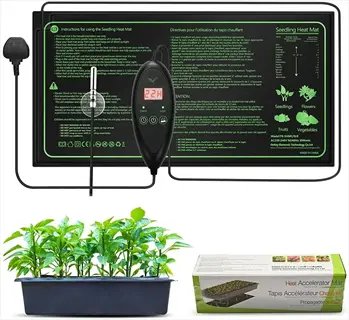
- Use a heat mat: A seedling heat mat paired with a thermostat keeps the root zone at the target temperature without overheating the trays.
- Measure soil, not air: Soil temperature can run 5 degrees Fahrenheit (3 degrees Celsius) cooler than room air, so check with a soil thermometer.
- Dome for humidity: Cover trays with a clear humidity dome until the first sprouts appear to lock in moisture and warmth.
- Remove dome fast: Once 50% of seeds emerge, lift the dome to prevent mold and fungal growth on tender new seedlings.
Water From the Bottom Up
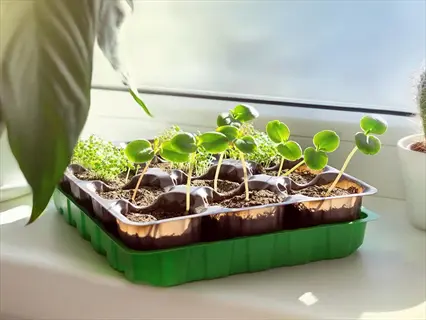
- Use bottom trays: Set cell trays inside a solid 10.5-inch by 21-inch (27 by 53 centimeters) tray and pour water in the bottom, not on top of seeds.
- Wick up moisture: A soilless mix pulls water through drainage holes until the surface feels evenly damp without disturbing the seeds.
- Empty excess water: After 15 to 20 minutes, drain any remaining water from the bottom tray to prevent soggy roots and fungal issues.
- Avoid overhead spray: Spraying or pouring water on top can dislodge seeds, splash pathogens, and increase the risk of damping off.
- Check daily: Lift each tray to feel its weight; a light tray needs water, while a heavy tray is still adequately moist for the day.
- Use room-temperature water: Cold water can shock warm-loving seeds and slow germination, so let tap water sit before using it.
Give Seedlings Plenty of Light
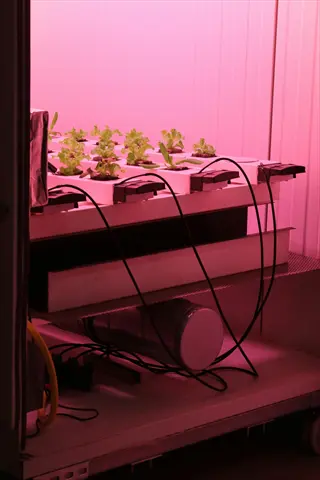
- Hang lights close: Position grow lights just 2 to 4 inches (5 to 10 centimeters) above seedling tops, with 2 inches being the ideal height.
- Run 12 to 16 hours: Use a timer to deliver 12 to 16 hours of light daily, but always leave a dark rest period at night.
- Avoid windowsills alone: Modern double-pane windows let through only about 25% of useful UV light, far below what seedlings need.
- Choose LED or fluorescent: A 4-foot (122 centimeters) shop light with two tubes supports about 2 standard trays of seedlings.
- Raise lights as plants grow: Adjust the height every few days so the gap stays consistent and stems remain stocky and strong.
- Watch for leggy stems: Pale, stretched seedlings signal weak light; lower the fixture or upgrade the bulb to fix the problem fast.
Thin Seedlings to the Strongest
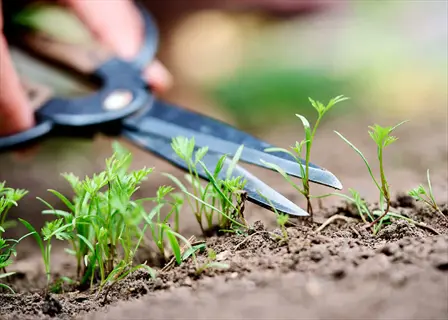
- Wait for true leaves: Once the second set of true leaves appears, choose the healthiest seedling per cell and thin the rest gently.
- Snip, do not pull: Use scissors at soil level to avoid disturbing the chosen seedling's roots, which are easily damaged at this stage.
- Look for stocky stems: Keep seedlings with short, thick stems and rich green color, which signal strong light and proper nutrition.
- Discard weak picks: Remove any seedling with pale leaves, twisted stems, or signs of mold to protect the rest of the tray.
- Improve air flow: Thinning opens space between plants, which reduces humidity at the soil line and lowers the risk of fungal disease.
- Save the seedlings: Some thinned greens like lettuce and basil can be added to salads or sandwiches as edible microgreens.
Fertilize at Quarter Strength
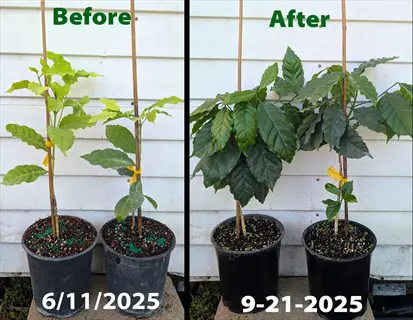
- Start after true leaves: Wait until each seedling has at least one set of true leaves before applying any fertilizer to avoid root burn.
- Dilute to one-quarter: Mix a balanced water-soluble fertilizer at one-quarter the label strength to gently feed without overwhelming roots.
- Feed once weekly: Apply the diluted fertilizer through bottom watering once per week to maintain steady, healthy growth.
- Use a fish and seaweed blend: Fish emulsion and seaweed extract provide gentle organic nutrients well-suited to tender young seedlings.
- Watch leaf color: Yellowing lower leaves often signal a need for nitrogen; deep green leaves mean the current feeding schedule is working.
- Stop fertilizing pre-hardening: Reduce feeding in the week before hardening off so seedlings toughen up rather than push soft new growth.
Harden Off Over Two Weeks
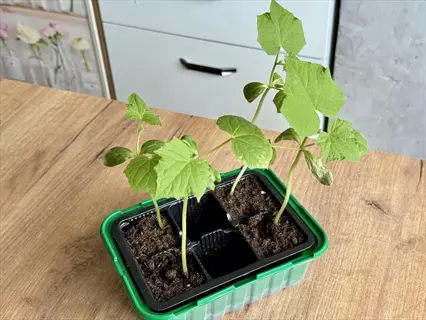
- Begin with shade: On day 1, set seedlings outdoors in a sheltered, shady spot for just 30 minutes, protected from wind and direct sun.
- Add time gradually: Each day, add 30 to 60 minutes outdoors and slowly increase exposure to morning sun over the first week.
- Introduce sun and wind: During week 2, expose seedlings to full sun and gentle breezes to toughen stems and thicken cuticles.
- Skip harsh days: Bring trays back inside during cold snaps, heavy rain, or strong wind to prevent set-back or breakage.
- Water lightly outdoors: Soil dries faster outside, so check moisture more often and water in the morning to avoid chilly damp roots.
- Plant on a cloudy day: Transplant on an overcast afternoon at the end of week 2 to reduce sun shock during the move outside.
Transplant Into the Garden
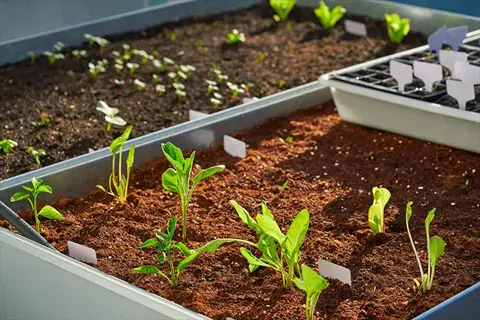
- Wait for last frost: Move warm-season crops outside only after the last frost date has fully passed in your local area.
- Dig a generous hole: Make each planting hole twice as wide as the root ball so roots can spread easily into loose, friendly soil.
- Plant tomatoes deep: Bury tomato stems up to the lowest set of leaves to encourage new roots along the buried portion of the stem.
- Water in deeply: Soak each transplant immediately after planting to settle soil around roots and reduce transplant shock.
- Mulch the soil surface: Add 2 to 3 inches (5 to 8 centimeters) of mulch to retain moisture, suppress weeds, and steady soil temperature.
- Protect from pests: Use row covers or cloches for the first week to shield tender transplants from bugs, birds, and cold nights.
Run through these ten steps in order and you will skip the damping off and leggy stems that wipe out most first-time trays. Bottom watering and the right gap between grow lights and seedling tops fix the two big issues most home growers face.
Once your plants push out true leaves and start to fill the cells, plan for the harden off window two weeks before your last frost. Stick to the bottom watering routine the whole time and your seed starting mix will stay damp without drowning the roots.
Best Time to Start Seeds Indoors
Knowing when to start seeds indoors is half the battle for any home grower like you. I think of it just like booking a flight: count back from the date you land (your last frost date) to know when to take off (sow your trays).
The University of Maryland gives clear data on this. Tomatoes go in 6 to 7 weeks before last frost. Peppers and eggplant need a longer 8-week head start. Cucumbers, squash, and melons want just 4 weeks or less before your frost-free date.
Check your zone's average last frost on a weather site. Frost dates have shifted earlier in many US zones. Update your seed starting calendar every few years to stay on track.
Use this table as your weeks before last frost anchor for the most common home crops. Plug your zone's last frost date into a simple count back and you will land on the right sow week for each crop you plan to grow.
Sow too early and your plants will get root-bound and leggy in cells, then crash when they hit the cold outdoor soil. Sow too late and you miss the warm window your fruiting crops need. The planting calendar above keeps you safely in the sweet spot.
Supplies and Equipment Checklist
Your seed starting supplies are like a kitchen pantry. You can start with the basics and add tools as you cook more often. The list below holds my full home setup for trays of seedling trays every spring.
A standard 1020 tray runs 10.5 by 21 inches (27 by 53 centimeters) per most home brands. A 4-foot (122 cm) shop light with two tubes covers about 2 trays. Plan your shelf space around those numbers.
Seed Starting Mix
- Choose sterile mix: Pick a soilless seed starting mix that contains peat moss or coconut coir, vermiculite, and perlite for excellent drainage.
- Avoid garden soil: Never use outdoor garden soil indoors, since it compacts, drains poorly, and carries fungi that cause damping off.
- Buy enough volume: A single 8-quart (9-liter) bag fills roughly 4 standard 1020 trays, so plan ahead for your sowing batch size.
- Pre-moisten before use: Always wet the mix in a bucket before filling cells to ensure even hydration throughout each planting cell.
Trays and Containers
- Standard 1020 trays: A 10.5 by 21 inch (27 by 53 centimeters) tray holds 12 to 18 large transplants or 50 to 120 small cells.
- Cell packs and inserts: Use 4-cell, 6-cell, or larger inserts that fit inside the 1020 tray to organize different varieties cleanly.
- Upcycled containers: Yogurt cups, egg cartons, and toilet paper rolls all work as long as they have drainage holes poked in the bottom.
- Solid bottom trays: Pair cells with a solid no-hole bottom tray so you can practice bottom watering without leaking onto shelves.
Grow Lights
- LED shop lights: Modern full-spectrum LED shop lights run cool, use less power, and last for years compared to older fluorescent fixtures.
- Fluorescent T5 or T8: Fluorescent tubes still work well and are an affordable starter option for new gardeners on a strict budget.
- Adjustable chains: Hang lights on chains so you can raise them as seedlings grow to maintain a consistent 2 to 4 inch (5 to 10 centimeters) gap.
- Timer outlet: A simple plug-in timer automates the 12 to 16 hour daily light cycle so you never forget to flip the switch.
Heat Mat and Thermostat
- Seedling heat mat: A waterproof seedling heat mat warms the root zone of warm-season crops like tomatoes, peppers, and cucumbers.
- Pair with thermostat: Plug the heat mat into a thermostat with a soil probe to hold a steady target temperature without overheating roots.
- Use only for germination: Remove trays from the heat mat once most seeds have sprouted so seedlings adjust to normal room temperature.
- Place on flat surface: Set the mat on a sturdy, level shelf so heat distributes evenly across every cell in your tray.
Labels and Small Tools
- Plastic or wood labels: Use waterproof plant markers and a permanent garden pen so labels stay legible through weeks of watering.
- Spray bottle or mister: A fine mister helps gently moisten the soil surface around delicate seeds without dislodging them from the soil.
- Watering can with rose: A small can with a fine rose nozzle delivers a gentle shower for older seedlings before they go outside.
- Small fan for airflow: A clip-on fan run on low strengthens stems, lowers humidity, and reduces the chance of damping off fungus.
You do not need every item at once when you first start out at home. A bag of seed starting mix, a few cell packs, basic grow lights, and plant labels will run you under fifty dollars at the garden store. Add a heat mat and humidity dome in year two as you grow more crops.
Yogurt cups, egg cartons, and toilet paper rolls work great for free trays. Poke drain holes in the bottom of any cup you use. DIY home setups have blown up on social media, and the home gardening market keeps growing year after year.
Germination Temperature and Light Setup
Seeds wake up just like people you know. Warm-season crops are slow risers and need a heated blanket to get going. Cool-season crops thrive in a cool guest room. The right germination temperature sets the whole tray up for clean, even sprouting.
I missed this for years and lost trays to slow, patchy sprouts each spring. Soil temperature matters far more than the air around your trays. Most home crops want 65-75 degrees Fahrenheit (18 to 24 degrees Celsius) at the soil line. Pair that warmth with grow lights at the right height and hours of light each day to grow stocky, strong plants.
Optimal Soil Temperature Ranges
- Most vegetables: Aim for 65 to 75 degrees Fahrenheit (18 to 24 degrees Celsius) at the soil surface for reliable germination of common crops.
- Warm-season crops: Tomatoes, peppers, and eggplant prefer 80 degrees Fahrenheit (27 degrees Celsius) according to University of Maryland Extension.
- Hot-season crops: Cucumbers, squash, and melons germinate best at 85 degrees Fahrenheit (29 degrees Celsius), making a heat mat essential.
- Cool-season crops: Broccoli, cabbage, and spinach germinate well at 55 to 65 degrees Fahrenheit (13 to 18 degrees Celsius) per Utah State University.
Measuring Soil, Not Air
- Use a soil thermometer: Push a probe-style soil thermometer about 1 inch (2.5 centimeters) into the moist mix to read true root-zone temperature.
- Mind the 5 degree gap: Soil temperature typically runs 5 degrees Fahrenheit (3 degrees Celsius) cooler than the surrounding air, per University of Minnesota Extension.
- Check morning and night: Take readings twice a day to capture the daily temperature range and confirm conditions stay within the target window.
- Adjust the heat mat: If the soil reads cooler than your target, pair the mat with a thermostat to bump it up without overheating.
Grow Light Placement
- Hang 2 to 4 inches above: Keep grow lights 2 to 4 inches (5 to 10 centimeters) above seedling tops, with 2 inches being the optimal distance.
- Raise as plants grow: Adjust the chain or hanger every few days so the gap remains consistent and stems stay stocky and strong.
- Run 12 to 16 hours daily: Provide 12 to 16 hours of light each day using a timer, then give seedlings a full dark rest period overnight.
- Avoid continuous light: Never leave lights on 24 hours; plants need darkness for healthy growth and proper hormone signaling.
Choosing the Right Light Type
- LED full-spectrum: Modern LED grow lights cover the red and blue wavelengths plants need, run cool, and last over 50,000 hours.
- Fluorescent T5 or T8: Two-tube shop lights are budget-friendly and effective for short, dense seedlings under 6 inches (15 centimeters) tall.
- Skip windowsill only: Modern double-pane windows transmit only about 25% of useful UV, often producing pale, stretched seedlings.
- Footprint per fixture: A 4-foot (122 centimeters) shop light with 2 tubes adequately covers approximately 2 standard 1020 trays.
Push a probe thermometer one inch into your mix to check the true root zone. Keep the light distance at just 2 inches (5 cm) above the tops of plants for the strongest stems. Use bottom heat with a mat and thermostat for tomatoes and peppers.
LED grow lights have dropped in price a lot since 2018. A good full-spectrum LED shop light now runs about $30 to $50 at most home stores. That puts pro-level lighting in reach for any home grower with a small budget.
Watering, Feeding, and Daily Care
Seedlings drink just like babies in a high chair. Small, frequent, warm sips work better than a big cold glass dumped on top. Watering seedlings the right way each day is what keeps the moist soil in that sweet spot you need.
Overwatering kills more home trays than any other mistake by a wide margin. Most spring losses I have seen at our local seed swap trace back to one issue: too much water from the top. Use bottom watering every time, and your roots will get the air they need to thrive.
Watering Technique
- Use bottom watering: Pour water into the bottom tray and let the soilless mix wick moisture up through drainage holes for even hydration.
- Aim for wrung-out sponge: Soil moisture should feel like a wrung-out sponge, damp but never dripping when you squeeze a handful.
- Empty excess after 20 minutes: Pour out any water remaining in the bottom tray to avoid soggy roots and oxygen-starved seedlings.
- Mist newly sown trays: A fine spray bottle gently moistens the soil surface for tiny seeds without dislodging them from the soil.
Avoiding Overwatering
- Lift to check weight: Pick up each tray daily; if it feels heavy, skip watering, and only add water when the tray feels noticeably light.
- Check the top half-inch: Touch the top 0.5 inch (1.25 centimeters) of mix; if it feels damp, wait a day before watering again.
- Skip watering in cool rooms: Cool indoor temperatures slow evaporation, so trays need water less often than they do during warm spells.
- Allow drainage holes: Always sow in containers with drainage holes so excess water can escape and roots get the oxygen they need.
Fertilizing Seedlings
- Wait for true leaves: Hold off on fertilizing until each seedling has its first set of true leaves above the initial seed leaves.
- Dilute to 1/4 strength: Mix a balanced water-soluble fertilizer at one-quarter the label rate to feed gently without burning fragile roots.
- Apply once weekly: Feed once per week through bottom watering so each cell absorbs the nutrient solution evenly across the tray.
- Choose fish and seaweed: Organic fish emulsion and seaweed extract supply nitrogen, potassium, and trace minerals seedlings love.
Air Circulation and Touch
- Run a small fan: Aim a clip-on fan at the seedlings on low setting for a few hours daily to mimic outdoor breezes.
- Strengthen stems: Gentle airflow encourages thicker, sturdier stems that handle outdoor wind better after transplanting.
- Lower humidity: Moving air reduces stagnant humidity around the soil surface, cutting the chance of mold and damping off.
- Stroke daily: Run your hand lightly across seedling tops once a day; the slight stress signals plants to build stronger stems.
Wait for true leaves before you feed at all. Then mix a liquid fertilizer at just one-quarter strength and apply once a week through the bottom tray. Fish emulsion and seaweed work great for tender young plants and add gentle trace nutrients too.
Run a small fan on low for a few hours each day next to your trays. The breeze builds thick, strong stems and keeps mold at bay. Fertilizing seedlings at the wrong time is the second big mistake I see new growers make each spring.
Troubleshooting Seedling Problems
Even the cleanest setup hits snags from time to time. Think of this section like a doctor's quick chart: spot the symptom, find the cause, fix it fast. The most common issues are leggy seedlings, damping off, mold, yellowing seedlings, and poor germination.
Damping off is the worst of the bunch. Extension reports show it can wipe out up to 80% of seedlings in bad cases. A few fungi cause it. Overwatering and lack of air flow set the stage for the trouble.
Extension hotlines hear two main gripes from home growers each spring. Damping off tops the list, and weak light pushing spindly plants comes in close behind. Use the chart below to diagnose your tray and act before the trouble spreads to the rest of your plants.
Act fast when you spot one of these signs in your tray. Leggy seedlings can still recover if you fix the light gap within a few days. A tray hit by fungal diseases like damping off is past saving though, so toss it and clean every tool well.
Bottom water all your trays from now on and you will skip most of these issues from the start. A clean seed starting mix, a small fan, and grow lights set at 2 inches above plants knock out the top three causes of failure for home growers.
Hardening Off and Transplanting
Hardening off is just like training for a marathon. You do short sessions each day and build up stamina over time. You never sprint on day one. Your seedlings need that same slow ramp before they can handle a full day of sun, wind, and cool nights outside.
Minnesota Extension calls for a 2-week window to harden off before you plant out. Skip this step and you will get sunburned leaves, snapped stems, and transplant shock. The day-by-day plan below blends university science with my own home schedule.
Late-spring frosts still hit hard even after the official last frost date in many zones. Check the 10-day forecast each morning during your hardening off schedule and pull trays in if you see a chill on the way. Tender stems snap fast in cold wind.
Transplant outdoors on a cloudy afternoon at the end of week two for the best start. Water each plant well right after you set it in. Gradual sun exposure is the single biggest favor you can do for your young plants this whole season.
5 Common Myths
All seeds need to be buried deep in soil to germinate properly and reliably indoors.
Most seeds only need a depth of 2 to 3 times their diameter, and some like basil and petunias require light and should sit on the surface.
Leaving grow lights on continuously gives seedlings the most energy and produces faster, stronger growth.
Seedlings need 12 to 16 hours of light daily plus a dark rest period; constant light disrupts plant rhythms and weakens growth.
Garden soil from outside is a perfectly fine medium for starting seeds indoors in trays.
Garden soil compacts and harbors fungi that cause damping off; a sterile soilless seed starting mix gives much better germination and survival.
Watering seedlings frequently from above keeps them happy and prevents them from drying out.
Overhead watering encourages fungal disease and damping off; bottom watering keeps soil moist like a wrung-out sponge without wetting fragile stems.
You can move indoor seedlings straight outside to the garden once the weather warms up.
Seedlings need a 2-week hardening-off period with gradual sun, wind, and temperature exposure to avoid transplant shock and survive outside.
Conclusion
You now have every tool you need for starting seeds indoors in your own home this spring. The full ten-step plan above gives you the timing, supplies, light, water, and feeding numbers you need for strong seedlings week after week.
Most seeds will sprout in just 5 to 10 days when the soil sits at 65 to 75 degrees Fahrenheit (18 to 24 degrees Celsius). Lock in that warmth, keep the mix damp like a wrung-out sponge, and your trays will fill up with healthy young plants. The germination science is solid and works year after year for me at home.
My one piece of advice for new growers is to start small with just one or two of your favorite crops. Pick basil and tomatoes, or lettuce and marigolds, and build your indoor seed starting skills from there. When I first tried this, I sowed twelve crops at once and lost half to damping off. Each season teaches you more, cuts your grocery bill, and turns into a calm slow-living hobby you can lean on for years to come.
Picture your own garden in July, packed with tomatoes off the vine and basil for fresh pesto. That harvest starts with one tray on your shelf right now. Harden off for two weeks, then transplant outdoors on a cloudy afternoon, and that summer image will be your real life.
External Sources
Frequently Asked Questions
What month should I start my seeds indoors?
Most gardeners start seeds indoors 6 to 8 weeks before the last expected frost date, which usually falls between February and April depending on region.
What seeds are best for starting indoors?
The best seeds to start indoors include:
- Tomatoes
- Peppers
- Eggplant
- Broccoli
- Cabbage
- Lettuce
- Basil
- Marigolds
What seeds should you not start indoors?
Seeds that resent root disturbance are best direct sown, including:
- Carrots
- Radishes
- Beets
- Peas
- Beans
- Corn
- Turnips
What are common mistakes when starting seeds indoors?
Common mistakes when starting seeds indoors include:
- Starting seeds too early
- Overwatering the soil
- Insufficient light causing leggy stems
- Using garden soil instead of seed starting mix
- Skipping hardening off
Can I sow seeds in October?
Yes, you can sow certain seeds in October, especially cool-season crops and overwintering varieties suited to fall planting.
Can you use toilet paper rolls to start seeds?
Yes, toilet paper rolls work well as biodegradable seed starting containers, especially for crops with sensitive roots.
Which seeds germinate the fastest indoors?
Several seeds germinate quickly under warm indoor conditions, including:
- Radish
- Lettuce
- Arugula
- Mustard greens
- Bok choy
What can I plant indoors in October?
October is a great month to plant indoor herbs, microgreens, and cool-season seedlings for winter harvest or spring transplant.
What seeds grow fast indoors?
Fast-growing seeds that germinate in under a week indoors include:
- Lettuce
- Radish
- Basil
- Microgreens
- Cress
- Spinach
- Sunflower
What is the easiest plant to grow from a seed indoors?
Some of the easiest plants to grow from seed indoors include:
- Basil
- Lettuce
- Tomatoes
- Marigolds
- Sunflowers
- Beans