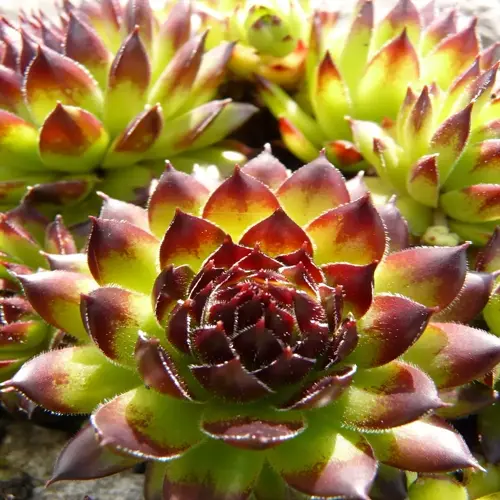

The best place to plant sempervivum is any sunny well-drained spot in your yard. Top picks include rock gardens, wide low troughs, wall cracks, and south-facing borders. These spots all share the same key traits. They get full sun and let water drain away fast after each rain.
I tested five spots in my yard last spring as a sempervivum planting location trial. My sempervivum rock garden, a raised bed, a clay pot, a wall crack, and a flat bed all got the same plant. The rock garden and wall crack won by a mile. The flat bed lost half its plants to rot by month four.
Three things drive plant health here. You need 6+ hours of direct sun each day. You need sharp drainage that clears water in seconds. You need some slope or height that mimics the mountain home these plants come from. Hit all three and your plants will spread on their own.
My rock garden bed has a slight tilt and a thick layer of pea gravel mixed into the top soil. Water runs through in under a minute. The roots stay damp just long enough to drink. Then they dry out fast and avoid rot. This is the same trick nature uses on alpine slopes across Europe.
NC State Extension calls this plant hardy in USDA zones 3a-8b. The same source notes an old Roman tradition. Romans planted these on rooftops to ward off lightning bolts. They also liked the green roof look from the spreading mats of leaves.
Sempervivum rock garden
- Why it works: Stone holds and shares heat, sharp gravel drains fast, and the rough look matches the wild mountain home these plants love best.
- Setup tips: Mix 50% gravel into the top 4 inches of soil for fast drainage, then place stones around each rosette to hold moisture below.
- Long-term win: Colonies spread between rocks for years and create a low patchwork that looks better with each season that passes.
Wall crevice or stone wall pocket
- Why it works: Wall cracks force water to drain straight down, and the vertical face keeps roots dry while letting roots grip stone for support.
- Setup tips: Tuck a small rosette into the crack with a teaspoon of gritty mix and one offset that can grip the stone face quickly.
- Bonus look: Plants growing from old walls add charm that no flat bed can match and copy the Roman rooftop tradition with ease.
Shallow trough or wide low container
- Why it works: A wide low pot mimics the natural root spread and keeps soil from staying wet at the bottom for days on end.
- Setup tips: Pick a trough 3-4 inches deep with at least one big drain hole and fill with cactus mix cut with extra grit.
- Movement bonus: Pots let you move plants to shelter in winter wet or shift them in heat to keep colors at peak brightness all season.
Knowing where to grow hens and chicks also means knowing the worst spots to avoid. North-facing beds with no direct sun rank dead last. Boggy low spots that pool water after rain come close behind. Spots under dense tree cover also fail because they trap damp shade for weeks at a time.
Run a quick drainage test before you plant. Dig a 6-inch hole and fill it with water. If the water drains in under 30 minutes, you have a good spot. If it sits for an hour, pick a new place or build a raised bed with added grit. This one test will save you many lost plants.
I had a friend who planted a whole tray in a low spot near her downspout. Every plant turned to mush by month two. We moved the survivors to her stone wall and they took off within weeks. The spot you pick matters more than soil mix, fertilizer, or anything else you can buy at the garden store.
I tried a stone trough on my deck last year as a side test. Within one season the rosettes had spilled over the edge. They formed a tight green cascade I now show off to every guest who visits. That one cheap trough has become my favorite garden feature by far.
Read the full article: Sempervivum Plant Complete Care Guide