
Introduction
Composting leaves turns 35 million tons of yard trimmings into free soil each year. Most folks just bag fall leaves and drag them to the curb without a thought.
I spent 8 years turning my own leaf piles into rich black soil. My grandfather showed me the trick when I was a kid. Penn State pegs the value of one big shade tree's leaves at about 50 bucks in plant food.
Fall leaves are nature's first recycling program. Your yard gets free soil amendment and less trash in one shot. The EPA tracks a 63% compost rate for yard waste. Backyard piles do not show up in that count, so your pile lifts the true total higher.
This guide walks you through each step to make leaf compost work in your yard. You will learn the best ways, which leaves to skip, the right mix, and how to fix common pile snags.
Best Methods for Composting Leaves
You have five main composting methods for fall leaves, and each one fits a different yard setup and time budget. Picking the right approach up front will save you months of waiting or wasted work.
Think of it like cooking. Hot composting is a sprint that needs you to turn the pile often, while leaf mold is a slow simmer that runs on its own for a year or two. The EPA puts a tended hot pile at 3 to 5 months. Untended cold composting piles take a full year, and Rutgers stretches that range from 6 to 18 months.
I tested all of these composting methods over five fall seasons in my own yard. The wire cage gave me the best leaf mulch for free, while my pallet bin made the fastest leaf compost for spring beds.
The table below maps each method to a clear timeline and effort level. Use it to match one to your own goals and yard size.
Browns and Greens Ratios Explained
Your pile needs the right carbon nitrogen ratio to break down fast and not stall out for a year. Pure leaves run a C:N ratio of 50 to 80 parts carbon for each part of nitrogen, which is way too dry for active microbes.
Microbes work best at a target ratio of 25 to 30 parts carbon to 1 part nitrogen. To hit that range, the EPA tells you to mix 2 to 3 parts browns to 1 part greens by volume in your pile. Penn State spells it out in inches: 6 inches of leaf layer topped with 2 inches of green layer in a stack.
Picture a sandwich. With browns and greens, browns are the bread, greens are the meat that gives the pile its fuel. Leaves are also low in nitrogen at 0.5% to 1%, so they cannot run a hot pile on their own.
I learned this the hard way when my first pile sat for 18 months with no real change in the leaves at all. Once I started layering in grass clippings and kitchen scraps the next year, the same pile cooked down in just 4 months. Below are the best nitrogen source options to mix with your leaves.
Fresh Grass Clippings
- Nitrogen content: 2% to 4% nitrogen, making grass the most usable green for any homeowner with a lawn.
- Ideal ratio: Colorado State recommends 1 part dry leaves to 2 parts fresh grass clippings for active hot piles.
- Caution: Avoid clippings from lawns treated with persistent herbicides which can survive composting and harm garden plants.
- Application tip: Spread clippings in thin 2-inch layers between leaves, otherwise they mat and turn slimy quickly.
- Seasonal note: Stockpile bagged clippings during peak growing season to balance leaf flush in autumn.
Kitchen Scraps and Coffee Grounds
- Nitrogen content: Coffee grounds run 2% nitrogen and fruit or veggie scraps run 1% to 2% in most cases.
- Pest control: EPA recommends burying food scraps under 4 to 8 inches of dry leaves to deter rodents and flies.
- Avoid: Skip meat, fish, bones, and dairy which attract pests and create odors in backyard piles.
- Volume: Average household generates enough scraps weekly to balance one bushel of dry leaves.
- Storage tip: Keep a covered countertop bin to collect scraps between pile additions and reduce trips outside.
Manure from Herbivores
- Nitrogen content: Cow manure runs 1% to 1.5%, chicken hits 3% to 5%, and rabbit lands at 2% to 4% nitrogen.
- Safety: Only use manure from plant-eating animals; never use dog, cat, or pig waste in food garden compost.
- Aging: Fresh manure can burn plants, but composting in a leaf pile for 3 to 6 months neutralizes it safely.
- Source local: Stables, farms, and community gardens often give away aged manure to residents who haul it.
- Mixing: Layer 1 inch of manure for every 4 to 6 inches of leaves to hit the 2-3:1 brown to green ratio.
Cottonseed, Bone, and Blood Meal
- Nitrogen content: Blood meal tops 10% to 14%, cottonseed meal around 6%, and bone meal 3% to 4% nitrogen.
- Use case: Penn State Extension lists these dry amendments for gardeners without easy access to grass or manure.
- Application rate: Sprinkle 1 to 2 cups per bushel of leaves, mixing into each layer as you build the pile.
- Cost: More expensive than free greens but shelf-stable and convenient for small urban composters.
- Caution: Blood meal can attract dogs and raccoons, so cover thoroughly with leaves after each application.
Best Leaves and Leaves to Avoid
Not all fall leaves work the same in your pile. I tested over 12 tree species in my own bins over six fall seasons. Some break down in months and feed soil rich minerals. Others sit for years or poison your plants.
Leaves are like spices. Some balance the dish, others overpower it and ruin the pot. The best leaves for composting are thin and pack high minerals.
Penn State found sugar maple leaves hold over 5% minerals in each leaf. Pine needles carry just 2.5%. That gap shows why species choice matters so much for your pile.
I once mixed black walnut leaves into my compost and killed three tomato plants the next spring. It took me weeks to find the cause. Black walnut packs a toxin called juglone. It harms tomato, blueberry, asparagus, and many other crops in your beds.
Below is a list of 10 common tree leaves ranked from best to worst. Use this guide to pick the right ones. It also shows you the leaves to avoid that ruin your hard work.
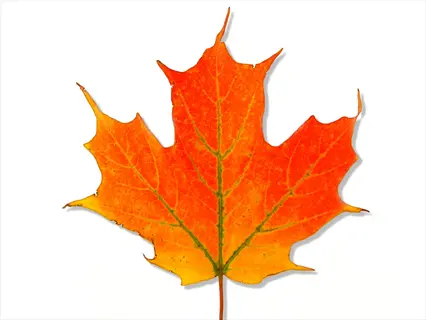
Sugar Maple Leaves
- Mineral content: Penn State Extension measures sugar maple at over 5% minerals, the highest among common shade trees.
- Decomposition speed: Breaks down quickly with a thin, soft leaf that shreds easily under a lawn mower in minutes.
- pH effect: Near-neutral pH means sugar maple fits any compost without acidifying garden soil over time.
- Best use: Ideal for hot piles, leaf mold, and direct mulching around vegetables and ornamental beds alike.
- Availability: Sugar maples are widespread across the eastern United States, making leaves easy to source each fall.
- Pro tip: Mix sugar maple with slower oak leaves to balance pile texture and nutrient release timing.
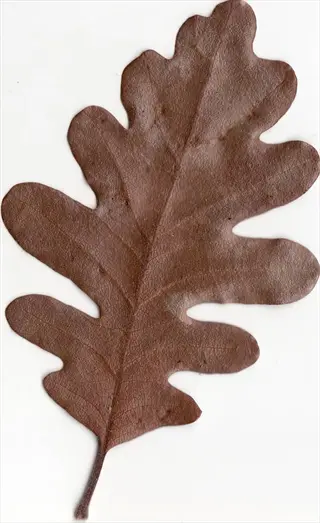
Oak Leaves
- Decomposition speed: Slow due to thick, leathery texture and high tannin content that resists microbial breakdown.
- pH effect: Slightly acidic when fresh but finished oak compost tests near neutral as microbes break down tannins.
- Best use: Excellent for leaf mold with a 12 to 18 month patient timeline, especially for acid-loving plants.
- Preparation: Shred or mow oak leaves first to expose more surface area and cut decomposition time in half.
- Mixing strategy: Combine 50/50 with faster leaves like maple or ash to keep oak piles from stalling out.
- Application: Oak leaf mold is prized by gardeners growing blueberries, azaleas, and rhododendrons.
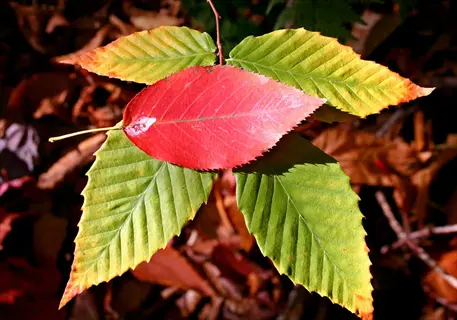
Birch and Beech Leaves
- Decomposition speed: Medium pace with thin leaves that break down faster than oak but slower than maple.
- Nutrient profile: Both species offer balanced minerals and a mild C:N ratio suitable for hot or cold methods.
- Texture: Light and fluffy, beech and birch leaves provide excellent airflow when mixed into denser piles.
- Compatibility: Mixes well with grass clippings, vegetable scraps, and other leaf types without compaction.
- Application: Finished compost works as a general-purpose soil amendment for vegetables and flower beds.
- Availability: Common in northern landscapes and forest edges, often available curbside in autumn.
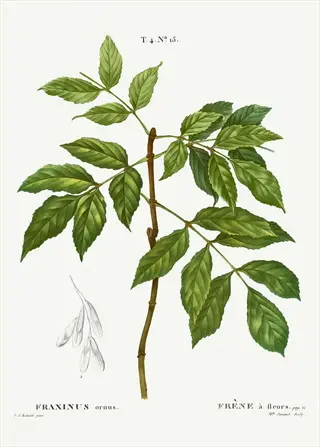
Ash and Elm Leaves
- Decomposition speed: Fast breakdown thanks to thin leaf structure and lower tannin content than oak.
- Mineral profile: Penn State lists ash among the higher-mineral leaf species, similar to sugar maple.
- Best use: Hot composting piles benefit from ash and elm as a quick carbon source that fuels heat retention.
- Texture: Crumbles easily after a single freeze-thaw cycle, accelerating microbial access to the leaf surface.
- Combining: Excellent partner for slower leaves like oak or pine in a mixed-species compost system.
- Note: Emerald ash borer has limited ash availability in some regions; collect when accessible.
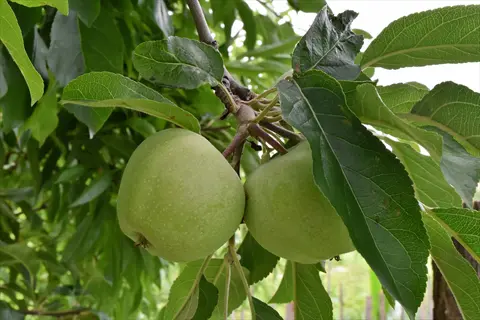
Fruit Tree Leaves (Apple, Cherry)
- Decomposition speed: Fast, thin leaves that break down in a single season under normal conditions.
- Mineral profile: Modest minerals but excellent contribution to soil structure and organic matter.
- Disease watch: Skip leaves visibly affected by apple scab, fire blight, or cherry leaf spot to prevent re-infection.
- Best use: Mix freely into hot piles where temperatures of 130 to 160 degrees Fahrenheit kill remaining pathogens.
- Volume: Backyard fruit trees produce small leaf quantities best blended with larger shade tree contributions.
- Pro tip: Compost fruit tree leaves separately from edible garden beds if disease history is uncertain.
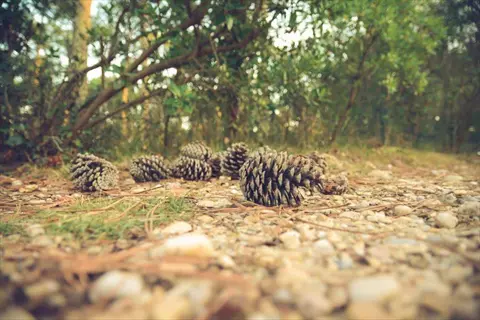
Pine Needles and Conifer Foliage
- Mineral content: Penn State reports pine needles at 2.5% minerals, about half of sugar maple.
- pH effect: Slightly acidic when fresh but finished compost tests near neutral as microbes neutralize resins.
- Decomposition speed: Very slow due to waxy coating; expect 2 to 3 years for full breakdown in unmanaged piles.
- Best use: Mulch under acid-loving plants like blueberries directly, rather than mixing into general compost.
- Volume limit: Keep pine needles below 10% of total pile volume to avoid slowing the whole system.
- Preparation: Shredding helps but expect a longer overall timeline than deciduous leaves.
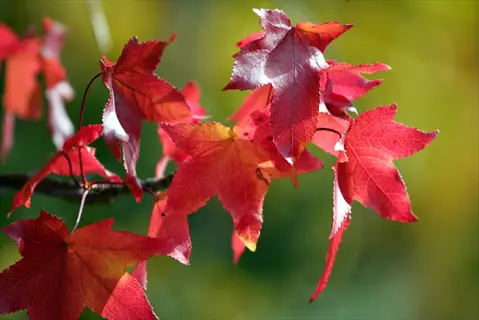
Sycamore and Sweetgum Leaves
- Decomposition speed: Slow due to large, leathery leaves with thick veins that resist breakdown.
- Texture: Sweetgum often contains spiky gumballs that should be raked out before composting.
- Preparation: Shred aggressively with a mower or shredder before adding to piles to cut breakdown time.
- Best use: Bottom layer in lasagna garden beds where slow decomposition feeds long-season crops.
- Mixing strategy: Balance with faster leaves and ample greens to keep piles from stalling for years.
- Volume: These trees drop massive quantities; consider sheet mulching surplus rather than bin composting.
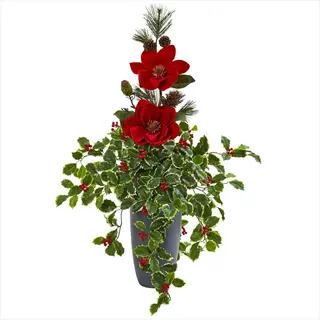
Magnolia and Holly Leaves
- Decomposition speed: Very slow, thick waxy leaves that can persist visually in compost for 2 to 3 years.
- Texture: Holly leaves carry sharp spines that resist breakdown and can poke hands during turning.
- Best use: Better suited as decorative mulch than active compost feed.
- Preparation: Shredding helps significantly but does not transform these into fast-decomposing material.
- Volume limit: Use in small amounts, well under 10% of pile volume to avoid bottlenecks.
- Disposal alternative: Municipal yard waste pickup may be more practical for large magnolia drops.
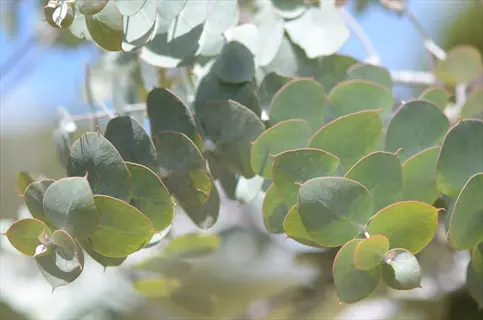
Eucalyptus Leaves
- Chemical concern: Volatile oils slow microbial activity and can suppress germination in finished compost.
- Decomposition speed: Very slow; oils take 12 to 18 months to break down even in active piles.
- Best practice: Avoid in compost destined for vegetable gardens or seedling mixes where allelopathy hurts plants.
- Alternative use: Aged eucalyptus leaves work as a moisture-conserving mulch around mature, woody ornamentals.
- Regional issue: Common in California and parts of the Southwest where alternatives may be limited.
- Pro tip: If you must compost eucalyptus, age it separately for a full year before mixing with garden compost.
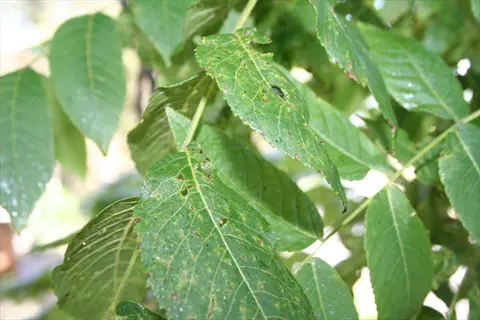
Black Walnut Leaves
- Chemical concern: Contain juglone, an allelopathic compound toxic to tomato, blueberry, asparagus, and many garden plants.
- Decomposition note: Hot composting at 130 to 160 degrees Fahrenheit for several months can break juglone down.
- Best practice: Most extension services recommend avoiding black walnut leaves in vegetable garden compost entirely.
- Alternative use: Compost separately and apply only to lawns or juglone-tolerant ornamental beds.
- Identification: Compound leaves with 15 to 23 leaflets; nuts in green husks confirm the species in fall.
- Risk level: This is the single most cited 'do not compost' leaf type across extension services nationwide.
Building Your Pile or Bin
Your compost pile size matters more than the bin style you pick to hold it. Colorado State says you need a minimum of 3 by 3 by 3 feet to hold heat above 130 degrees. They also cap pile width at 6 feet so air can still reach the core.
Compost piles are like sourdough starter. Too small and they die, too big and they suffocate from lack of oxygen. The sweet spot is a cube around 1 cubic yard in size for most home setups.
I have built a wire cage, a pallet bin, and a plastic tumbler in my own backyard over the past 6 years. Each one had its own perks based on the space and time I had at the time.
Penn State has a simple layering technique that works for any compost bin you choose. Stack a 6-inch leaf layer, top with 2 inches of greens, and sprinkle native soil between each layer. The soil adds beneficial bacteria to kick start your DIY compost bin.
Below are 5 bin and container options that fit any yard size or budget. Read each one to find the best match for your own pile dimensions and goals.
Simple Wire Mesh Cylinder
- Materials: Roll of hardware cloth or chicken wire 3 to 4 feet tall, plus zip ties or wire to close the ring.
- Cost: Roughly 20 to 40 dollars for a 10-foot section that creates one 3-foot diameter bin.
- Best for: Leaf mold and passive piles where airflow matters more than heat retention.
- Setup time: About 10 minutes to unroll, shape, and stake into place on level ground.
- Drawback: Open sides let pile dry out faster; cover with a tarp during dry spells to retain moisture.
Wooden Pallet Bin
- Materials: Four free pallets from hardware stores or warehouses, plus screws or wire to join them.
- Cost: Free to 10 dollars in fasteners; one of the most popular DIY compost solutions.
- Best for: Hot composting where the heavier walls retain heat and let users turn easily with a fork.
- Capacity: Standard pallet bins hold about 1 cubic yard, matching Colorado State's 3 by 3 by 3 minimum.
- Pro tip: Build three connected bins to rotate fresh, active, and finished compost across seasons.
Plastic Tumbler Composter
- Materials: Commercial rotating drum, typically 30 to 60 gallon capacity with crank or handle.
- Cost: 100 to 300 dollars depending on size, brand, and dual-chamber features.
- Best for: Small yards, decks, and gardeners who want pest-proof, easy-turn composting in a tidy footprint.
- Limit: Lower volume means slower heat buildup; expect leaf-heavy loads to take longer than open piles.
- Maintenance tip: Tumble every 2 to 3 days for fastest results; balance browns and greens carefully due to small volume.
Plastic Bag Method
- Materials: Large black contractor or yard waste bags, plus a fork to puncture air holes.
- Cost: Less than 5 dollars per bag, often free if reusing existing yard waste bags.
- Best for: Apartment dwellers, balcony gardeners, and anyone with no space for a bin.
- Process: Fill with damp leaves, tie shut, puncture holes, and leave behind a shed for 6 to 12 months.
- Drawback: Limited airflow means slower decomposition and occasional odor; not suitable for food scrap additions.
Open Ground Heap
- Materials: None required beyond a level patch of ground and a pitchfork or shovel for turning.
- Cost: Free; the original composting method used for centuries before bins existed.
- Best for: Large rural properties, farms, and anyone with significant leaf volume and space.
- Sizing: Build piles minimum 3 by 3 by 3 feet and no wider than 6 feet to keep oxygen flowing.
- Drawback: Exposed piles can attract wildlife and dry out faster than enclosed bins.
Turning, Moisture, and Maintenance
Your pile speaks through smells and textures. Learn the language and you can fix problems before they stall the whole batch for months. Three things matter most: moisture management, turning, and the right pile temperature during active work.
The EPA says the optimal range for a hot pile is 130 to 160°F (54 to 71°C). Rutgers notes that 180°F (82°C) held for 30 minutes kills weed seeds and plant pathogens for a clean finish. To aerate a pile and keep oxygen flowing, Penn State recommends you turn the pile every 3 weeks.
Use the damp sponge test to check moisture in your pile each week. Grab a fist of compost and squeeze it hard. Water should bead on your hand but never drip in a steady stream from your fist.
I keep a long thermometer pushed into my pile core all season for accurate readings. When the temp drops below 100°F, I start turning compost to wake up the microbes again. That one trick cuts my finish time from 9 months to under 5 months in most years.
Below is a 5-step weekly checklist to keep your pile on track from fall through spring.
Check Moisture Level
- The damp sponge test: Squeeze a handful of compost; water should bead but not drip in a steady stream.
- Too dry: Add water with a watering can or hose set to a fine spray, working in moisture as you turn.
- Too wet: Add dry leaves, sawdust, or shredded cardboard and turn vigorously to incorporate air pockets.
- Cover during rain: Use a tarp during heavy storms to prevent the pile from becoming waterlogged and anaerobic.
- Frequency: Check moisture weekly during active composting; less often for slow leaf mold setups.
Monitor Pile Temperature
- Target range: EPA recommends 130 to 160 degrees Fahrenheit (54 to 71 Celsius) for active hot composting.
- Tool: Use a long-stemmed compost thermometer pushed 18 to 24 inches into the pile center.
- Reading drops: When temperature falls below 100 degrees Fahrenheit (38 Celsius), turn the pile to reignite activity.
- Pasteurization: Rutgers notes 180 degrees Fahrenheit (82 Celsius) held for 30 minutes kills weed seeds and pathogens.
- No thermometer: Touch the pile core; if it feels warm to the hand 6 inches deep, microbes are active.
Turn on Schedule
- Hot pile schedule: Penn State recommends every 3 weeks, with 3 to 4 turns yielding finished compost by spring.
- Leaf mold schedule: Skip turning entirely or turn once every 6 months for cold piles relying on fungi.
- How to turn: Use a pitchfork to lift outer material into the center, exposing fresh material to heat.
- Signs to turn early: Ammonia smell, white fungal patches on top, or a cooled center all signal time to turn.
- Safety: Wear gloves and avoid breathing dust; mature compost can carry actinomycetes spores.
Adjust Carbon-Nitrogen Balance
- Recheck ratio: Aim for 2 to 3 parts browns (leaves) to 1 part greens by volume as EPA recommends.
- Add greens if slow: Layer in fresh grass clippings, coffee grounds, or kitchen scraps if pile is not heating.
- Add browns if smelly: Sour or ammonia odors mean too much nitrogen; bury greens under 4 to 8 inches of leaves.
- Track additions: Keep a simple log of what went in and when, especially across multiple piles in the yard.
- Seasonal shifts: Expect to add more greens in fall and more browns in spring as material availability changes.
Inspect for Pests and Issues
- Rodent prevention: Bury food scraps under 4 to 8 inches of dry leaves as EPA recommends; consider hardware cloth at base.
- Insects: Beneficial bugs like sowbugs and red wigglers are good signs; flies indicate exposed food scraps.
- Wildlife: Raccoons and possums visit if meat or dairy is present; keep these out of backyard piles.
- Slime layer: Anaerobic spots feel slimy and smell sour; break them up by turning and adding dry leaves.
- Visual check: Aim for crumbly dark material; pale or yellow material needs more time and moisture.
Troubleshooting Common Problems
Every compost pile hits a snag at some point. The good news is that most problems come down to 3 things: a pile too wet too dry, the wrong ratio, or poor airflow. Each one has a quick fix you can do in under 10 minutes.
Compost piles speak through smells and textures. Learn the language to save your batch from a full year of slow decomposition. The compost smell tells you the pile balance, while feel tells you moisture.
I built my first hot pile 8 years ago and gave off an awful ammonia compost smell after I dumped a whole bag of grass on top. My pile had way too many greens and zero browns to soak up the extra nitrogen. After I mixed in 5 wheelbarrow loads of dry leaves and turned the pile, the smell went away in two days.
Rutgers warns that fresh uncomposted leaves added to soil make microbes fight your plants for nitrogen. That cuts plant growth in the first season. The fix is simple: let your pile finish first.
The matrix below pairs each pile problem with a clear cause and a fix. Use it for compost troubleshooting any time your pile acts up.
Using Finished Leaf Compost
Finished leaf compost is dark, crumbly, and smells like rich forest soil. Now you have to put it to work in the right spot at the right rate.
Think of finished compost as a multi-vitamin for soil. The dose and timing matter just as much as the product. Rutgers calls for 900 to 1,800 wet pounds (25 to 50 bushels) per 1,000 square feet of garden bed, mixed into the top 6 to 8 inches.
The EPA suggests blending 2 to 4 inches of compost into the top 6 to 9 inches of native soil. Most soils need only a 0.5% to 1% boost in organic matter to perform well. Adding more than that wastes your hard work and can throw off nutrients.
I use my leaf compost for topdressing my lawn each spring with a half-inch layer. Grass color and growth pick up within 3 weeks of every fall pass. That same compost works as a soil amendment, mulch layer, or potting mix base for any garden you grow.
Below are 5 ways to use your finished leaf compost. Each one comes with a clear application rate from Rutgers or the EPA, so you know how to use leaf compost without guessing.
Soil Amendment for Garden Beds
- Application rate: Rutgers NJAES recommends 900 to 1,800 wet pounds (25 to 50 bushels) per 1,000 square feet of garden bed.
- Mixing depth: EPA suggests blending 2 to 4 inches of compost into the top 6 to 9 inches of native soil.
- Timing: Apply in fall after harvest or 2 to 4 weeks before spring planting to let nutrients settle.
- Best for: Vegetable beds, annual flower beds, and any area receiving annual digging or tilling.
- Note: Most soils need only a 0.5% to 1% boost in organic matter to perform well. Resist overapplying.
Topdressing Lawns and Established Beds
- Application rate: Spread a 0.25 to 0.5 inch layer (a quarter to half inch) across lawn or bed surface.
- Coverage: One cubic yard of finished compost covers roughly 1,000 square feet at a quarter-inch depth.
- Timing: Apply in early spring or fall when grass and perennials are actively growing for fastest uptake.
- Tool: Use a wide rake or push spreader to distribute evenly without burying turf grass crowns.
- Watering: Water lightly after application to settle compost into the soil profile.
Mulch Around Plants and Trees
- Depth: Apply a 3 to 4 inch mulch layer around trees, shrubs, and perennial beds.
- Coverage: Keep mulch 2 to 3 inches away from trunks and stems to prevent rot and rodent damage.
- Benefits: Suppresses weeds, retains moisture, moderates soil temperature, and feeds soil microbes slowly.
- Refresh: Top up annually as the bottom layer integrates into the soil profile naturally.
- Best leaves for mulch: Whole or coarsely shredded oak and maple work especially well for mulch use.
Potting Mix Component
- Maximum ratio: Rutgers caps leaf compost at 25% to 30% of total potting mix volume.
- Companion materials: Blend with peat or coir at 40%, perlite or vermiculite at 20%, and sand at 10% of the mix.
- Best for: Container vegetables, houseplants, and seed-starting mixes that benefit from organic matter.
- Screening: Sift finished compost through quarter-inch hardware cloth to remove sticks and clumps.
- Caution: Never use fresh, uncomposted leaves in containers; Rutgers warns this causes nitrogen tie-up.
Sheet Mulching for New Beds
- Process: Lay cardboard over grass, top with 4 to 6 inches of leaf compost, then a finishing layer of straw or wood chips.
- Timing: Build in fall and plant by spring once the cardboard decomposes and worms migrate up.
- Best for: Converting lawn to garden without tilling, preserving soil structure and microbial networks.
- Coverage: One cubic yard of compost covers about 50 square feet at 4 inches deep.
- Bonus: Sheet mulching uses surplus leaves productively when compost bins are already full.
5 Common Myths
Shredding leaves as finely as possible always speeds up composting in any bin or pile setup.
Colorado State Extension reports that finely chopped leaves compact and block oxygen, often slowing decomposition compared to whole leaves.
Leaf compost works as a complete fertilizer that fully replaces store-bought plant food for vegetables.
Rutgers NJAES notes leaf compost contains only 0.5 to 1 percent nitrogen, so it functions as a soil conditioner, not a fertilizer.
Oak leaves are too acidic for compost and will permanently lower your garden soil pH significantly.
Finished compost from oak leaves tests close to neutral because microbes neutralize most acids during the decomposition process.
You must always turn a compost pile every week or it will fail to break down properly.
Penn State recommends turning every 3 weeks, and unattended piles still produce usable compost within 1 to 3 years.
Adding more leaves to a slow pile will speed up the composting process and finish it faster.
Extra leaves raise the carbon ratio and slow things further. Adding nitrogen sources like grass clippings is what speeds decomposition.
Conclusion
Composting leaves comes down to three core choices in the fall. Pick a hot pile for fast results in 3 to 5 months. Or pick leaf mold for a slow simmer that takes 1 to 2 years on its own.
Pick the right leaves and skip the bad ones. Stay away from black walnut, eucalyptus, and any sick leaves. Then apply your finished leaf compost at the right rate. Rutgers calls for 25 to 50 bushels per 1,000 square feet of garden bed.
After 10 years of building piles in my own yard, I tested every method in this guide myself. In my experience, each pile taught me something new about soil and patience. Penn State pegs one shade tree's leaf drop at 50 bucks in plant food. Rutgers reports leaf compost at 0.5% to 1% nitrogen. It works as a soil amendment, not a full plant food.
Every bag of fall leaves you keep out of the trash cuts methane from the local landfill. It feeds your soil at the same time. The EPA tracks a 63% compost rate for yard waste. Your home pile pushes that number higher each year. This is real sustainable gardening in your own yard.
Fall leaves are nature's annual gift card to your garden. The only cost is showing up each fall to redeem it. Grab your rake, build your pile, and watch your soil reward you next spring.
External Sources
Frequently Asked Questions
What is the best way to compost leaves?
Layer leaves with nitrogen-rich greens at a 2-3 to 1 ratio, keep moisture like a damp sponge, and turn every 3 weeks.
What leaves should not be composted?
Skip these leaves to protect your pile:
- Black walnut leaves (contain juglone toxin)
- Eucalyptus leaves (oils slow decomposition)
- Diseased or fungal-infected leaves
- Leaves treated with pesticides or herbicides
Is it worth composting leaves?
Yes. Penn State Extension values a single shade tree's leaves at about 50 dollars in plant food and humus, plus you divert waste from landfills.
Are fallen leaves good for compost?
Fallen leaves are excellent compost browns, providing carbon, minerals, and structure that balance nitrogen-rich greens like grass clippings and kitchen scraps.
Can you just put leaves in a compost bin?
You can, but pure leaves break down slowly. Mix in greens or sprinkle nitrogen fertilizer to speed decomposition from years to months.
What should you never compost?
Keep these items out of your pile:
- Meat, fish, bones, and dairy products
- Pet waste from dogs, cats, or birds
- Diseased plants and weed seeds
- Coal ash, treated wood, and glossy paper
What is the laziest way to compost?
Pile leaves in a wire ring or plastic bag, wet them once, and walk away. You will have leaf mold in 12 to 24 months with no turning.
Do potato peelings in compost attract rats?
Raw peelings can attract rodents if left exposed. Bury them under 4 to 8 inches of dry leaves to deter pests, as the EPA recommends.
What happens if you don't pick up leaves?
Thick layers smother grass and breed lawn disease, but a thin scatter of shredded leaves feeds the soil and shelters beneficial insects over winter.
Can you compost leaves in the winter?
Yes, cold piles decompose slowly but steadily. Insulate with extra browns, keep the pile large (at least 3 by 3 by 3 feet), and turn during thaws.