
Introduction
Why do some flower beds explode with color all summer while yours fizzle out by mid July? The answer often comes down to one quiet habit that most beginners skip. This Deadheading Flowers: Complete Garden Guide shares the simple trick that keeps your garden pumping out new blooms from spring through fall.
I learned this the hard way during my first season as a serious gardener over a decade ago. My petunias quit blooming by week 6, but my neighbor's bed kept going strong until October. She showed me how to pinch off spent blooms and the whole thing clicked for me on the spot.
A flower can last a single day or several weeks based on the species, according to Penn State Extension. Once that bloom fades, your plant shifts gears into baby-making mode and pours its energy into seeds. Pluck off the dead flower and you trick the plant back into making more blooms instead.
This guide goes deeper than the rest. You get a month by month calendar plus a full mistakes section that no other guide covers. You will learn which plants love to be deadheaded, which ones to leave alone, and how to deadhead plants the safe way. By the end you can walk into your garden any week of the growing season and know just what to do.
How To Deadhead Flowers
Once you know how to deadhead the right way, the whole task takes minutes per bed each week. The trick is to match your method to the stem type in front of you. I split the work into 3 main moves that cover every plant in my yard, and you can do the same once you see the pattern.
Pinching, snipping, and shearing each suit a different kind of stem. Soft stems snap under your fingers, woody stems need bypass pruners, and mounding plants ask for hedge shears across the whole top. The three styles below show you where to cut on each plant so the new shoots come back strong and fast.
Pinching With Finger And Thumb
- Best for: Soft-stemmed annuals like petunias, marigolds, impatiens, and salvia where stems snap cleanly under thumbnail pressure.
- Technique: Position thumb and forefinger just below the spent flower head and squeeze firmly while twisting, letting the bloom drop into your other hand.
- Where to cut: Pinch directly above the first healthy set of leaves so the new shoot emerges from a strong leaf node.
- Frequency: Walk the garden every two to three days during peak summer because soft annuals fade quickly in heat and rain.
- Common slip-up: Pulling instead of pinching can rip stems and tear leaves, opening wounds that invite fungal disease.
- Pro tip: Drop pinched blooms into a bucket rather than the bed to avoid leaving decaying material that can spread mildew.
Snipping With Pruners Or Scissors
- Best for: Thicker-stemmed plants like roses, coneflowers, dahlias, peonies, and woody perennials that resist pinching.
- Technique: Use sharp bypass pruners to make one clean angled cut about 0.25 inch (6 mm) above the leaf node, parallel to the leaf's natural angle.
- Where to cut: On multi-bloom stems, follow the spent stalk down to the first lateral bud or set of healthy leaves before cutting.
- Sanitation: Wipe blades with rubbing alcohol between plants, especially after touching any plant showing spots or mildew.
- Common slip-up: Cutting too high leaves an ugly dead stub that dies back and can rot into the plant crown.
- Pro tip: Hold the cut bloom gently as you snip so it does not drop into the foliage and require fishing out later.
Shearing For Mass Effect
- Best for: Mounding plants like catmint, hardy geraniums, lavender, candytuft, and threadleaf coreopsis that produce hundreds of small blooms.
- Technique: Use hedge shears or grass shears to remove the top one-third of the entire plant in smooth sweeping passes.
- Recovery time: Expect about two weeks for fresh foliage and a strong flush of color to return after a hard shearing.
- Timing: Time mid-season shearing for just before a vacation or before the hottest week so plants regrow in cooler weather.
- Common slip-up: Shearing too deep into woody growth on lavender or sage can cause permanent dead patches that never refill.
- Pro tip: Water and apply a light slow-release fertilizer after shearing to fuel the rebound flush of foliage and flowers.
Special Cases And Multi-Flower Heads
- Best for: Spiked perennials like delphinium, lupin, foxglove, and salvia that carry many florets on a single tall stalk.
- Technique: Pick off individual spent florets first to extend the show, then cut the entire spike back to a basal leaf when the spike is fully done.
- Bulb deadheading: Snip behind the seed capsule on tulips and daffodils but leave the green stem and leaves intact to photosynthesize.
- Climbing plants: On climbing roses and clematis, cut back to the next strong leaf node along the cane to encourage lateral flowering.
- Common slip-up: Cutting an entire delphinium spike at the first faded floret wastes weeks of potential remaining bloom.
- Pro tip: Label tall spikes you intend to leave for self-seeding so household helpers do not accidentally trim them.
Picture pinching like plucking a grape from its stem with your thumb and forefinger, with one quick squeeze and a tiny twist. I learned the grape trick from a flower farmer back in 2018 and it changed how I taught my kids to help in the beds. For pruners and shears, make one clean cut above the leaf at the angle of that leaf for the best look.
Keep a small spray bottle of 70% rubbing alcohol in your tool bag and mist your blades between plants. Clemson Extension calls this the single best habit for stopping disease spread across your beds. A clean blade and a smart cut do most of the work for you.
Plant Biology Behind Deadheading
To get why your snips work, think of your flower as a worker on a tight budget each season. The plant life cycle runs through 5 clear stages each year. Seeds sprout, leaves grow, flowers open, seeds form, and the cycle ends or restarts. Each stage costs your plant a chunk of its yearly energy paycheck.
I tested this idea on my own salvia bed back in 2020 to prove it to a skeptic friend. Once a bloom gets pollinated, your plant pours most of its budget into seed production. SDSU Extension says it best when they note that deadheading tricks the plant into thinking it must make more blooms to pass its genes forward. Snip off the spent flower, and your plant pivots back to making new buds in a hurry.
Seed-making is the most costly line item on your whole plant budget by far. In my experience teaching new gardeners, the rent analogy makes it click for them right away. Think of a couple saving for a baby fund while also paying rent. Once seeds form, the rent on flowers gets cut to keep the baby fund full. Take the seeds out of the picture and your plant can afford new blooms again.
Penn State Extension notes that the saved energy does not just flow back to your flowers. It also feeds vegetative growth in the leaves and stems, plus the roots below your soil. That means your deadheaded plant builds stronger roots and bushier foliage on top of the bonus blooms you get to enjoy.
The end result is healthier plants that store more energy for next year too. When you redirect plant energy away from a dead-end seed crop and into living growth, you set up your garden for years of payoff. That is the simple science behind every snip and pinch you make in your bed.
Best Flowers To Deadhead
Not every flower in your bed needs the same treatment, and that is why a single rule never works. The best plants to deadhead each have their own recipe, just like dishes in your kitchen. Some need a quick pinch every few days, while others want a deep snip once a week. I tested this across my own garden over several seasons before I trusted the patterns below.
In my own beds, I keep a small list on a chalkboard near the back door so I never forget what each plant wants. Iowa State Extension lists coreopsis, phlox, shasta daisy, and yarrow as top picks. They bloom for weeks when you cut them back on time. The chart below ranks the top annuals to deadhead and perennials to deadhead by technique and frequency. Use it as a fast lookup when you are out in the yard with shears in hand.
How to deadhead roses trips up most new gardeners because the leaf count matters so much. Iowa State Extension says you should snip just above a leaf with 5 leaflets, not the smaller 3-leaflet ones near the bloom. Aim to keep at least 2 of those 5-leaflet leaves on each shoot below your cut.
How to deadhead petunias is the simplest job in the whole garden once you get the hang of it. Grab the spent flower plus the small green pod right behind it and pinch them both off with your thumb. The whole task takes about 5 minutes a day for a big container, and the payoff in extra blooms is huge.
Flowers To Leave Alone
When not to deadhead is just as crucial as knowing when to grab your shears. Some plants give themselves back to your garden through seed, while others demand work to keep going. In my early years of gardening, I made the mistake of snipping every spent bloom in sight and lost a whole hollyhock patch the next spring.
The four groups below cover self-cleaning plants, self-seeding flowers, wildlife plants with ornamental seed heads, and once-per-season bloomers. Learn which group each plant in your yard belongs to and the work load drops by half. Penn State Extension notes that rudbeckia seeds are crucial winter food for goldfinches when other sources run thin.
Self-Cleaning Annuals
- What they do: These plants naturally drop spent blooms before setting visible seed, so the next flush appears without your help.
- Key examples: Impatiens, begonia, lantana, calibrachoa, angelonia, scaevola, torenia, and many newer hybrid petunia cultivars are bred to self-clean.
- Why it works: Plant breeders select for sterile or low-seeding traits so flowering continues without the seed-set energy drain.
- Care tip: Light tidying is fine for appearance but is never required for bloom production on these tidy performers.
- Watch out for: Mixed containers can confuse this rule, since one non-self-cleaning neighbor may still need pinching to look its best.
- Pro tip: Check the plant tag wording at purchase, as labels reading 'low-maintenance' or 'continuous bloom' usually indicate self-cleaning behavior.
Self-Seeding Biennials And Cottage Favorites
- What they do: These plants count on dropped seed to produce next year's blooms, so deadheading removes future generations.
- Key examples: Hollyhock (Alcea), Foxglove (Digitalis), Forget-Me-Not (Myosotis), Lobelia, Nigella, and Verbena bonariensis fall in this group.
- Why it matters: Most are biennials that bloom in year two, so future flowers depend on the seed cycle remaining unbroken.
- Care tip: Let the last flush of the season ripen, then shake or scatter the dried heads where you want next year's plants to appear.
- Watch out for: Some cottage favorites can become weedy without occasional thinning, so monitor seedling density each spring.
- Pro tip: Tag self-seeders with garden markers so you do not pull young seedlings during spring weeding.
Wildlife And Winter Interest Plants
- What they do: Their seedheads feed birds in autumn and winter and add architectural form to the dormant garden.
- Key examples: Coneflower (Echinacea), Black-eyed Susan (Rudbeckia), sedum 'Autumn Joy,' globe thistle, and ornamental grasses lead this group.
- Why it matters: Penn State Extension notes Rudbeckia seeds are crucial food for goldfinches when other food supplies run low in winter.
- Care tip: Leave seedheads standing through winter and cut back only in early spring before fresh growth emerges from the crown.
- Watch out for: Heavy snow can flatten tall stems, so consider light staking in regions with wet snowfall to preserve the structure.
- Pro tip: Pair these plants with evergreen anchors so the winter garden still feels intentional rather than untidy.
Once-Per-Season Bloomers
- What they do: These plants flower only once each year and will not produce a second flush no matter how diligently you deadhead.
- Key examples: Peony, bearded iris, oriental poppy, bleeding heart (Dicentra), pulmonaria, and most spring-flowering bulbs belong here.
- Why it matters: Deadheading still improves appearance but never adds blooms, so prioritize foliage health and post-bloom care.
- Care tip: For bulbs, snip the seed capsule but leave the green stem and leaves to photosynthesize and refuel the bulb for next year.
- Watch out for: Cutting peony foliage back too early can starve next year's eyes, so let leaves stay until late summer or early fall.
- Pro tip: Combine once-per-season bloomers with rebloomers so the bed always has fresh color even when the early stars are done.
Think of these plants as a gift to your garden, not a chore on your list. The seedheads feed birds, the dropped seeds bring next year's babies, and the standing stalks add winter shape to a flat bed. Your job is to step back and let the plant do its thing.
Tools And Disinfection Guide
Your tools matter as much as your method when you head out to deadhead. Sharp blades make clean cuts that heal fast, while dull or dirty pruners crush stems and spread disease. I burned through 2 cheap pairs of pruning shears my first year before I learned what really mattered in a garden tool.
Clemson Extension says you should disinfect pruners with rubbing alcohol between cuts. This stops disease from jumping plant to plant. Think of it like a chef wiping the knife between raw chicken and salad greens. The 4 tools and habits below cover every base for disease prevention in your beds.
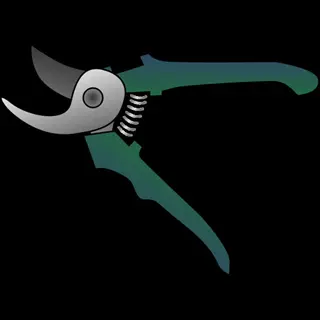
Bypass Pruning Shears
- Cut type: Two curved blades pass each other like scissors, producing the cleanest cut for living stems up to about 0.75 inch (19 mm) thick.
- Best use: First choice for roses, dahlias, hydrangeas, peonies, and any deadheading task on woody or semi-woody plants.
- Sharpening: Touch up blades with a diamond file every few weeks during peak season because dull blades crush stems and invite disease.
- Sanitation: Carry a small spray bottle of 70% isopropyl alcohol to mist blades between plants, especially when moving from rose to rose.
- Ergonomics: Choose shears sized to your hand because oversized pruners cause fatigue during long deadheading sessions across large beds.
- Pro tip: Spring-loaded handles reduce hand strain and are worth the small upcharge for gardeners with arthritis or repetitive use.
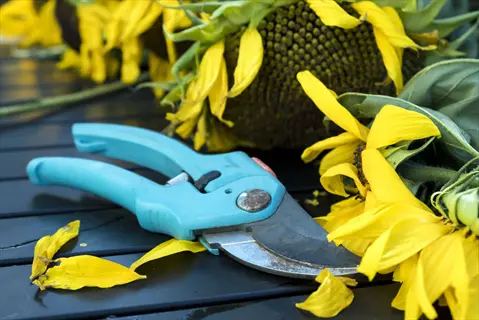
Garden Snips Or Floral Scissors
- Cut type: Long thin blades make precision cuts on small stems, ideal for tight spaces between foliage and finely branched annuals.
- Best use: Perfect for petunias, marigolds, snapdragons, and other small-stemmed annuals where pruners feel too bulky.
- Sharpening: Keep an extra pair in a dedicated tool roll so you can rotate sharp snips through the garden without stopping work.
- Sanitation: Soak blades in 70% isopropyl alcohol for 30 seconds between disease-prone plants like roses and impatiens.
- Storage: Hang snips on a magnetic strip in the shed to keep blades dry and visible rather than rusting in a drawer.
- Pro tip: Stainless steel resists sap buildup and lasts far longer in humid climates than carbon steel models.
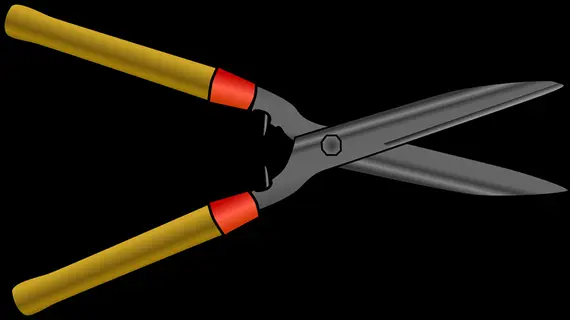
Hedge Or Grass Shears
- Cut type: Long flat blades remove many small stems at once, perfect for the shearing technique on mounding plants.
- Best use: Reach for these on catmint, hardy geraniums, lavender, candytuft, and threadleaf coreopsis when whole-plant cutbacks are needed.
- Sharpening: A bench grinder works for the long blade edges, but professional shop sharpening once a season keeps performance consistent.
- Sanitation: Wipe blades with alcohol-soaked cloth between different plant species to prevent fungal transfer across the bed.
- Body mechanics: Bend your knees rather than your back when shearing low mounds, and break work into 15 minute sessions to protect shoulders.
- Pro tip: Battery-powered cordless hedge shears now exist for arthritis-affected gardeners and dramatically speed mass deadheading.
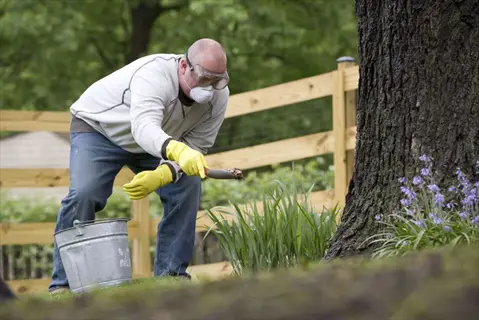
Disinfection And Care Kit
- Disinfectant: Keep 70% isopropyl rubbing alcohol in a spray bottle to mist blades between cuts on disease-prone plants.
- Alternative: A 10% household bleach solution also works but corrodes metal over time, so rinse and oil blades after use.
- Wipe cloth: Use a dedicated microfiber rag for blade wiping and replace it weekly during peak season to avoid spreading spores.
- Lubrication: A light coat of camellia oil or 3-in-1 machine oil on blade pivots prevents rust and keeps action smooth.
- Storage: Hang tools indoors or in a dry shed because rust pits dull blades faster than any actual cutting work.
- Pro tip: Build the disinfection kit into a small caddy you carry along with your bucket so the habit becomes automatic.
A small kit of clean garden scissors, sharp bypass pruners, and a spray bottle covers about 95% of all home garden work. Add hedge shears once you start growing mounding plants and you can tackle any deadheading job. Your shoulders and your plants will both thank you for working with the right tool.
Seasonal Deadheading Calendar
Most guides skip the calendar piece, but when to deadhead changes month by month across your growing season. I built the schedule below over 8 seasons of trial and error in zone 5b, plus chats with friends in warmer and cooler zones. Think of your gardening year as a 4 quarter game with its own playbook for each part.
Spring deadheading is light work and summer deadheading is the peak grind. Fall deadheading winds down fast. Iowa State Extension says to stop on roses by late August. That way plants can harden off in time for winter. MSU Extension adds that midsummer pruning with a hard cutback rebounds in about 2 weeks.
Your zone shifts the whole map. Southern zones 9 to 10 can start 4 weeks earlier, while northern zones 3 to 4 push everything 4 weeks back. Check your first frost date on a quick web search and count back about 6 weeks for your rose cutoff.
Common Deadheading Mistakes
Common deadheading errors can block your reblooms even when you put in the work. Just like a small slip in the kitchen ruins a great recipe, a small slip on your shears can cost weeks of color. I made every mistake on this list at least once during my first 3 years of gardening.
The good news is each error has a quick fix you can apply right away. Iowa State Extension says to cut roses above a 5-leaflet leaf for the strongest rebloom. That detail of where to cut makes or breaks the rebloom. Clemson Extension warns that decaying flower heads can spread disease to healthier plants nearby. Watch out for the 6 deadheading mistakes below so you can sidestep them in your own yard.
Cutting Too High Above The Leaf Node
- The mistake: Leaving a long bare stub of stem above the next set of leaves looks untidy and dies back over time.
- Why it matters: Dead stubs can rot inward toward the crown and create entry points for fungal disease.
- The fix: Always cut about 0.25 inch (6 mm) above the first healthy leaf node, parallel to the leaf's angle.
- Where it shows up: Most often on roses, dahlias, and coneflowers where beginners hesitate to cut deeply enough.
- Quick check: If you can see a stub longer than your fingernail, recut closer to the leaf for a clean result.
- Pro tip: Mark the correct cut point with a fingertip before snipping until the eye trains itself to find the right spot.
Cutting Roses At The Three-Leaflet Leaf
- The mistake: Snipping above a small three-leaflet leaf produces a weak shoot that rarely flowers well or at all.
- Why it matters: Iowa State and SDSU Extensions specifically advise cutting above a five-leaflet leaf to stimulate strong rebloom.
- The fix: Trace the cane downward past one or two three-leaflet leaves until you find a leaf with five leaflets, then cut just above it.
- Where it shows up: Most common on hybrid tea roses where leaf counts vary along each cane.
- Quick check: Count leaflets before cutting and aim to leave at least two five-leaflet leaves on each shoot below the cut.
- Pro tip: Make a habit of looking at the leaf before committing the cut, since cane geometry shifts as the plant matures.
Skipping Tool Disinfection
- The mistake: Using the same pruners across many plants without cleaning the blades spreads fungal and bacterial diseases.
- Why it matters: Clemson Extension specifically recommends rubbing alcohol between cuts to prevent disease transmission.
- The fix: Carry a small spray bottle of 70% isopropyl alcohol and mist blades between rose bushes and other vulnerable plants.
- Where it shows up: Black spot on roses, botrytis on peonies, and powdery mildew on phlox often trace back to dirty shears.
- Quick check: If your blades show visible sap or plant residue, they need cleaning before the next cut.
- Pro tip: Always start the day with clean tools and end the day by wiping blades dry and oiling the pivots.
Deadheading Bulbs Too Aggressively
- The mistake: Cutting back the entire green stem and leaves of tulips, daffodils, and other bulbs immediately after bloom.
- Why it matters: RHS guidance emphasizes that the green foliage photosynthesizes to refuel the bulb for next year's bloom.
- The fix: Snip only the seed capsule behind the spent flower and leave the green stem and leaves to yellow naturally.
- Where it shows up: Tulips, daffodils, hyacinths, and ornamental alliums all suffer reduced future bloom if foliage is cut early.
- Quick check: Wait until leaves are at least 50% yellow before any foliage removal on bulbs.
- Pro tip: Plant bulbs behind later-emerging perennials so dying leaves are hidden by fresh foliage during the rebuild period.
Deadheading Roses Too Late In Fall
- The mistake: Continuing to deadhead roses into October or November pushes plants to produce tender new growth that frost will kill.
- Why it matters: Iowa State Extension recommends stopping in late August or September so rose hips form and plants harden off.
- The fix: Make your last deadheading session no later than early September in most zones, then let hips form naturally.
- Where it shows up: Hybrid tea roses, floribundas, and grandifloras are most vulnerable to fall pruning damage.
- Quick check: If first frost is six weeks away, stop deadheading and let the plant prepare for dormancy.
- Pro tip: Mark the calendar each year so the cutoff date does not slip past unnoticed during late summer garden chores.
Leaving Spent Blooms On The Ground
- The mistake: Letting deadheaded flowers fall into the bed below where they decay against the crown of the plant.
- Why it matters: Clemson Extension warns that decaying spent flower heads can increase disease incidence on plants.
- The fix: Carry a bucket or compost trug and drop every snip into it rather than letting blooms land on the soil.
- Where it shows up: Worst on peonies, hydrangeas, and dahlias whose heavy blooms turn to slime in damp weather.
- Quick check: Glance at the soil under each plant after deadheading and clear any remaining debris before moving on.
- Pro tip: Add deadheaded flowers to a hot compost pile to kill any disease spores before they return to the garden.
Avoid these slips and your deadhead too late problems drop to near zero. The fixes above will save you weeks of waiting and a fortune in plants that fail to rebloom. Take one mistake at a time and your habits will tighten up by the end of the season.
5 Common Myths
Deadheading is the same as pruning and removes large amounts of woody growth from the plant.
Deadheading only removes spent flowers, while pruning shapes plants by cutting back stems, branches, or whole sections.
Every flowering plant in your garden must be deadheaded regularly or it will stop blooming completely for the year.
Many self-cleaning annuals and once-blooming perennials never need deadheading and will perform well without intervention.
You should keep deadheading roses right up until the first hard frost arrives in late autumn.
Stop deadheading roses in late August or September so plants form hips and harden off properly before winter.
Cutting flower stems anywhere on the plant produces the same regrowth response from any flowering perennial.
Cutting just above a healthy leaf node or five-leaflet leaf is what triggers strong, well-placed new shoots and blooms.
Removing every spent seed head is always best for the garden because it tidies the bed and stops disease.
Leaving coneflower and rudbeckia seedheads feeds finches in winter and adds important structural interest to the garden.
Conclusion
Deadheading flowers boils down to 3 simple ideas you can carry to any bed. First, match your technique to the stem type. Next, know which plants want the snip and which ones want to be left alone. Last, follow the seasonal calendar for your zone. Get those right and you set up a chain of more blooms that runs through your whole growing season.
I want you to keep the SDSU Extension line that started this whole guide in mind. Deadheading tricks the plant into thinking it must keep making blooms to pass on its genes. From my own years in the beds, I can tell you that one idea explains every snip you will ever make. Hold onto it and the rest of the work feels like a fun puzzle.
Most guides skip the calendar and ignore the mistakes that block your reblooms. In my experience teaching new gardeners, those gaps cost folks the most blooms each year. This guide gave you both, plus the full disinfection routine from Clemson Extension that keeps your plants safe from disease. Take any of those pieces back to your garden and you will see results within a few weeks of work.
Think of yourself as a partner with your plants rather than a boss with a checklist. Each pinch and snip is a small conversation about what you both want from the garden maintenance routine. Your beds will reward you with healthier plants, longer bloom shows, and a yard that feels alive from the first warm day to the last frost.
External Sources
Frequently Asked Questions
What is the proper way to deadhead flowers?
Cut or pinch spent blooms just above the first set of healthy leaves or a leaf node, using clean, sharp tools.
Which flowers should not be deadheaded?
Avoid deadheading these self-seeding or wildlife-supporting plants:
- Hollyhock (Alcea)
- Foxglove (Digitalis)
- Forget-Me-Not (Myosotis)
- Lobelia
- Coneflower (Echinacea)
- Rudbeckia / Black-eyed Susan
What are common deadheading mistakes?
Top mistakes gardeners make when removing spent flowers:
- Cutting too high above the leaf node
- Using dull or dirty pruners
- Deadheading roses too late in fall
- Removing bulb foliage before it yellows
- Shearing plants that resent hard cuts
What flowers are you supposed to deadhead?
Common flowers that bloom more when deadheaded include:
- Petunias
- Roses
- Coreopsis
- Salvia
- Shasta daisy
- Yarrow
- Delphinium
- Geranium
- Marigold
- Zinnia
Should I deadhead my roses in October?
No. Stop deadheading roses by late August or September so rose hips form and plants harden off for winter.
Is October too late to prune?
For most flowering shrubs and perennials, October is too late for hard pruning; light deadheading or seedhead removal is acceptable.
When to stop deadheading flowers?
Stop deadheading about six weeks before your first expected frost so plants can prepare for dormancy.
What flower is called the poor man's rose?
Geraniums (Pelargoniums) are often called the poor man's rose because of their lush, colorful clusters and easy care.
Why say goodbye to hydrangeas?
Many gardeners remove hydrangeas due to poor placement, lack of blooms, or sensitivity to climate and pruning timing.
Where to cut when deadheading?
Cut about one quarter inch above the first healthy leaf node, lateral bud, or set of leaves below the spent bloom.